2022Ford Maverick
2022 factory owner’s manual
Flat-tow pages: printed 287–288 · PDF viewer 290–291
The Stellar guide · Ford Maverick Hybrid
A complete flat-tow resource for RV owners: model-year eligibility, installed baseplate photos, equipment comparisons, wiring, charging and the steps that matter before you leave.
01 / Model-year fitment
Choose your truck to filter Ford instructions and baseplates. Then open one section at a time. All of the information stays available.
Follow the guide in order, or begin with the question you have today. Every topic stays within reach as you read.
| Maverick configuration | Four-down RV towing | Start here |
|---|---|---|
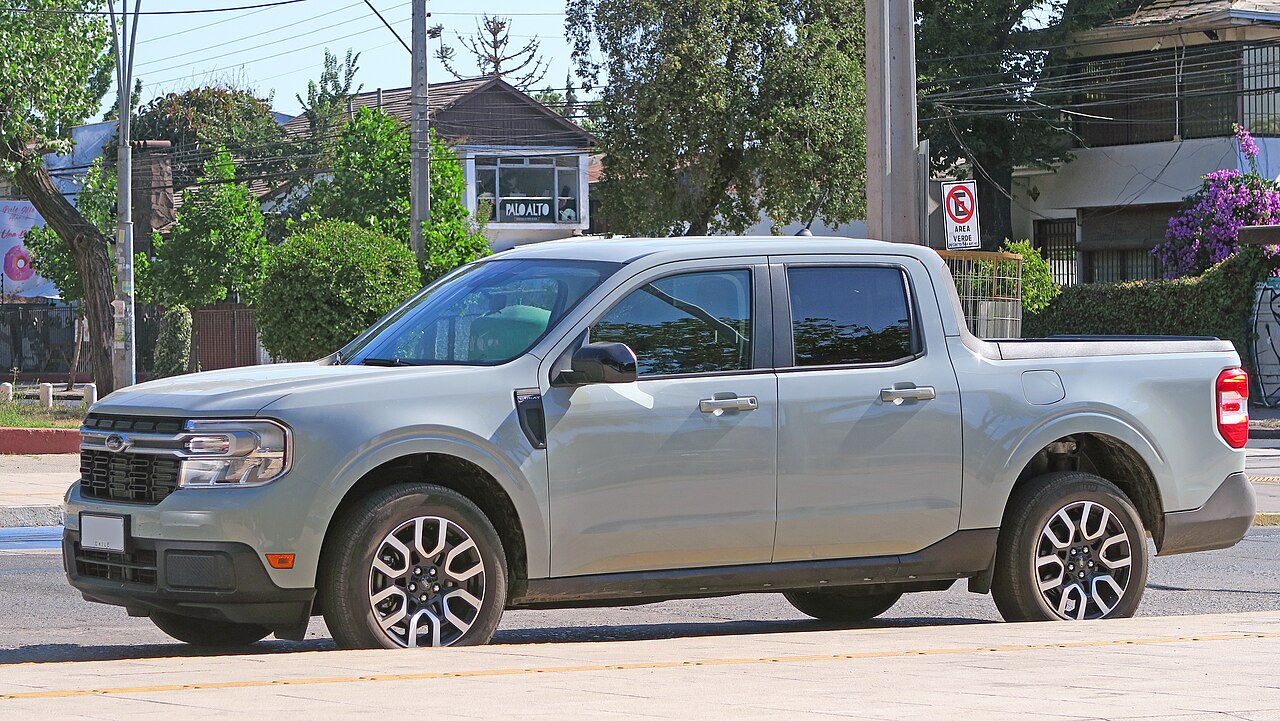
| 2022–2024 · 2.5L Hybrid FWD | Eligible when Ford’s procedure is followed | Earlier front-end baseplate family. Use the manual for the exact model year. |
| 2025–2026 · 2.5L Hybrid FWD | Eligible when Ford’s procedure is followed | Refreshed front end. Recheck baseplate application, fascia and driver-assistance equipment. |
| 2025–2026 · 2.5L Hybrid AWD | Eligible when Ford’s procedure is followed | Hybrid AWD is different from EcoBoost AWD. Verify VIN and current manufacturer application. |
| 2.0L EcoBoost · FWD or AWD | Not approved for recreational four-down towing | A tow bar or baseplate does not make this powertrain eligible. Discuss an approved transport method. |
| 2027 or later / uncertain vehicle | Do not assume carryover approval | Obtain the exact Ford manual and current baseplate application before selecting parts. |
Save it for the road
Pick your model year to open the full factory manual or go straight to Ford’s recreational-towing section.
Flat-tow pages: printed 287–288 · PDF viewer 290–291
Flat-tow pages: printed 292–293 · PDF viewer 296–297
Flat-tow pages: printed 292–293 · PDF viewer 296–297
Flat-tow pages: printed 330–331 · PDF viewer 334–335
Flat-tow pages: printed 331–332 · PDF viewer 335–336
Some phone PDF viewers ignore page-jump links. Enter the listed PDF page number manually. “Flat-tow section only” opens Ford’s separate online section, which you can also print or save.
Original Stellar quick references with links back to the controlling manuals.
Open Blue Ox towing guide PDF ↗Manufacturer overview. Older model names and ratings may differ; use the exact tow-bar manual and label.
Sources checked November 2026. Documents open at their original publisher; use the viewer’s download control to save a copy. The Brake Buddy manual is a manufacturer document hosted by ManualsLib because the original publisher download was unavailable during review. Some files are large. A product manual does not by itself establish Maverick fitment.
Choose another section ↑50 equipment documents and resources. Search a part number, or open a category below. Every listed baseplate, tow bar and brake has instructions linked here and at the top of its product details.
Showing 50 documents
No matching documents. Try a brand, part number or a different category.
Equipment / Baseplates
Tap an option to open it. Tap it again to close it.
Understand the choice
A baseplate spreads towing loads into specified structural mounting points. Its removable arms or tabs provide the connection you use each trip. “Removable” describes those attachment pieces, not the entire structure behind the bumper. The important comparisons are the exact vehicle application, connection style, installation changes and daily handling.
Roadmaster’s -5 Direct-Connect kits omit the separate crossbar. Its -4 Crossbar-Style kits serve a different interface and can suit an existing crossbar-dependent bar or accessory. The simpler-looking kit is not automatically compatible with equipment you already own.
BX2913 and BX2917 use the Blue Ox tab interface. Demco 9519360/9519366 and the listed etrailer applications use their specified removable connecting hardware. Match the actual tow-bar ends; adapters are named parts with their own limitations, not interchangeable pins.
Compare fascia cuts, shutter work, drilling, sensor clearance and the appearance with arms removed. For example, Blue Ox’s BX2917 instructions explicitly say shutters remain off. Decide whether that installation meets your expectations before selecting by appearance or price.
A useful quote includes the bracket, required connection pieces, specified hardware, installation, socket and breakaway mounting, and a complete hookup demonstration. A cheap bracket plus missing adapters may not be the least expensive complete system.
2025 XL exception to resolve: Roadmaster’s earlier-body FitMaster record mentions 2025 XL while its 2025 record lists the newer 524480-5. Both records are linked in the product details. Have Roadmaster or the installer resolve the actual fascia/application instead of assuming that the year filter alone settles this overlap.
Open a product below for its specific application, two-sided comparison, example, instructions and photos. The pros and cons explain practical selection tradeoffs; they are not claims of comparative road testing.
Showing 10 application options
 Roadmaster Direct-Connect · 524480-5Click for application, pros & cons, examples, photos and manualsTap to close+ Add to my inquiry
Opens in a new tab. Match the part number and revision to your equipment; save the PDF for your installation and travel records.
Roadmaster lists 2025–2026 Maverick XL, XLT and Lariat with the 2.5L Hybrid. Its application excludes tow hooks and aftermarket fog lights. This is the Direct-Connect interface for Roadmaster motorhome-mounted bars with the correct Roadmaster ends.
Choose this when you want the tow-bar arms to attach to the removable truck-side arms without handling a separate crossbar. The permanent mounting structure remains behind the front fascia when the arms are removed.
A 2025 Hybrid owner choosing Nighthawk 676 can compare this Direct-Connect arrangement with the -4 crossbar version. Nighthawk 677 has Blue Ox ends, so the same model-family name would not establish the same connection.
Include the exact tow-bar ends, safety-cable anchor arrangement, socket and breakaway mount in the installation plan. Measure finished pin height with the actual truck loaded for travel.
Product instructions ↗ · Manufacturer application / specifications ↗
Enlarge installed photo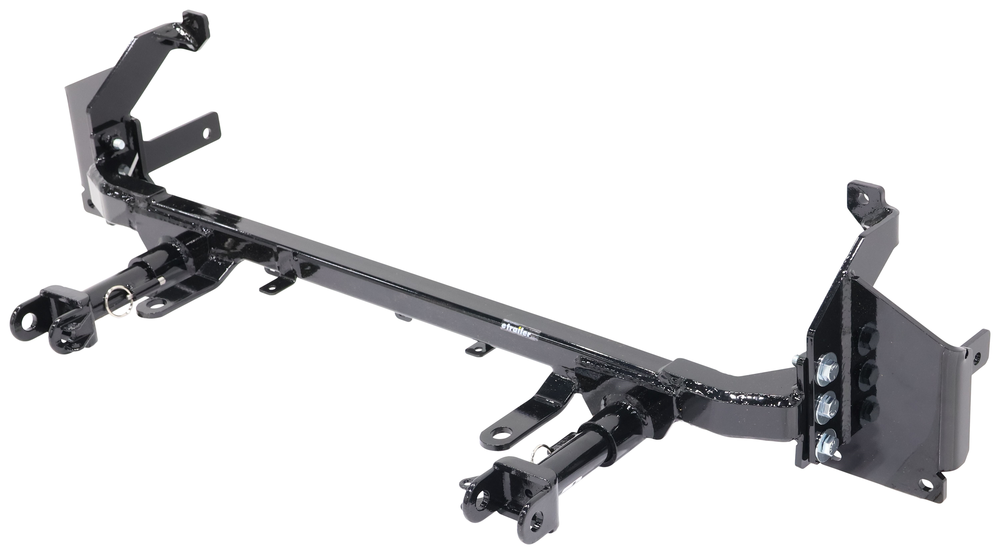 Enlarge photo
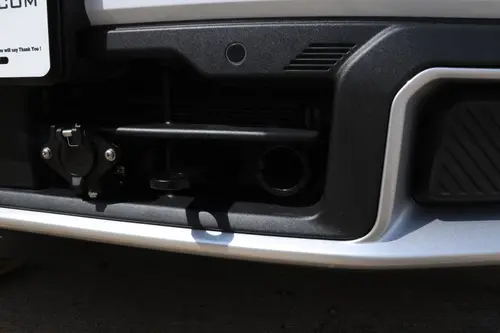 Enlarge photo
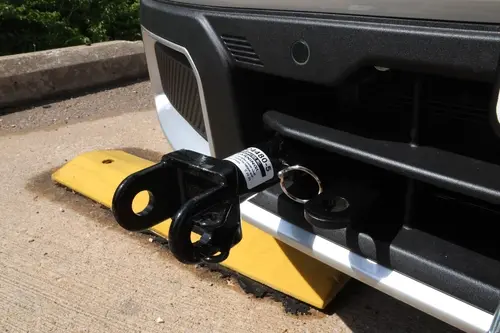 Enlarge photo
524480-5
Removable arms connect to compatible Roadmaster motorhome-mounted bars without a separate crossbar. A clean starting point when you want a Roadmaster system.
Verify the current fit list, front-end options and tow-bar ends. Direct-Connect and Crossbar-Style arms are different interfaces. Protective screens and rock guards have their own compatibility restrictions; the bracket name alone does not approve every accessory.
Manufacturer PDF Blue Ox · BX2917Click for application, pros & cons, examples, photos and manualsTap to close+ Add to my inquiry
Opens in a new tab. Match the part number and revision to your equipment; save the PDF for your installation and travel records.
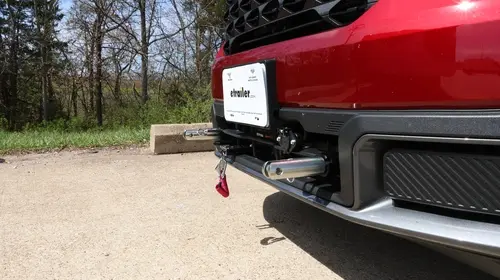
Blue Ox lists BX2917 for 2025–2026 Maverick HEV, including adaptive cruise control and shutters. It uses removable Blue Ox tabs and connects to suitable Blue Ox-style tow-bar ends.
This is the refreshed-body Blue Ox application. It is a practical starting point for an owner keeping an approved Alpha, Avail or other bar already fitted with Blue Ox ends.
A 2026 Hybrid Lariat owner with an Avail first confirms the receiver version and bar condition, then compares BX2917 installation changes against the other baseplates. The owner should see the shutter instructions before approving the work.
The manual gives a reference tab height of 15 inches and width of 26 inches. These help explain the layout; actual installed height must still be measured for tow-bar leveling.
Product instructions ↗ · Manufacturer application / specifications ↗
Enlarge installed photo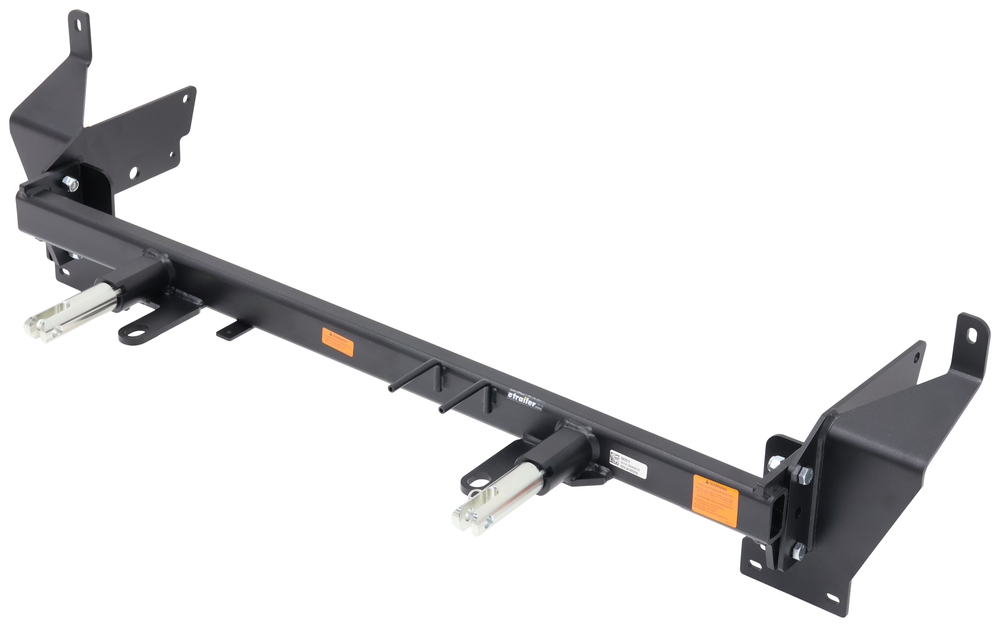 Enlarge photo
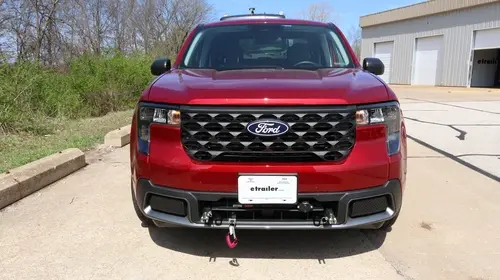 Enlarge photo
 Enlarge photo
BX2917
Removable-tab baseplate listed by Blue Ox for the refreshed Maverick HEV, including applications with adaptive cruise and shutters.
Check the installation revision against the exact truck. A catalog description that mentions shutters identifies the application; it does not promise that all shutter pieces remain unchanged. Confirm trimming and sensor clearance before installation.
Manufacturer PDF Demco Tabless · 9519366Click for application, pros & cons, examples, photos and manualsTap to close+ Add to my inquiry
Opens in a new tab. Match the part number and revision to your equipment; save the PDF for your installation and travel records.
Demco manual TP29366 identifies the 2025 Ford Maverick. This entry is not a confirmed 2026 application: obtain Demco’s current approval for that year rather than extrapolating from similar bodywork.
The tabless system uses removable connecting tabs at the front of the truck. Compare it when selecting a Commander 2, Dominator or Excali-Bar 3 with the appropriate Demco connection.
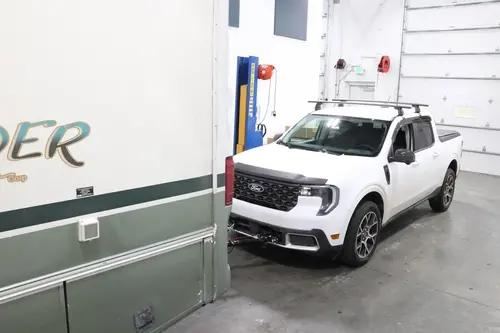
An owner choosing the lighter Dominator can build a Demco connection around 9519366, but still needs a separately selected brake, lighting circuit and charge path. A matching brand does not supply those other functions.
Reference dimensions in TP29366 are 14½-inch pin height and 24-inch centers. The correct number is 9519366; 9519336 is not the Maverick substitute.
Enlarge installed photo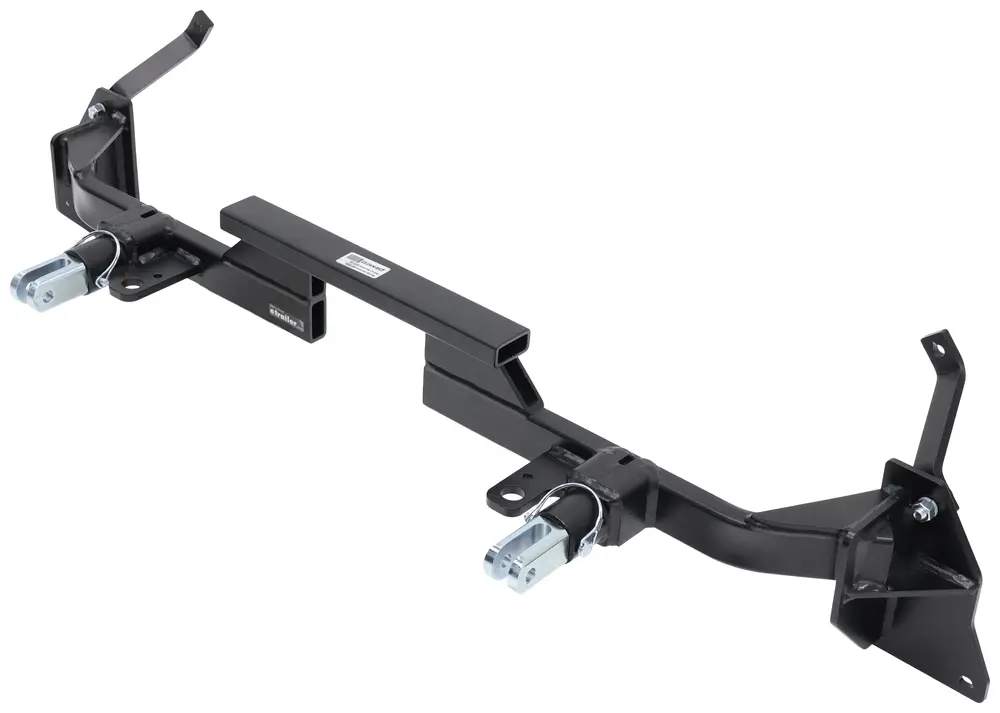 Enlarge photo
 Enlarge photo
 Enlarge photo
9519366
Removable connecting tabs provide the truck-side interface for an approved Demco-style combination. The manufacturer part number is 9519366.
Demco instruction TP29366 identifies the 2025 Maverick. Confirm the latest application approval for 2026 before ordering. The instructions call out lower-shutter changes and possible air-cooler clearance work. 9519336 is a different vehicle application and must not be substituted.
Manufacturer fitment catalog etrailer Invisible · e96GVClick for application, pros & cons, examples, photos and manualsTap to close+ Add to my inquiry
Opens in a new tab. Match the part number and revision to your equipment; save the PDF for your installation and travel records.
This is the refreshed-front-end etrailer Maverick baseplate entry. Use its current e96GV Hybrid fitment and LIT-00942 instructions; do not substitute the earlier e64FV because the removable arms look alike.
The removable-arm layout is worth comparing for an owner considering the etrailer SD or XHD connection. Compare the complete installed package, including any expressly required end adapter.
A refreshed-body Hybrid owner comparing e96GV with a Roadmaster Direct-Connect kit should compare front-end modifications and the chosen bar’s attachment ends, not just the steel bracket price.
Have the quote identify both full part numbers, the approved connecting ends and which installation parts are supplied. Keep the instruction sheet with the installation record.
Enlarge installed photoEnlarge photo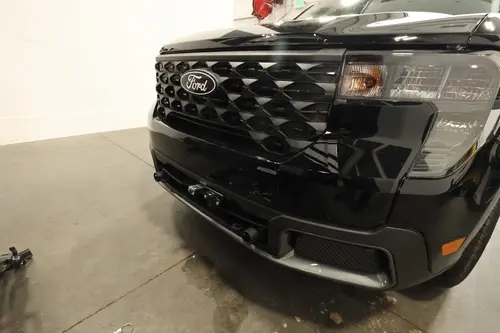 Enlarge photo
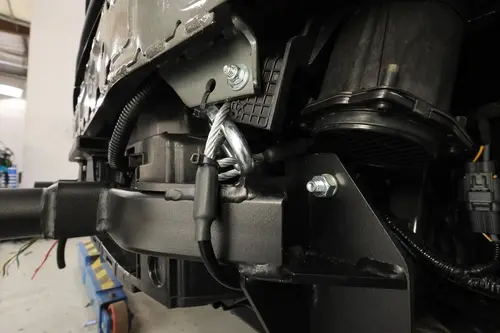 Enlarge photo
e96GV
Removable-arm option for the refreshed front end. Include this brand when comparing appearance, interface and the cost of a complete installed system.
Confirm the current Hybrid application and instruction revision before purchase. Compatibility depends on the exact tow-bar ends; a brand match or similar-looking tab is not sufficient. Any adapter must be approved for both components.
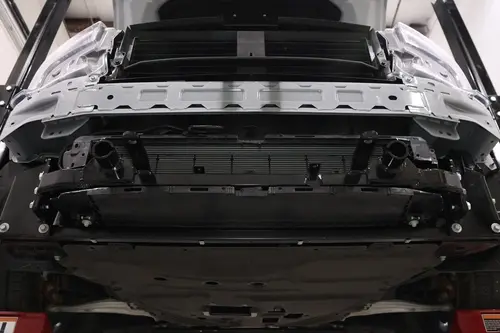
 Roadmaster Crossbar-Style · 524480-4Click for application, pros & cons, examples, photos and manualsTap to close+ Add to my inquiry
Opens in a new tab. Match the part number and revision to your equipment; save the PDF for your installation and travel records.
The refreshed-body Roadmaster Crossbar-Style application uses a different truck-side connection from 524480-5. Select it for an approved Roadmaster crossbar arrangement, not as an interchangeable spelling of Direct-Connect.
A crossbar links the two removable truck-side assemblies and creates the interface required by certain Roadmaster bars or accessories. Its value is connection compatibility, not an automatic increase in towing capacity.
An owner keeping a crossbar-dependent setup compares 524480-4 with the cost of changing the bar ends and accessories to Direct-Connect. Buying 524480-5 just because it looks cleaner may prevent the existing equipment from connecting.
List the crossbar, quick-disconnect pieces, base pins and accessory approvals in the estimate. The bracket suffix is part of the application, not an optional detail.
Enlarge installed photo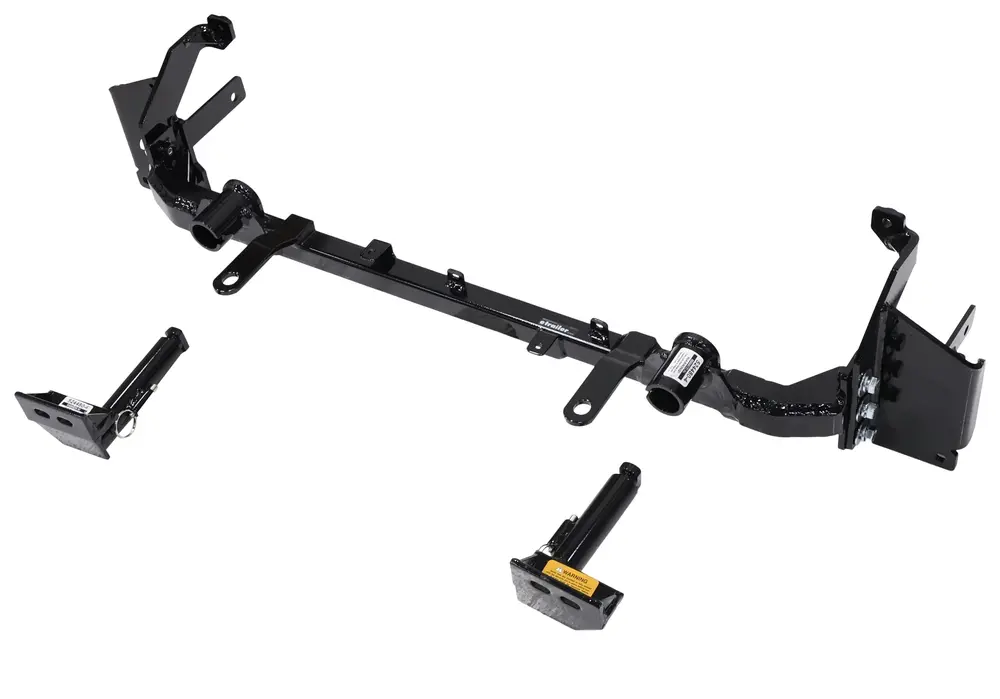 Enlarge photo
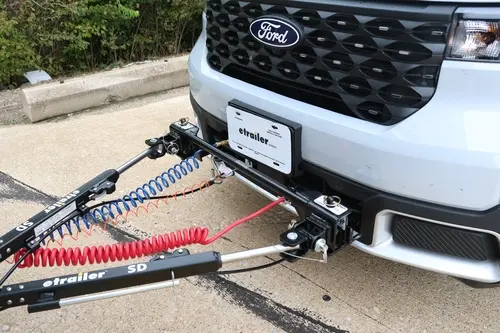 Enlarge photo
 Enlarge photo
524480-4
The Crossbar-Style alternative for a compatible Roadmaster crossbar system. It is a different connection choice from 524480-5.
Useful when an existing approved bar or accessory calls for a crossbar. Include the required crossbar or quick-disconnect assembly in the equipment audit. Do not assume the baseplate box supplies every piece of the coach-to-truck connection.
Manufacturer manual finder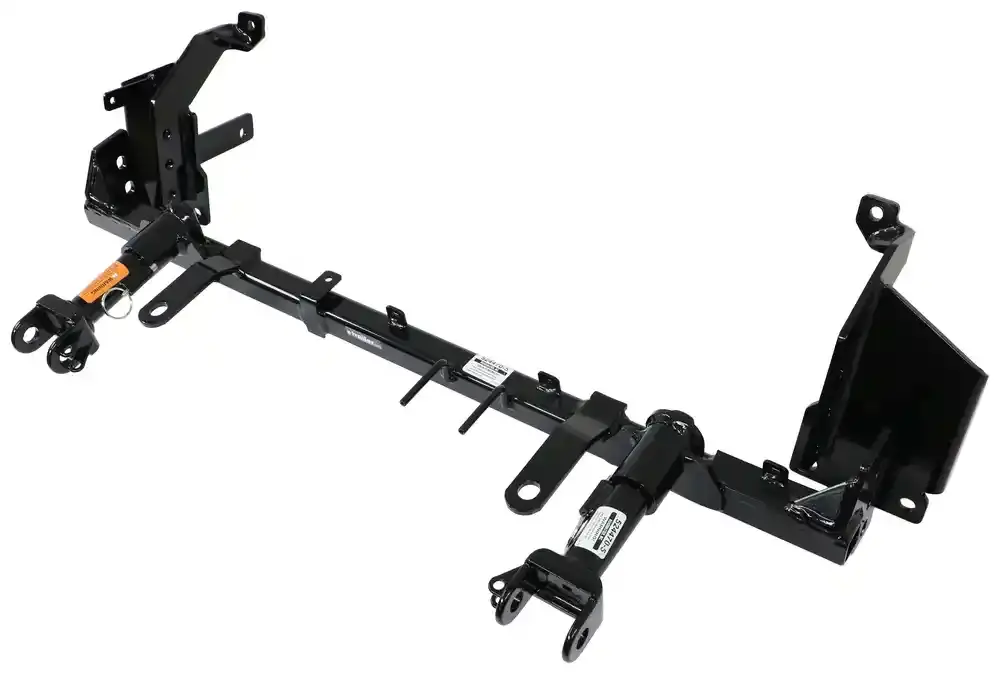 Roadmaster Direct-Connect · 524470-5Click for application, pros & cons, examples, photos and manualsTap to close+ Add to my inquiry
Opens in a new tab. Match the part number and revision to your equipment; save the PDF for your installation and travel records.
The established earlier-body application is the 2022–2024 Maverick 2.5L Hybrid. Roadmaster’s current earlier-year FitMaster entry also mentions the 2025 XL, while its 2025 entry lists 524480-5: resolve that catalog overlap against the actual front end before ordering for a 2025 XL.
This Direct-Connect kit suits an earlier Hybrid and a compatible Roadmaster motorhome-mounted bar when the owner wants a removable-arm connection without a separate crossbar.
A 2023 Hybrid owner retaining a Nighthawk 676 compares 524470-5 for a direct connection. Moving that hardware to a 2025 truck requires a new application decision rather than assuming all Mavericks share the same front structure.
Include any fascia trimming in the scope. Obtain new or replacement installation hardware exactly as the manufacturer directs when transferring a kit.
Product instructions ↗ · Manufacturer application / specifications ↗
Enlarge photo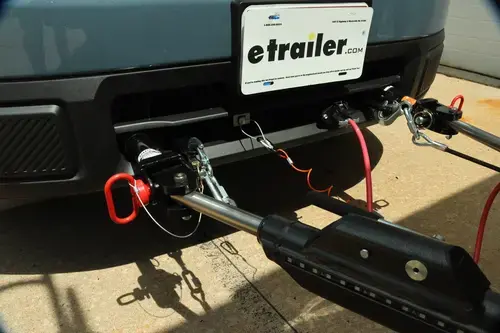 Enlarge photo
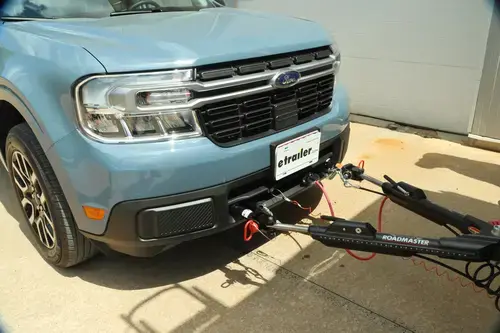 Enlarge photo
524470-5
Earlier-body Direct-Connect application. Compare this when building around a compatible Roadmaster bar for a 2022, 2023 or 2024 Hybrid.
The 2025 front-end change requires a new fitment check; this is not an automatic carryover. Confirm fascia changes, cooling-system clearance and accessory restrictions in the current instructions.
Manufacturer PDF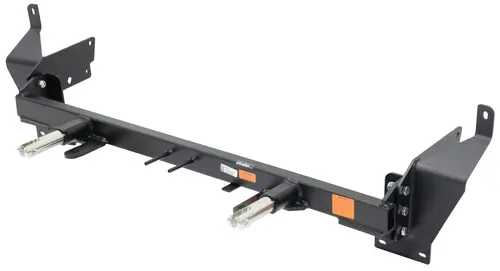 Blue Ox · BX2913Click for application, pros & cons, examples, photos and manualsTap to close+ Add to my inquiry
Opens in a new tab. Match the part number and revision to your equipment; save the PDF for your installation and travel records.
Blue Ox’s current catalog lists BX2913 for 2022–2024 Maverick HEV with adaptive cruise control and shutters. It is the earlier-body removable-tab application; BX2917 is the 2025–2026 listing.
Compare this for an earlier Hybrid when you want Blue Ox tabs or already own an appropriate Blue Ox-ended tow bar. The vehicle-specific instructions matter more than an older online listing using a different Blue Ox part number.
A 2024 Hybrid owner with an Alpha BX7390 can compare BX2913 against other systems while keeping the tow bar. That saving only holds if the bar, tabs, pins and mounting hardware are all suitable and complete.
Ask to see the applicable shutter/fascia pages before installation, and inspect that the removed speaker and electrical connections have been restored.
Product instructions ↗ · Manufacturer application / specifications ↗
Enlarge photo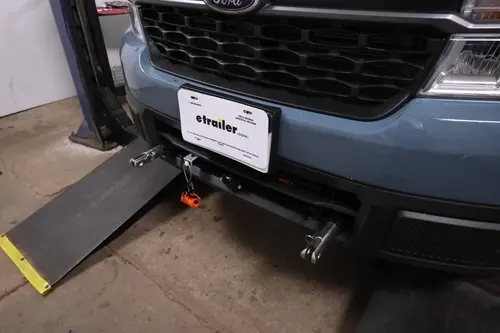 Enlarge photo
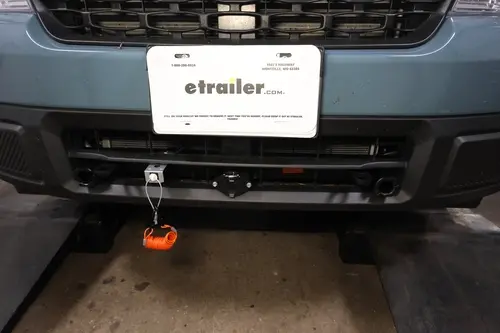 Enlarge photo
BX2913
The current Blue Ox catalog lists BX2913 for 2022–2024 HEV applications with adaptive cruise control and shutters.
The BX2913 instructions require fascia work, drilling and trimming. They also describe removal of shutters and the pedestrian-alert speaker during access; the speaker is reinstalled. Read the actual instructions to understand which shutter components remain off. Verify any older BX2690 kit with Blue Ox before reuse.
Manufacturer PDF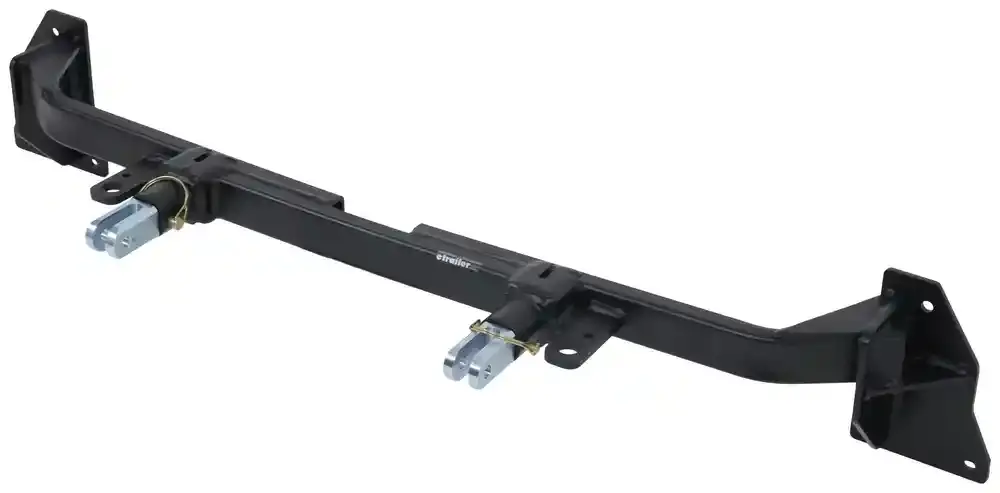 Demco Tabless · 9519360Click for application, pros & cons, examples, photos and manualsTap to close+ Add to my inquiry
Opens in a new tab. Match the part number and revision to your equipment; save the PDF for your installation and travel records.
Demco’s earlier Maverick application is 9519360, documented in TP29360. Keep it with the earlier-body Hybrid comparison; 9519366 is the separate refreshed-front-end part.
This is a removable-tab route into an approved Demco connection. It is useful to compare when retaining a serviceable Demco bar or choosing one of Demco’s current motorhome-mounted models.
An owner moving a Dominator from an older towed car to a 2023 Maverick may reuse the approved bar, but still needs the Maverick-specific 9519360 mounting system and a fresh review of height and cable length.
Record the baseplate part number separately from the removable tab number. Inspect the complete kit against TP29360 instead of accepting a seller’s description of “Demco Maverick brackets.”
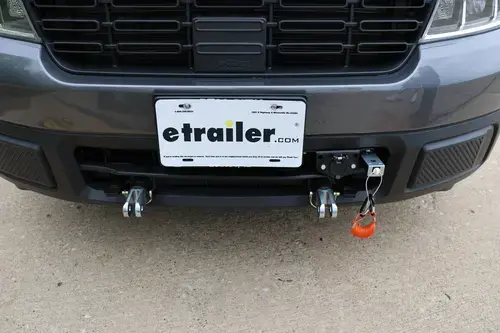
Enlarge photo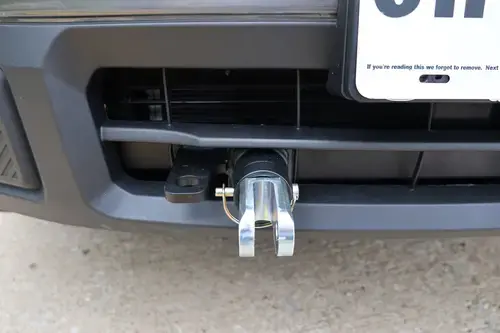 Enlarge photo
 Enlarge photo
9519360
Earlier Maverick Demco application. Keep this separate from the refreshed-front-end 9519366 kit when comparing quotes or used equipment.
Match the part label, complete hardware list and latest manufacturer fitment to the VIN. Used or transferred baseplates need a condition and installation review; missing plates or substituted hardware can change the integrity of the mount.
Manufacturer fitment catalog etrailer Invisible · e64FVClick for application, pros & cons, examples, photos and manualsTap to close+ Add to my inquiry
Opens in a new tab. Match the part number and revision to your equipment; save the PDF for your installation and travel records.
The earlier-body etrailer Maverick entry is e64FV, with LIT-00692 instructions. Keep it distinct from refreshed-body e96GV when researching 2022–2024 Hybrid equipment.
A removable-arm alternative for owners comparing an etrailer tow-bar package or an expressly approved adapted connection. Evaluate the complete coach-to-truck arrangement rather than assuming every two-pin interface is the same.
A 2022 Hybrid owner pricing an SD bar and e64FV should compare that installed total with a Roadmaster or Blue Ox package that includes equivalent brakes, lights and charging.
Check that the scope includes the socket location, breakaway switch and safety-cable routing. Those small installation decisions affect how convenient the system is every trip.
Enlarge installed photoEnlarge photo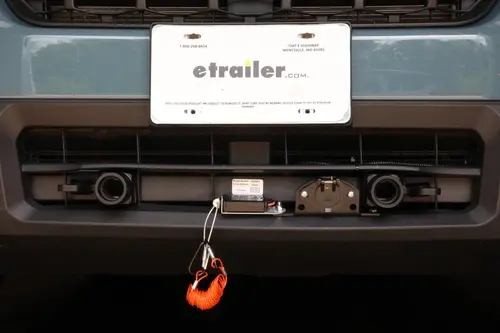 Enlarge photo
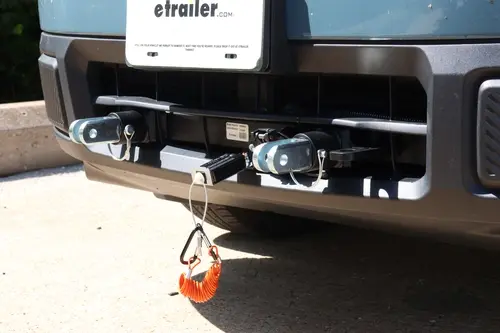 Enlarge photo
e64FV
Earlier-body removable-arm option. This is the earlier application; e96GV belongs to the refreshed front-end comparison.
Inspect the exact tow-bar connection and approved adapters before buying. Quote the baseplate, installation hardware, safety connections, electrical socket and breakaway mounting as a complete package.
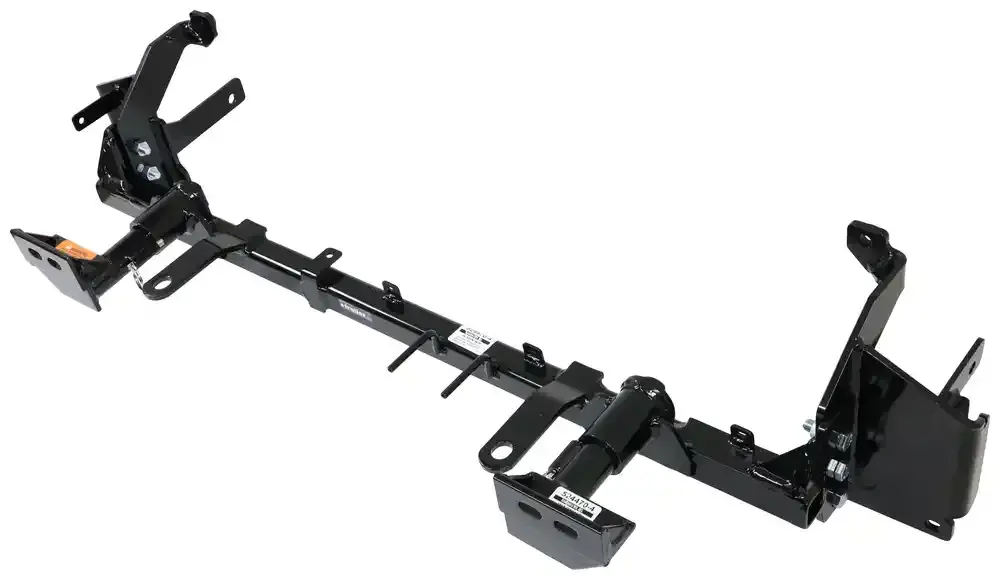 Roadmaster Crossbar-Style · 524470-4Click for application, pros & cons, examples, photos and manualsTap to close+ Add to my inquiry
Opens in a new tab. Match the part number and revision to your equipment; save the PDF for your installation and travel records.
The earlier-body Crossbar-Style Roadmaster kit is 524470-4. It belongs in the 2022–2024 Hybrid comparison and serves a different interface from Direct-Connect 524470-5.
Consider it when preserving an approved crossbar-style system is more useful than converting the connection. This can matter for an existing bar or an accessory that mounts to the crossbar.
A 2024 owner with a complete approved Roadmaster crossbar system may reasonably choose -4. An owner starting from scratch should compare the same installation with -5 and decide whether any crossbar-dependent accessory is actually needed.
Inventory the crossbar, quick-disconnect components, pins, retainers and approved accessories. Compare the arm-removed photos as well as the fully connected appearance.
Enlarge photo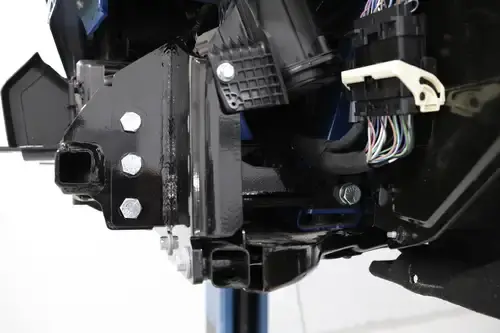 Enlarge photo
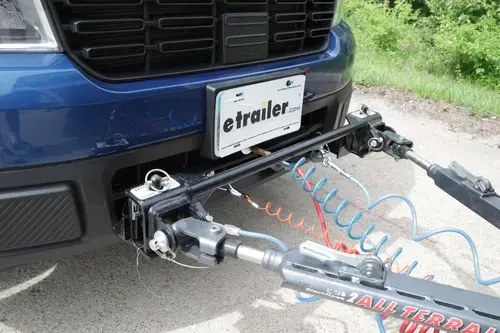 Enlarge photo
524470-4
Earlier-body Crossbar-Style choice for a compatible Roadmaster crossbar setup, including some existing equipment combinations.
Compare the visible connection and accessory needs with the Direct-Connect version. The suffix matters: -4 and -5 are not interchangeable descriptions. Confirm the complete crossbar assembly and any approved adapters in the estimate.
Manufacturer PDFVIN, model year, Hybrid drivetrain, trim, adaptive cruise/radar, active shutters, front fascia, collision history and any aftermarket accessories. We also match the bracket to the actual tow-bar ends.
Fascia removal, grille trimming, drilling, shutter modifications and sensor clearance are kit-specific. We explain the applicable changes in the estimate. “Custom fit” does not mean every installation is reversible without visible changes.
Send the VIN and a front photo. We will identify the correct application and compare the complete installed options.
Plan my installationChoose the correct generation first. Manufacturer numbers are shown prominently; alternate catalog references help identify the same item in an existing quote. Tap an installed photo to enlarge it.
Equipment / Tow Bars
Tap an option to open it. Tap it again to close it.
Once the truck, coach and connection are approved, compare the features you will use at every stop. Capacity is one requirement; lifting the bar, reaching the release, managing cables and storing the arms are daily ownership decisions.
Compare complete product weight. Demco lists Dominator at 30 lb, Commander 2 at 41 lb and Excali-Bar 3 at 46 lb. Blue Ox lists Alpha BX7390 at 40 lb; CURT lists Rambler 70015 at 38 lb. Try the complete assembly rather than judging by aluminum/steel labels alone.
Nighthawk’s illuminated arms distinguish it from a capacity-only choice. The benefit is visibility around the connection; you still need to test the truck’s rear signals and inspect every retaining pin.
Start with model, receiver shank, installed ends, condition and recall status. Nighthawk 676 and 677, Falcon 3HD 622 and 627, and Sterling 576 and 586 deliberately have different end configurations. Reusing a sound bar can make sense; buying the wrong baseplate to match a worn-out bar may not.
Falcon 3HD, Avail, Apollo, Excali-Bar 3, XHD and Seeker offer different higher ratings. Evaluate the future motorhome/vehicle combination too. Where the bar maker specifies sizing by the towed vehicle’s GVWR, meet that requirement as well as checking actual loaded weight and coach limits.
Demco weight comparison · Alpha specifications · Rambler specifications
Compare rated capacity, handling weight, attachment ends, receiver size and hookup convenience. These are equipment options, not blanket approval of every bar-and-baseplate combination.
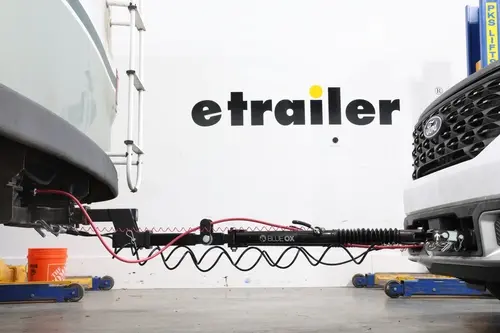
A tow bar links the motorhome’s receiver to the Maverick’s baseplate. The baseplate attaches to the truck; the bar connects the two vehicles. Neither part replaces Ford’s Neutral Tow procedure, supplemental braking, the breakaway system, safety cables, lighting or a suitable 12-volt power plan. Choose those pieces as one complete setup.
Confirm that Ford permits your exact Maverick to be towed four wheels down, then choose its model-year baseplate. Record the motorhome’s permitted towing weight, receiver size and ratings, and the truck’s loaded weight. Only then narrow the tow-bar choices by attachment style, capacity and the amount of weight you can comfortably lift and store.
Compare how the arms extend and lock, how the release handles work, where the bar folds for storage and what cables or adapters are included. A nonbinding release can make disconnecting easier when the connection is under load. You still need a suitable parking position and the manufacturer’s release procedure. It does not permit backing up with the truck attached.
An owner of an eligible 2025 Maverick Hybrid starts with the refreshed-front-end baseplate applications. After the coach’s limits and receiver are checked, the owner compares compatible tow bars and plans the brakes, lights and charging together. Buying the highest-rated bar first would leave those other decisions unresolved.
An owner changing from another towed vehicle to a 2024 Maverick records the bar’s exact model, serial number and installed attachment ends. The installer checks condition, recalls, the correct earlier-year baseplate and any approved adapter. A familiar brand name or a pin that appears to fit is not enough to establish the combination.
Open a product below for its photos, comparison details and PDF instructions. Then use the four expandable checks for capacity, connections, height and used equipment before making the final selection.
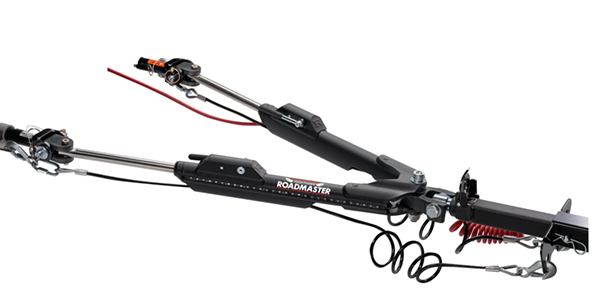
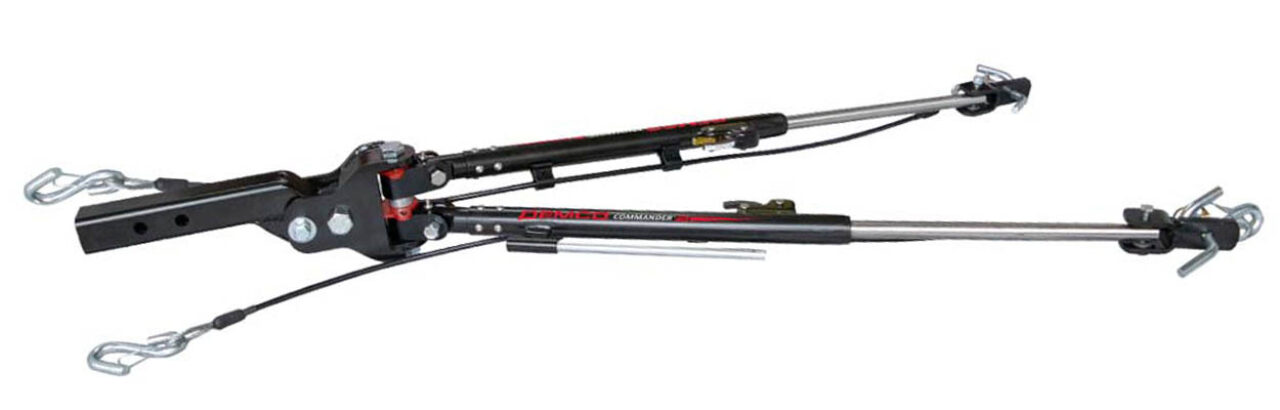
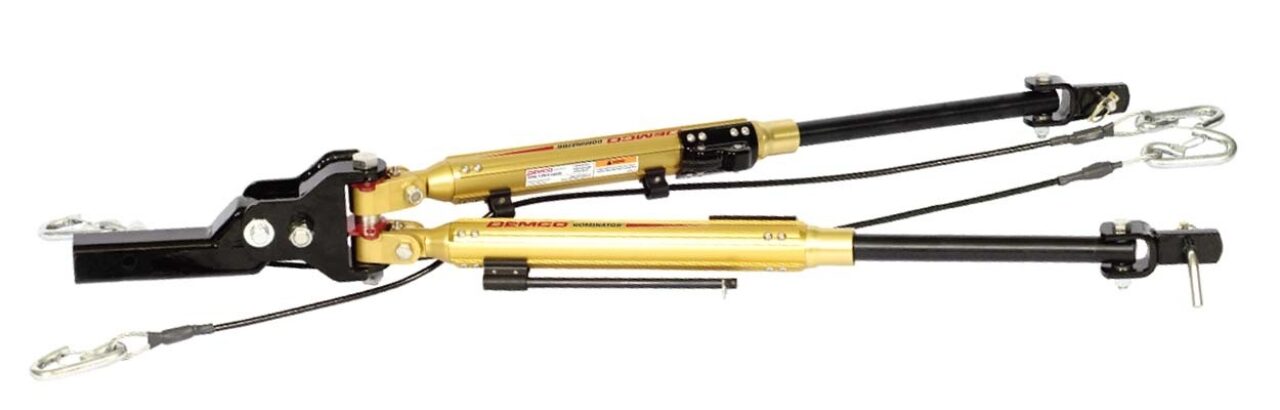
The arms and attachment ends connect to the baseplate. The receiver shank connects to the motorhome. Safety cables and the electrical cord serve separate functions, even when routed along the bar.
Shown: a Roadmaster Nighthawk. Compare this and the other options in the table below.
 Enlarge photo
 Enlarge photo
 Enlarge photoRoadmaster Nighthawk · 676 / 677Click for application, pros & cons, examples, photos and manualsTap to close+ Add to my inquiry
Opens in a new tab. Match the part number and revision to your equipment; save the PDF for your installation and travel records.
Nighthawk 676 has Roadmaster ends; 677 has Blue Ox ends. For Maverick applications, compare 676 with the matching Roadmaster mounting system and 677 with BX2913 or BX2917. Both are 8,000-lb bars; vehicle eligibility and the coach’s lower limits still govern.
Its distinguishing feature is lighting along the arms, combined with a nonbinding release and organized cable routing. It is worth comparing when visibility around the connection and frequent campsite hookups matter to you.
For an owner arriving after dusk, seeing the arms and cable path can be useful. That owner still walks around the truck to test the brake and turn lights; illumination on the bar cannot perform that check.
Check the exact end version, cord/socket contents and Roadmaster recall applicability by serial number. Confirm any applicable recall remedy before use.
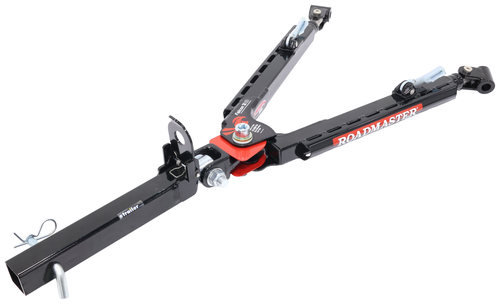 Roadmaster Falcon 3HD · 622 / 627Click for application, pros & cons, examples, photos and manualsTap to close+ Add to my inquiry
Opens in a new tab. Match the part number and revision to your equipment; save the PDF for your installation and travel records.
Falcon 3HD 622 uses Roadmaster ends and 627 uses Blue Ox ends; both are rated 10,000 lb. This is a different model from the older Falcon 2 or Falcon All-Terrain, so use the 3HD manual and label.
Consider this when a current Roadmaster bar with greater rated capacity is useful, particularly if future approved towed vehicles are part of your plan. The bar’s number is only one component limit.
An owner considering a future heavier towed vehicle can include 3HD in the comparison, then check whether the motorhome could tow that future vehicle at all. A 5,000-lb receiver would remain a 5,000-lb limit.
Verify 622 versus 627 before ordering, inspect operating and stowing clearance, and check the current Roadmaster recall by model and serial number.
Enlarge photo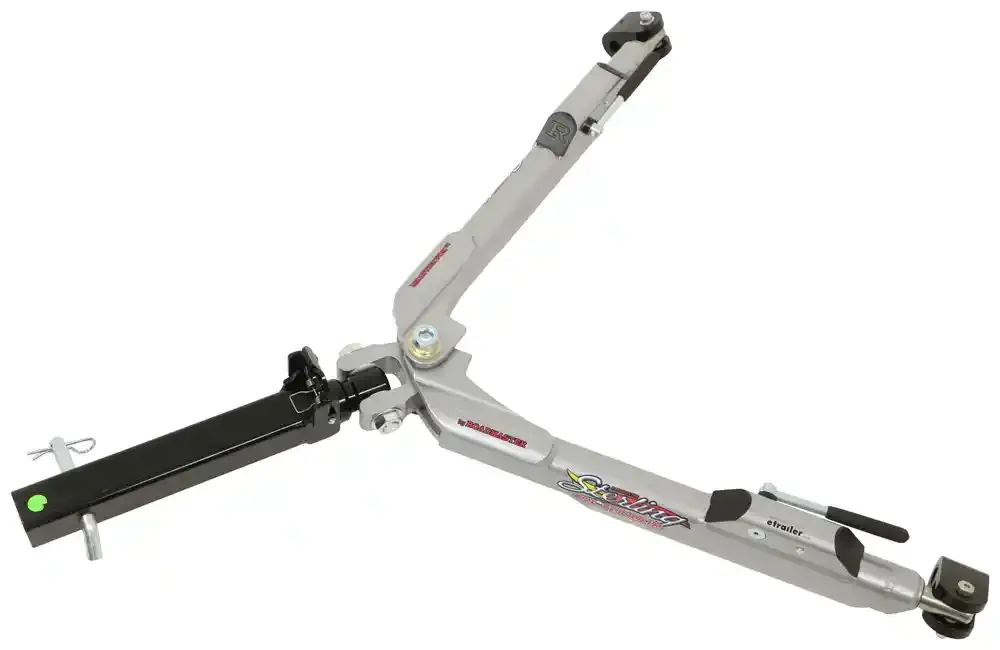 Roadmaster Sterling · 576 / 586Click for application, pros & cons, examples, photos and manualsTap to close+ Add to my inquiry
Opens in a new tab. Match the part number and revision to your equipment; save the PDF for your installation and travel records.
Sterling 576 is the Roadmaster-ended version; 586 is the Blue Ox-ended version. Both are in the 8,000-lb Sterling All-Terrain family. Use the actual serial number when identifying parts on an older bar.
An aluminum-bodied Roadmaster option to compare for handling and nonbinding release. It is also a common reuse decision: a good existing bar may remain useful if its connection, condition and service status are suitable.
A motorhome owner who already has a Sterling 586 can investigate a Blue Ox Maverick baseplate before buying another tow bar. A 576 requires the Roadmaster connection or an expressly approved conversion.
Review wear, latch action, pins, cable condition and the current recall notice. Match replacement parts to the serial-number range in the manufacturer documentation.
Enlarge photo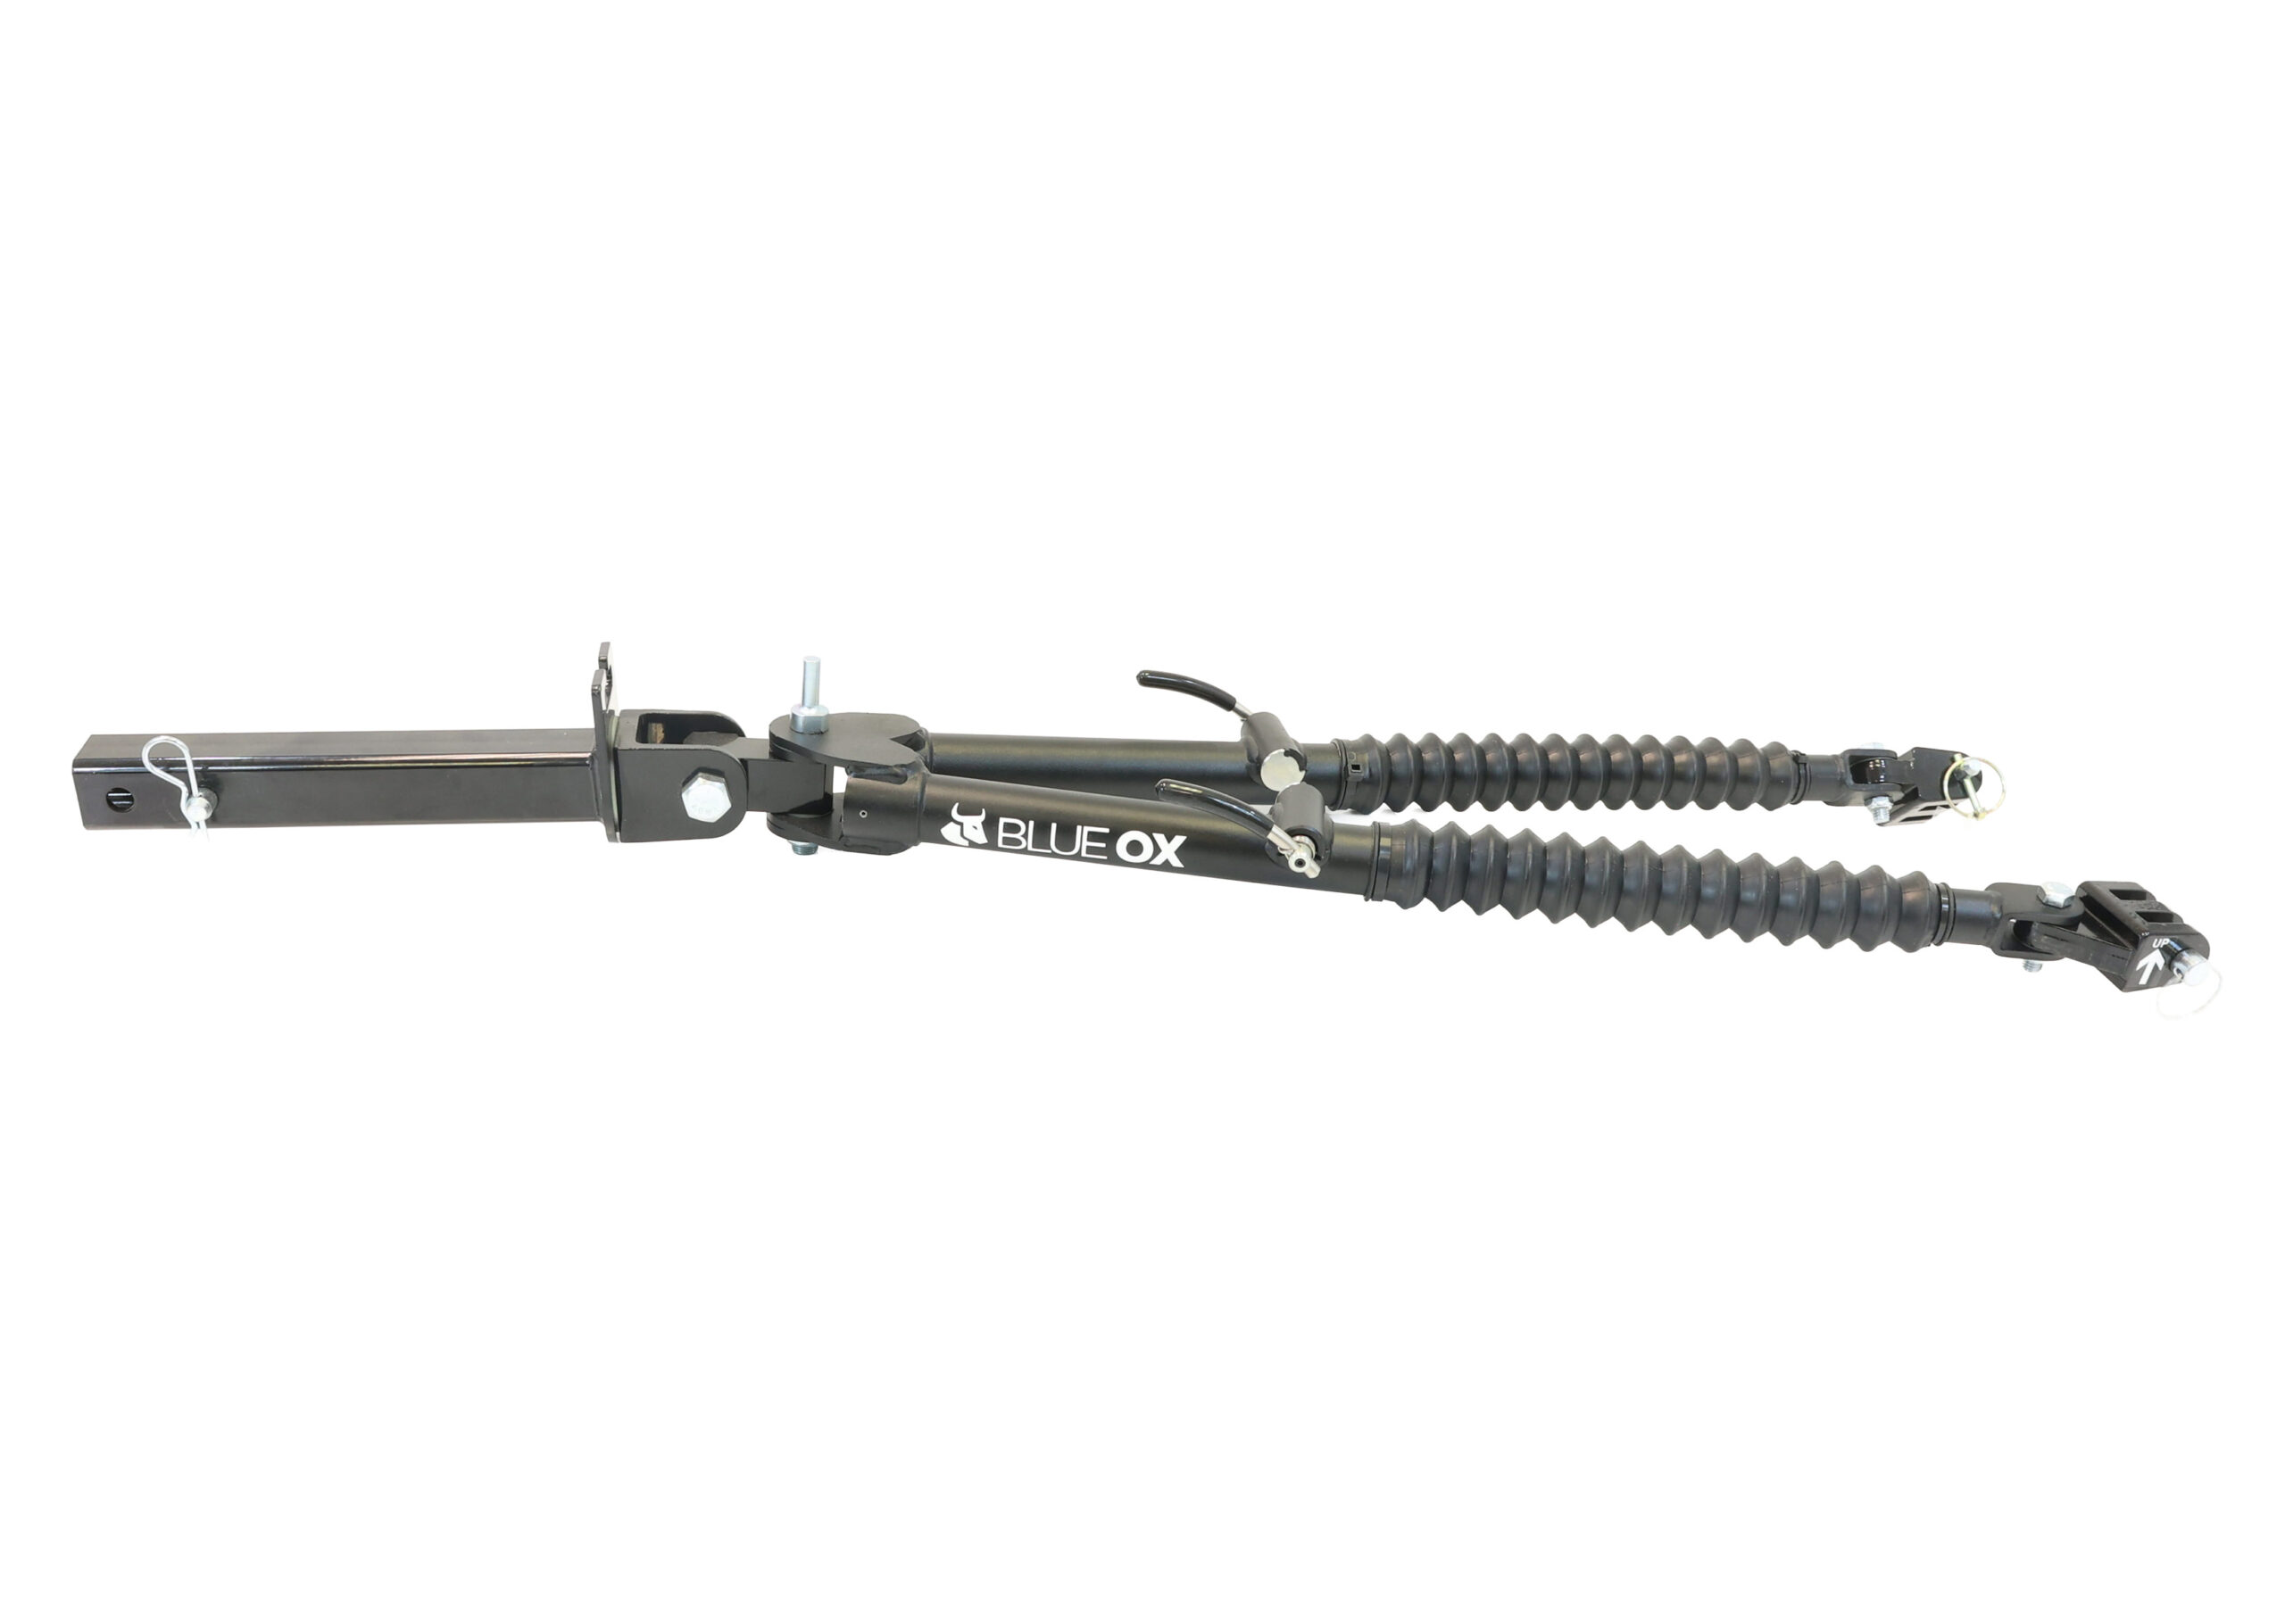 Blue Ox Alpha · BX7390Click for application, pros & cons, examples, photos and manualsTap to close+ Add to my inquiry
Opens in a new tab. Match the part number and revision to your equipment; save the PDF for your installation and travel records.
Alpha BX7390 is an 8,500-lb steel bar with a 2-inch receiver shank and Blue Ox attachment style. Compare it with BX2913 for 2022–2024 HEV or BX2917 for 2025–2026 HEV.
A straightforward Blue Ox motorhome-mounted choice for owners who want self-aligning arms and a nonbinding release without selecting the higher-capacity Avail or Apollo solely for the larger number.
A 2024 Hybrid owner with a 2-inch coach receiver can compare Alpha plus BX2913 against an Avail package. If both satisfy every rating, handling, release action and total package cost may matter more than unused capacity.
Check that the box contains the specified cables and connecting hardware. Electrical lighting, charging and supplemental braking remain separate decisions.
Product instructions ↗ · Manufacturer application / specifications ↗
Enlarge photo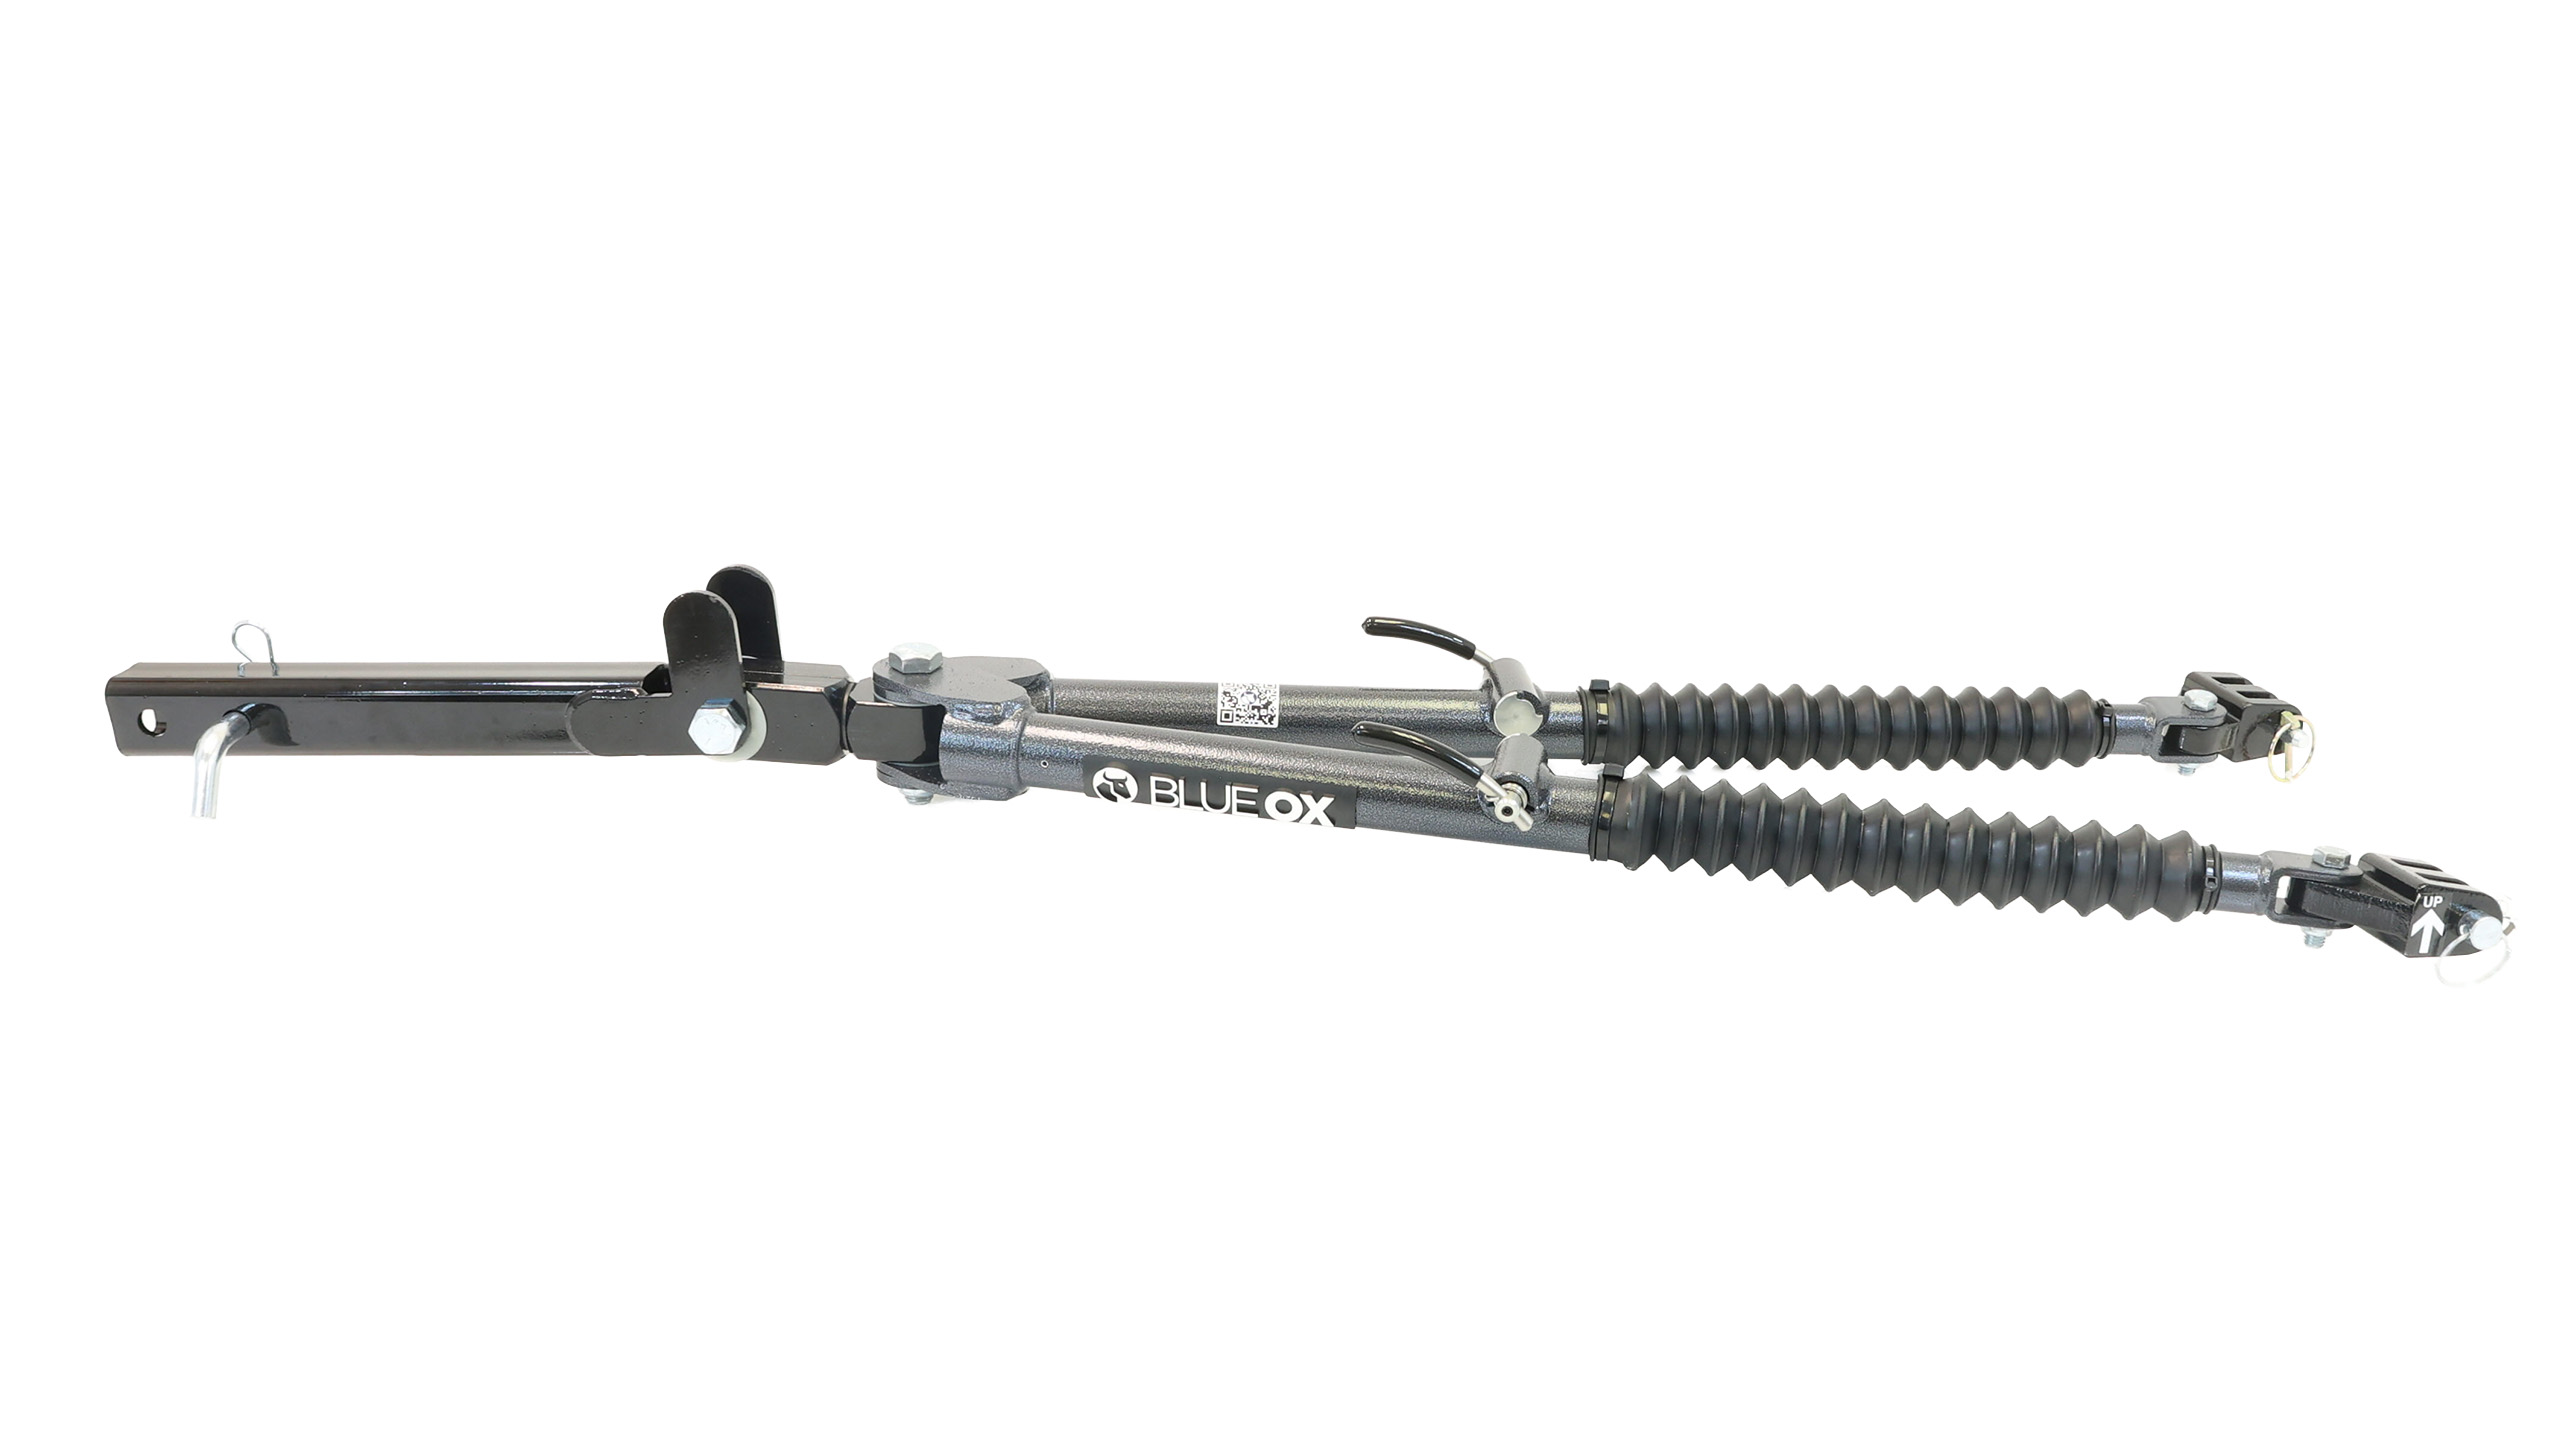 Blue Ox Avail · BX7421 / BX7426Click for application, pros & cons, examples, photos and manualsTap to close+ Add to my inquiry
Opens in a new tab. Match the part number and revision to your equipment; save the PDF for your installation and travel records.
Avail BX7421 fits a 2-inch receiver; BX7426 fits a 2½-inch receiver. Both listed versions are rated 10,000 lb and use the Blue Ox connection appropriate to BX2913 or BX2917.
The receiver-size choice is a major reason to compare the two versions. Nonbinding operation and the available capacity can suit an owner retaining a Blue Ox baseplate system or planning a different approved towed vehicle later.
A buyer comparing two used Avail bars should photograph the model label and measure the shank. An older BX7420 is a separate model, not proof of the specifications listed for BX7421 or BX7426.
Use the manual for the exact receiver version. Confirm the connection parts, cable length and maintenance history before treating a used bar as ready to travel.
Enlarge photo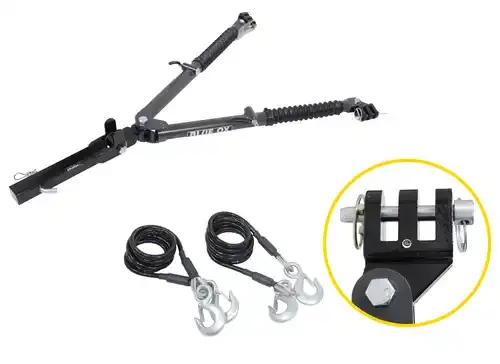 Blue Ox Apollo · BX7475 / BX7470Click for application, pros & cons, examples, photos and manualsTap to close+ Add to my inquiry
Opens in a new tab. Match the part number and revision to your equipment; save the PDF for your installation and travel records.
Apollo BX7475 is rated 12,500 lb with a 2-inch receiver; BX7470 is rated 15,000 lb with a 2½-inch receiver. These versions use the Blue Ox connection, with the appropriate Maverick baseplate and attachment spacing.
This is the high-capacity Blue Ox comparison, most relevant when the owner’s wider towing plans justify it. A Maverick-only purchase should still compare handling, price and daily use against Alpha or Avail.
If the motorhome can tow only 5,000 lb, replacing an adequate bar with a 15,000-lb Apollo does not make the coach capable of towing a 7,000-lb vehicle.
Compare the complete bar’s handling and the exact manual’s leveling limits. Keep the BX7475 and BX7470 instructions separate when discussing specifications.
Enlarge photoDemco Commander 2 · 9511012Click for application, pros & cons, examples, photos and manualsTap to close+ Add to my inquiryOpens in a new tab. Match the part number and revision to your equipment; save the PDF for your installation and travel records.
Commander 2 is Demco’s 6,000-lb steel model for a 2-inch coach receiver. The standard Demco connection belongs with the approved Demco tab arrangement, such as the corresponding Maverick 9519360 or 9519366 application.
Demco positions it as the entry-level choice. For an eligible Maverick within all component ratings, the decision against Dominator is often purchase cost versus the weight you lift.
An occasional traveler who leaves the bar stored on the motorhome may accept the heavier steel unit. Someone lifting it into storage after every trip may value the Dominator’s lower listed weight more.
Use the actual bar’s height-adjustment instructions; built-in adjustment does not guarantee that no additional approved rise/drop is needed.
Product instructions ↗ · Manufacturer application / specifications ↗
Enlarge photoDemco Dominator · 9511008Click for application, pros & cons, examples, photos and manualsTap to close+ Add to my inquiryOpens in a new tab. Match the part number and revision to your equipment; save the PDF for your installation and travel records.
Dominator is Demco’s 7,500-lb aluminum model for a 2-inch receiver and the appropriate Demco baseplate connection. Use the Maverick mounting application for the correct body generation.
Its clearest distinction is handling weight. Demco lists 30 lb, compared with Commander 2 at 41 lb and Excali-Bar 3 at 46 lb. This can matter more than surplus towing capacity for a Maverick owner.
An owner who has difficulty lifting a steel bar can compare the complete Dominator in person. The 11-lb difference from Commander 2 is a tangible handling consideration, not a claim that the truck will tow differently.
Confirm the supplied connecting ends, cables and approved leveling arrangement. A lighter bar still requires the same inspection and arm-lock verification.
Product instructions ↗ · Manufacturer application / specifications ↗
Enlarge photo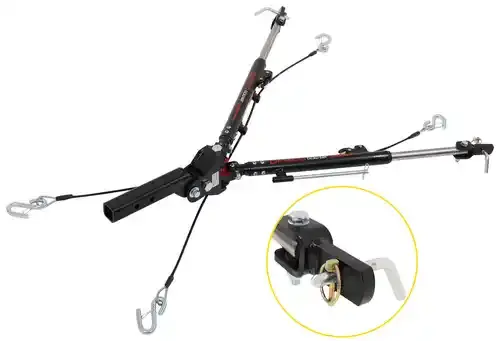 Demco Excali-Bar 3 · 9511013Click for application, pros & cons, examples, photos and manualsTap to close+ Add to my inquiry
Opens in a new tab. Match the part number and revision to your equipment; save the PDF for your installation and travel records.
Excali-Bar 3 is rated 10,500 lb and mounts in a 2-inch receiver. Match its Demco-style connection to the approved Maverick baseplate or expressly listed adapter.
This is Demco’s higher-capacity steel option. It is most useful to compare when a broader towing plan calls for that capacity and the motorhome can support it.
An owner who keeps the bar on the coach and anticipates another approved vehicle might prefer the capacity. An owner removing it after every outing may instead favor Dominator’s lower weight.
Use the Excali-Bar 3 manual TB20061 for hookup and leveling. Do not substitute instructions for an earlier Excali-Bar with a similar name.
Product instructions ↗ · Manufacturer application / specifications ↗
Enlarge photo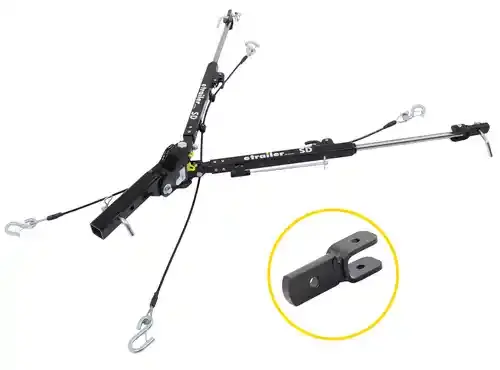 etrailer SD · e34ZRClick for application, pros & cons, examples, photos and manualsTap to close+ Add to my inquiry
Opens in a new tab. Match the part number and revision to your equipment; save the PDF for your installation and travel records.
etrailer SD e34ZR is a 6,000-lb, 2-inch-receiver bar supplied for etrailer and Demco baseplates. The product page lists other connection configurations separately: e47ZR for Blue Ox, e44ZR for Roadmaster Crossbar-Style and e74ZR for Roadmaster Direct-Connect.
This is a practical comparison for an etrailer or Demco Maverick baseplate package. Self-supporting arms and integrated safety cables address daily hookup organization.
A buyer with BX2913 should not order e34ZR simply because it is an etrailer bar. The Blue Ox configuration listed by the brand is e47ZR; that distinction belongs in the quote.
Specify the full bar configuration, cable reach and approved height setup. Compare the current supplied ends if evaluating a used or modified bar.
Product instructions ↗ · Manufacturer application / specifications ↗
Enlarge photo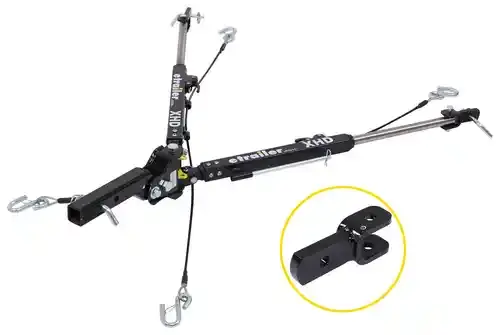 etrailer XHD · e94ZRClick for application, pros & cons, examples, photos and manualsTap to close+ Add to my inquiry
Opens in a new tab. Match the part number and revision to your equipment; save the PDF for your installation and travel records.
etrailer XHD e94ZR is the 10,500-lb, 2-inch-receiver configuration for etrailer/Demco baseplates. Its product page lists e67ZR for Blue Ox, e64ZR for Roadmaster Crossbar-Style and e84ZR for Roadmaster Direct-Connect. These are different from the SD family’s configuration numbers.
Compare XHD with SD when higher bar capacity is useful, while evaluating the handling and storage of the complete assembly. Its self-supporting arms and integrated cables organize the connection.
An owner using an etrailer Maverick baseplate can compare SD and XHD as complete packages. If both satisfy the application, the decision should include handling and future plans rather than a larger rating alone.
Have the seller identify the exact approved XHD connection in writing and include any required cable extensions in the parts list.
Product instructions ↗ · Manufacturer application / specifications ↗
Enlarge photo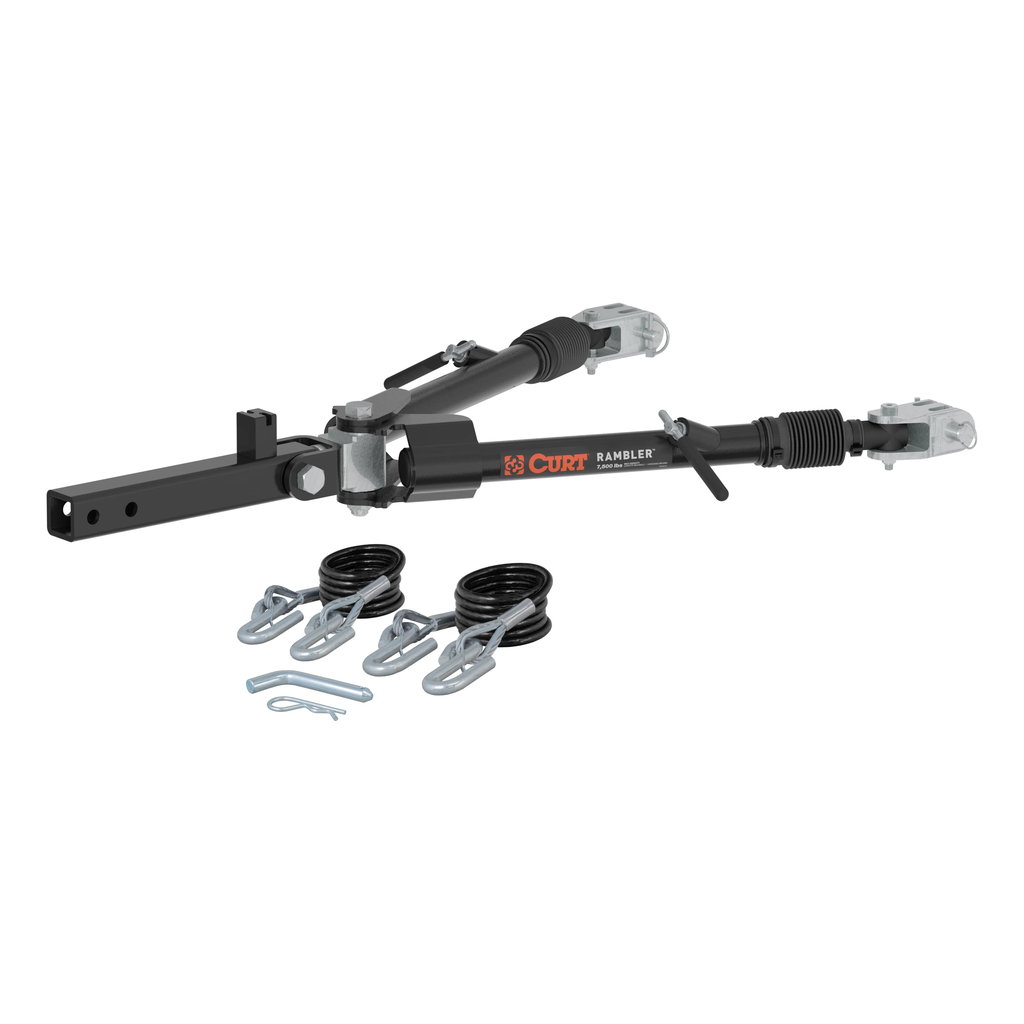 CURT Rambler · 70015Click for application, pros & cons, examples, photos and manualsTap to close+ Add to my inquiry
Opens in a new tab. Match the part number and revision to your equipment; save the PDF for your installation and travel records.
Rambler 70015 is a 7,500-lb steel bar with a 2-inch shank. Its manual illustrates a three-lug connection secured with the supplied ½-inch pin; an arbitrary pin fit is not approval for another brand’s baseplate.
Compare it when handling weight, nonbinding release and storage positions matter. CURT lists a 38-lb product weight and three stowing positions.
A coach with rear-mounted accessories may benefit from a different stowing position. Check the actual folded bar against the spare tire, ladder and storage-door swing before purchase.
Read the 70015 manual’s height diagram and arm-lock checks. The lower-priced CURT 19745 universal coupler bar is a different design and is not a substitute specification.
Product instructions ↗ · Manufacturer application / specifications ↗
Enlarge photo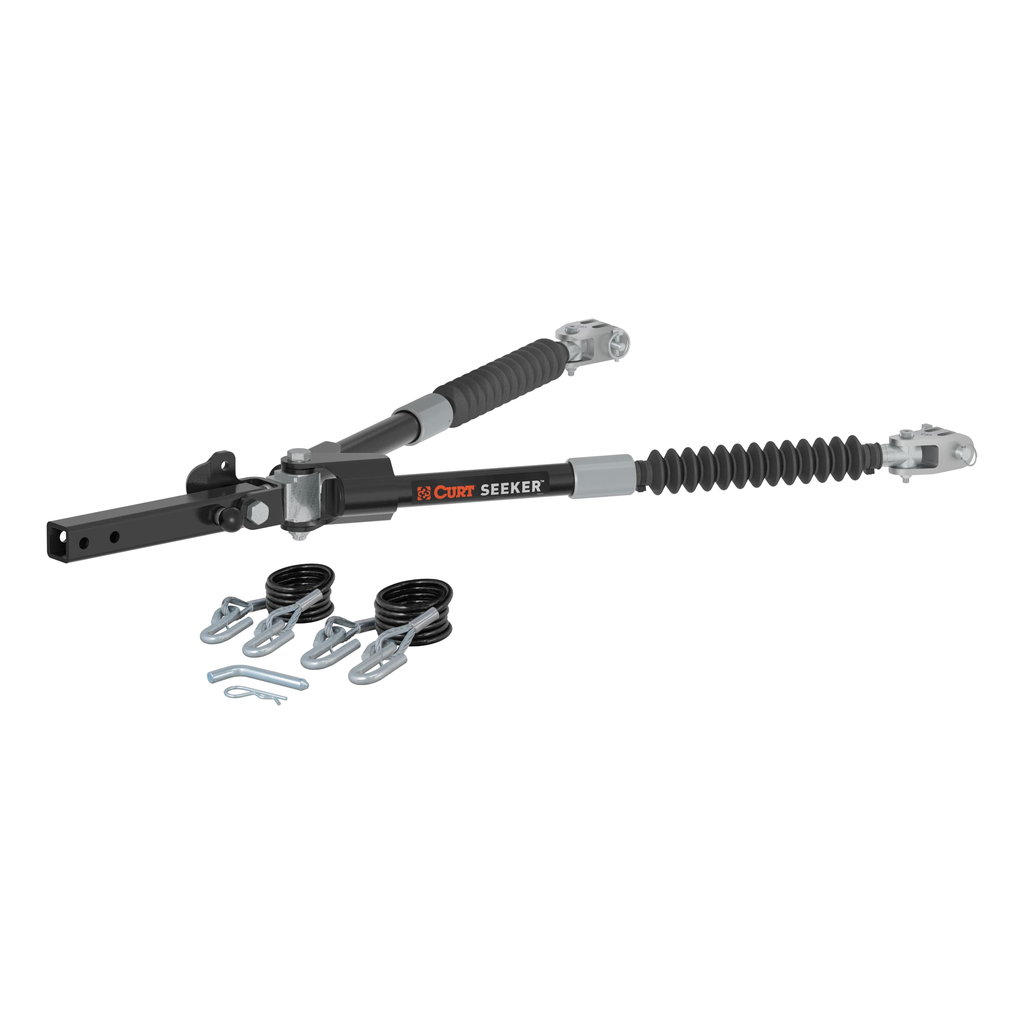 CURT Seeker · 70012Click for application, pros & cons, examples, photos and manualsTap to close+ Add to my inquiry
Opens in a new tab. Match the part number and revision to your equipment; save the PDF for your installation and travel records.
Seeker 70012 is CURT’s 10,000-lb, 2-inch-shank bar. The manual shows the supplied ½-inch-pin lug connection and identifies the locking-collar position for towing.
Consider it as CURT’s higher-capacity comparison with Rambler. The useful differences include capacity, release/locking operation and how the bar stows on your motorhome.
If a rear spare tire conflicts with the stowed bar, first evaluate the listed storage positions. Adding receiver extensions without checking the instructions can create a new limit instead of solving the installation.
Have the installer demonstrate the collar’s locked state and both supplied safety cables. Compare the complete connection price with Rambler, not only the bar’s advertised capacity.
Product instructions ↗ · Manufacturer application / specifications ↗
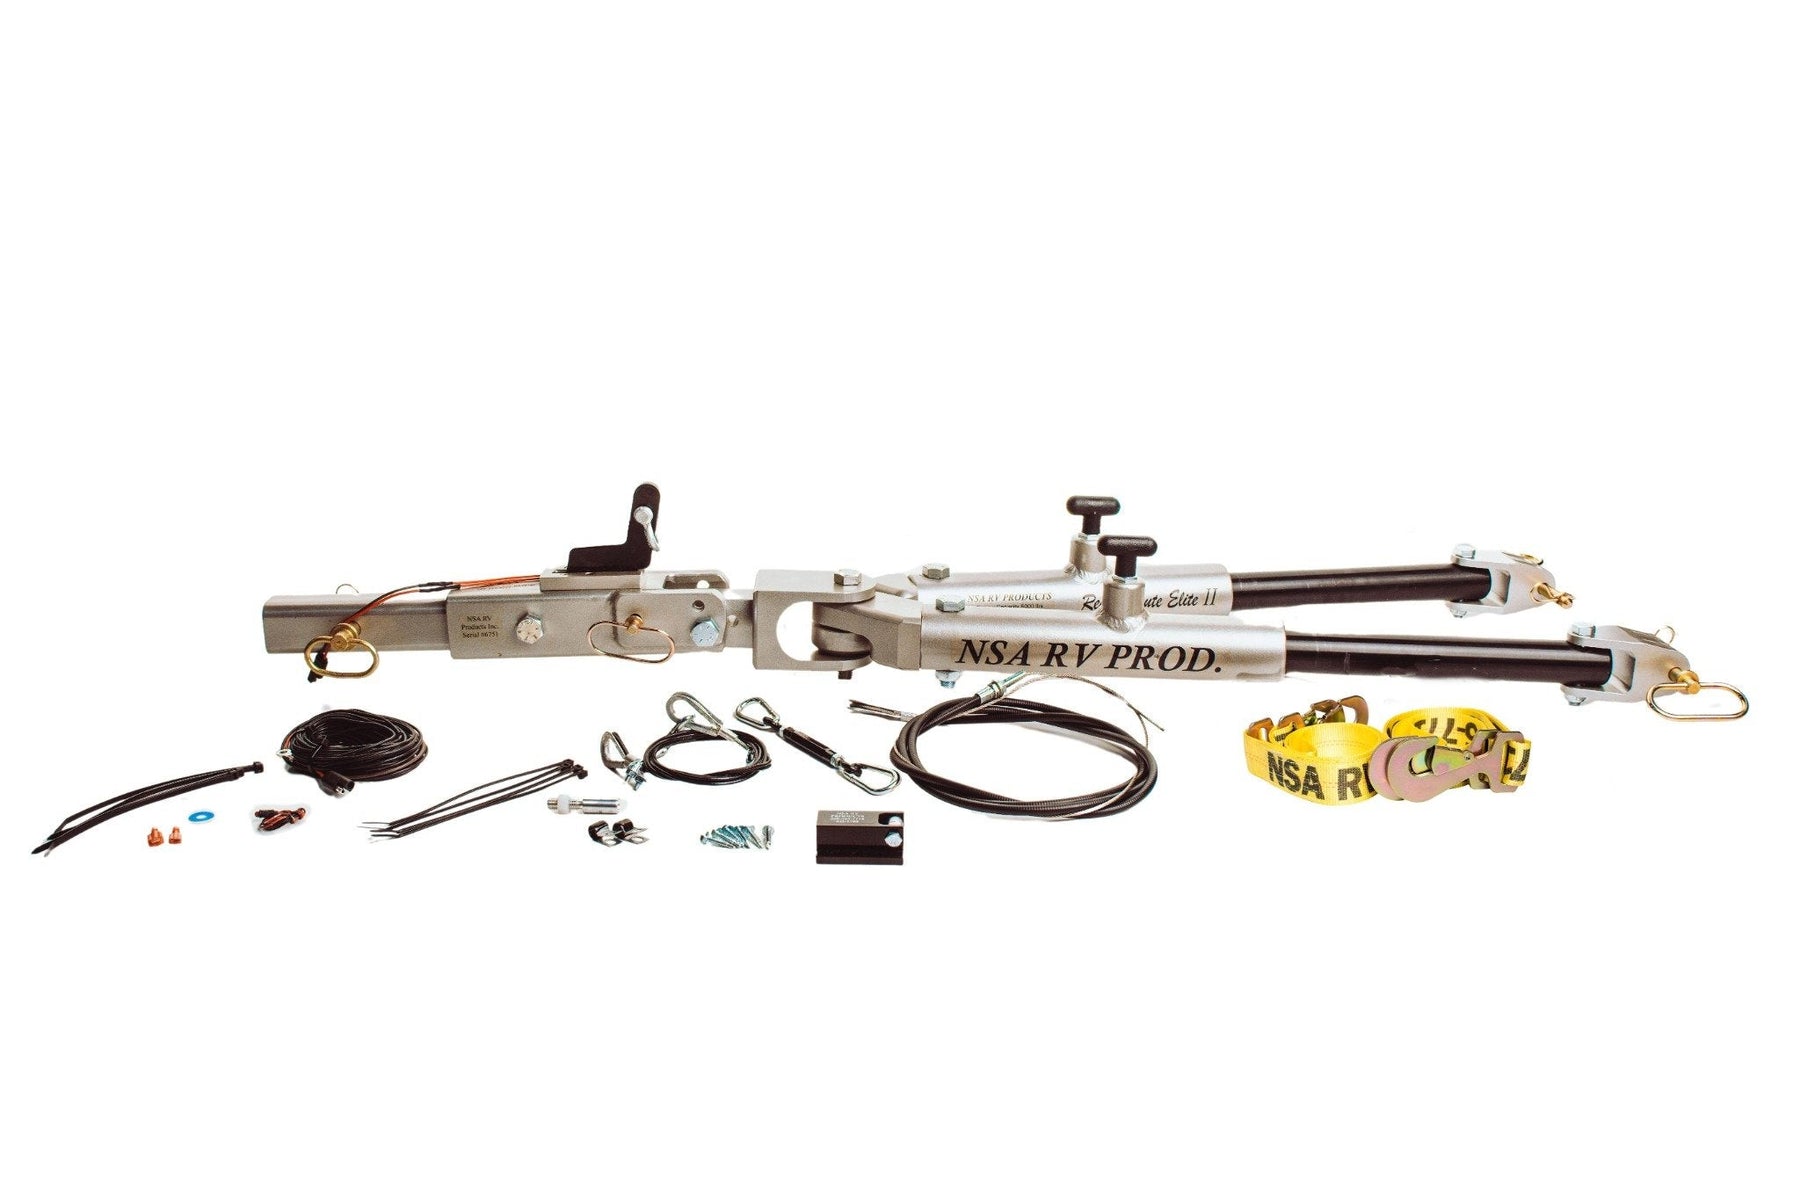
Enlarge photoNSA Ready Brute Elite II · RB-9050-2Click for application, pros & cons, examples, photos and manualsTap to close+ Add to my inquiryOpens in a new tab. Match the part number and revision to your equipment; save the PDF for your installation and travel records.
Ready Brute Elite II combines an 8,000-lb bar with mechanical surge braking. NSA sells different clevis options, including Blue Ox, Demco Classic and Roadmaster hole-size versions; choose the one approved for the actual baseplate.
As the towed vehicle pushes against the slowing coach, the surge mechanism pulls an installed cable that applies the truck’s brake pedal. It is a different operating approach from a portable electric pedal actuator.
An owner comparing Elite II with a separate tow bar and DUO should compare complete installed systems: include the NSA vehicle cable, breakaway and monitor before comparing totals.
Do not confuse Ready Brute II with Ready Brute Elite II: NSA states the non-Elite tow bar lacks the integrated surge brake. Have the installer demonstrate full pedal release.
Product instructions ↗ · Manufacturer application / specifications ↗
Enlarge photoCompare the loaded Maverick weight with the motorhome’s permitted towing capacity, GCWR and receiver label, then the bar, high-low adapter and safety cables. A 10,000 lb bar does not turn a 5,000 lb coach hitch into a 10,000 lb hitch.
Use the Maverick’s actual travel weight, including installed equipment and anything carried in it. Compare that weight with every applicable limit: the motorhome’s towing rating, its available combined-weight allowance, the receiver, tow bar, adapters, baseplate system and safety cables. The lowest applicable limit is the ceiling; satisfying it still does not establish fitment or braking approval.
GCWR means gross combined weight rating: the maximum permitted loaded weight of the motorhome and what it tows. Subtracting the loaded coach weight from GCWR gives one weight allowance to check. The receiver label or motorhome instructions may impose a lower limit.
Example 1 — the receiver is the limit: assume a truck weighs 4,100 lb ready to tow, the receiver is rated for 5,000 lb, the bar for 10,000 lb and every other relevant limit is at least 5,000 lb. The bar does not raise the combination’s 5,000 lb ceiling. These are illustrative figures, not a Maverick weight specification.
Example 2 — the loaded coach changes the answer: a hypothetical 26,000 lb GCWR minus a 22,200 lb loaded motorhome leaves 3,800 lb. That would be insufficient for the same 4,100 lb truck, even with a 5,000 lb receiver. A larger tow bar would not resolve that limit.
Review the complete setup and use the coach manufacturer’s ratings and actual scale weights for your own calculation.
Receiver size, baseplate tabs, clevis/ear style and crossbar requirements are separate choices. Use only manufacturer-approved adapters. Account for the adapter’s rating, extra length and effects on turning and height.
There are two separate interfaces to match. At the motorhome, check the receiver opening, shank size, pin and any rise/drop adapter. At the truck, match the tow-bar ends to the removable baseplate arms or required crossbar. The same tow-bar family may be sold with different ends, so compare full part numbers and the hardware actually installed.
An approved adapter must explicitly cover the combination. Check its capacity, fastening instructions, additional length and clearance while turning. Do not assume that a reducer sleeve, receiver extension and baseplate adapter are interchangeable parts: they solve different connection problems.
Example 1 — two versions of one bar: the Roadmaster Falcon 3HD manual identifies 622 and 627, with Blue Ox ears on 627. An owner needs to match those ends to the selected baseplate, not select solely by the Falcon name or 10,000 lb rating.
Example 2 — a different receiver size: an existing 2.5-inch tow-bar shank cannot slide into a 2-inch motorhome receiver. Confirm whether the manufacturer offers an approved replacement shank or a different bar configuration. Do not modify the receiver or improvise hardware to make it fit.
Measure on level ground in travel condition. The tow-bar manual defines its permitted operating angle and any rise/drop limits. Use an appropriately rated adapter only when needed; never substitute a generic universal “three-inch rule” for the selected bar’s instructions.
Park the motorhome and Maverick on the same level surface, loaded for travel. Set the coach’s suspension to its normal travel condition. Measure from the ground to the centers of the connection points specified in the selected tow-bar manual. Use that manual’s diagram because some bars have an adjustable head or built-in rise/drop that changes the measurement.
Compare the difference with the permitted range for that exact bar. If correction is needed, select an approved, adequately rated rise/drop arrangement and remeasure the finished connection. Also check ground clearance, turning clearance and enough slack for the safety cables, electrical cord and brake connection without letting them drag.
Example 1 — measuring a difference: a receiver center at 21 inches and the specified baseplate connection center at 16 inches have a 5-inch difference. That measurement starts the selection process; it does not by itself tell you which adapter is approved or whether the bar can operate at that angle.
Example 2 — why the exact manual matters: the Blue Ox Apollo BX7475 manual recommends the hitch receiver be within 3 inches above or below the baseplate tabs. Use that limit for the covered Apollo setup; check the appropriate Demco, CURT, Roadmaster or other manual for a different bar.
Inspect arms, latches, joints, pins, cables, boots, mounting hardware and evidence of impact or binding. Check recall applicability and service requirements. Older Falcon All-Terrain, Avail BX7420 or other legacy versions should be evaluated by their own model label.
Record the manufacturer, complete model number and serial number before evaluating a used bar. Obtain the correct manual and ask about its service, storage and accident history. A current model’s rating or service instructions may differ from an older version that looks similar.
Inspect the arms, pivots, locking mechanisms, pins and retainers, attachment ends, boots and safety cables using the maker’s inspection procedure. Look for cracks, distortion, unusual looseness, damaged threads, corrosion or missing components. Appearance alone cannot establish condition: an impact or overload may leave damage that is difficult to see.
Example 1 — similar name, different equipment: a used Avail labeled BX7420 should be evaluated using its own identification and manual. Do not apply the details for the BX7421 / BX7426 choices on this page just because all are called Avail.
Example 2 — an arm will not lock: if one arm does not lock as its manual requires, or a pin or cable is damaged, stop the setup and obtain the manufacturer’s inspection or repair guidance. Replacing a visible clip alone does not demonstrate that the rest of the bar is fit for use.
Roadmaster tow-bar inspection instructions (PDF) · Roadmaster recall model and serial-number check
Have equipment already? We can check the combination before quoting.
Plan my installationEquipment / Braking
Tap an option to open it. Tap it again to close it.
Roadmaster identifies the Maverick Hybrid as having the equivalent of full-time active brake assist. A small pedal force can produce substantial braking even when the truck is configured for towing. The supplemental brake must be designed and adjusted for that behavior.
Patriot BRK2022: use the manufacturer’s Hybrid mode. RVibrake 4 52202: use its Active assist configuration and setup procedure. Their advantage is transferability; the tradeoff is repeated positioning, calibration and storage. Both still need the proper breakaway and 12V installation.
Stay-IN-Play DUO: Demco’s current manual identifies additional regulator 6492 for the Maverick. Its initial installation is more involved, but daily equipment handling is reduced. Do not omit the regulator and adjustment from the quote.
Air Force One: designed for the coach’s air-brake system. BrakeMaster 9160: a different air-coach option requiring the Maverick active-brake reducer and mounting components. Identify the coach chassis and any factory air connection before specifying either package.
Even Brake 9400 is excluded for active brakes by its manual, so it is shown below as an existing-equipment warning, not a Maverick recommendation. Brake Buddy Select 3 remains unconfirmed here until its exact manufacturer application and settings are established. A product’s presence in this guide does not mean every listed brake is suitable.
An owner moving from a hydraulic-brake motorhome to an air-brake coach should re-evaluate a DUO installation against an air-coach system. Keeping the same Maverick and tow bar does not make the two coach brake systems equivalent.
What a completed installation demonstrates: normal braking, complete pedal release, breakaway operation, accurate in-coach indication, and the reset procedure after Ford’s required stops. Readers should leave knowing which part does each job and which instructions govern their actual setup.
Even Brake active-assist exclusion · DUO Maverick regulator instructions
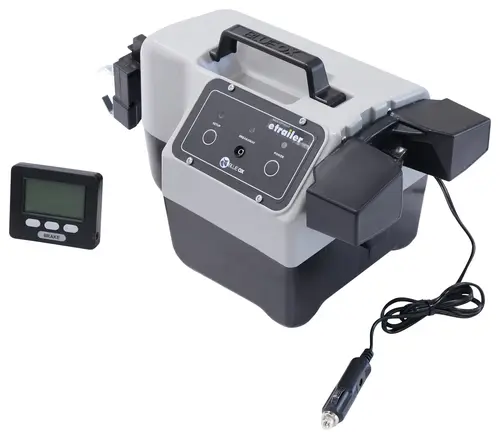 Blue Ox Patriot · BRK2022Click for application, pros & cons, examples, photos and manualsTap to close+ Add to my inquiry
Opens in a new tab. Match the part number and revision to your equipment; save the PDF for your installation and travel records.
Patriot BRK2022 is a portable brake for a compatible footwell and pedal, with a constant 12V supply. Blue Ox expressly covers hybrids and continuous-assist brakes through its Hybrid mode; it does not require a motorhome air-brake connection.
A powered actuator presses the truck’s brake pedal. The in-coach controller lets the driver monitor the brake and use the controls described in the manual. The unit is removed before driving the Maverick.
After a Ford-required start during a travel stop, follow Patriot’s restart/setup instructions before towing again. A ready light from earlier in the morning is not a substitute for the required reset.
Use Hybrid mode as directed, verify the monitor, and demonstrate pedal application and full release. Include a suitable powered outlet and charging plan in the quote.
Enlarge photoBRK2022
Portable pedal actuator with an in-coach controller and included breakaway. Blue Ox lists compatibility with hybrids. The unit is removed from the footwell when driving.
Useful when transferring the main unit between approved vehicles. On the Maverick Hybrid, use the Patriot Hybrid mode, constant 12V power and the prescribed pedal setup. The breakaway installation stays with each vehicle.
Use the Patriot Hybrid mode as directed for hybrid vehicles, and reset the brake after starting the vehicle. Follow the linked manual’s setup checks.
Open Patriot BRK2022 manual PDF ↗Blue Ox official manual, Rev. D, October 2025. Confirm the revision for your unit.
Manufacturer details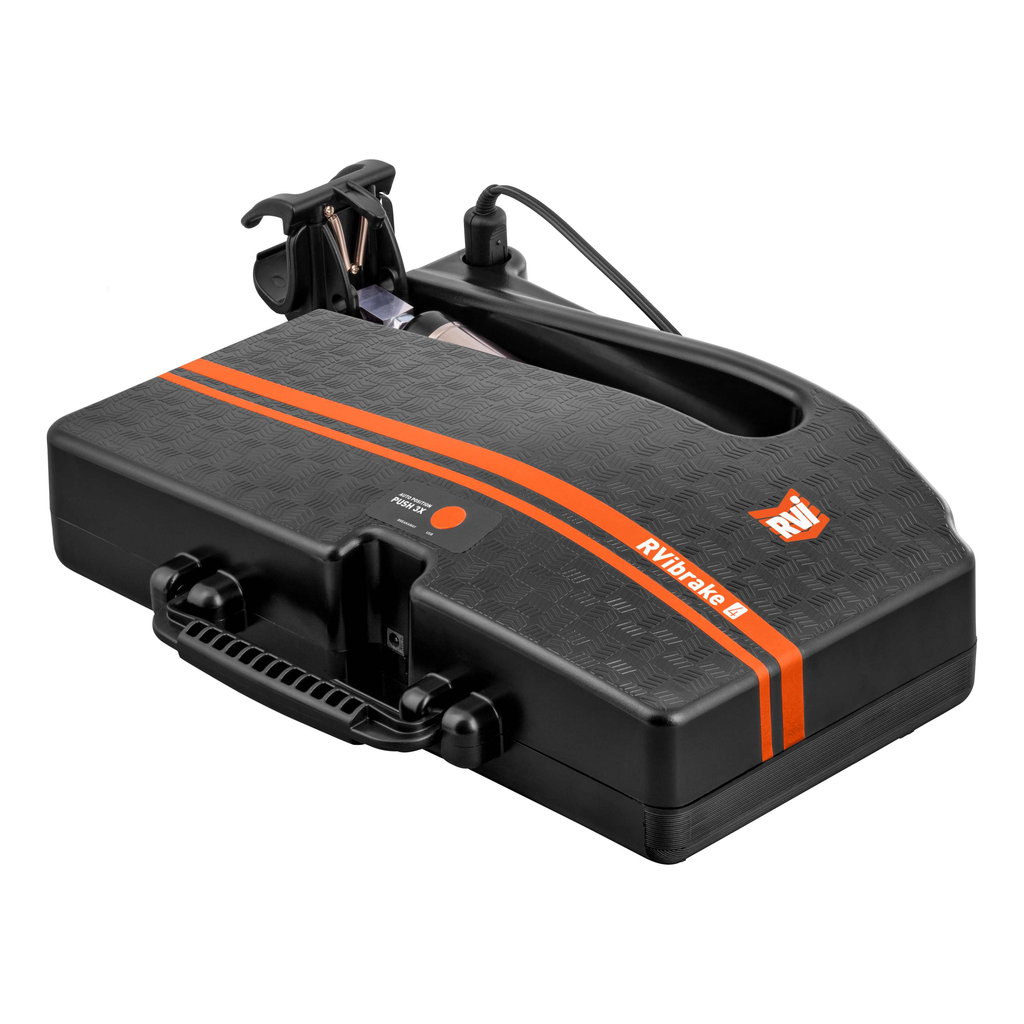 CURT RVibrake 4 · 52202Click for application, pros & cons, examples, photos and manualsTap to close+ Add to my inquiry
Opens in a new tab. Match the part number and revision to your equipment; save the PDF for your installation and travel records.
CURT RVibrake 4 52202 is a portable floor-mounted actuator. Its manual supports both Vacuum and Active assist modes; the Maverick’s active-assist application needs the Active configuration and its prescribed brake test.
Auto Position establishes the actuator position against the pedal and floor arrangement. The Bullseye monitor controls brake type, pressure and sensitivity; these are separate settings with different jobs.
An owner stops to follow Ford’s engine-running routine. Before continuing, the owner repeats the brake manufacturer’s required positioning/reset steps and checks the monitor instead of assuming Auto Position remains valid.
The Active-mode instructions begin at 5 PSI and require the manual’s brake test to establish operation. This is a starting procedure, not a universal final pressure for every truck or coach.
Enlarge photo52202
Compact floor-mounted system with Bullseye monitoring and a range extender. Check the application guide for any stop plate or other fit-specific component.
Follow its Auto Position process after installation and whenever the manual requires it, including after restarting the towed vehicle. Moving the pedal after setup can alter the actuator position. Pair the Ford stop routine with the brake manufacturer’s reset instructions.
Open manufacturer manual Demco Stay-IN-Play DUO · 9599006 / 9599018Click for application, pros & cons, examples, photos and manualsTap to close+ Add to my inquiry
Opens in a new tab. Match the part number and revision to your equipment; save the PDF for your installation and travel records.
Stay-IN-Play DUO is for a motorhome with hydraulic brakes. 9599006 is the listed standard package; 9599018 adds Wireless Coachlink. Demco’s current TB20051 manual specifically identifies additional regulator 6492 for a Ford Maverick installation.
The installed system uses the coach’s brake-light input together with deceleration to command the Maverick’s pedal actuator. It stays installed, reducing the equipment placed in the footwell for each departure.
A hydraulic-brake motorhome owner using the Maverick every weekend can compare DUO’s higher initial installation effort with repeated portable-unit setup. The quote should identify 6492 and the chosen monitor package.
Have the installer demonstrate normal operation, complete release, the breakaway test and the monitor. Demco requires adequate breakaway braking as well as avoiding wheel drag; simply turning pressure down is not a complete setup.
9599006 / 9599018
Installed system for a motorhome with hydraulic brakes. Uses deceleration and the coach’s brake-light signal together. 9599018 is the Wireless Coachlink package.
Less equipment to position in the driver footwell for each trip. The installation must account for the Maverick’s brake-assist behavior, control-unit location, pedal cable geometry, breakaway and monitoring. Identify the coach’s actual brake system before choosing it.
Open manufacturer manual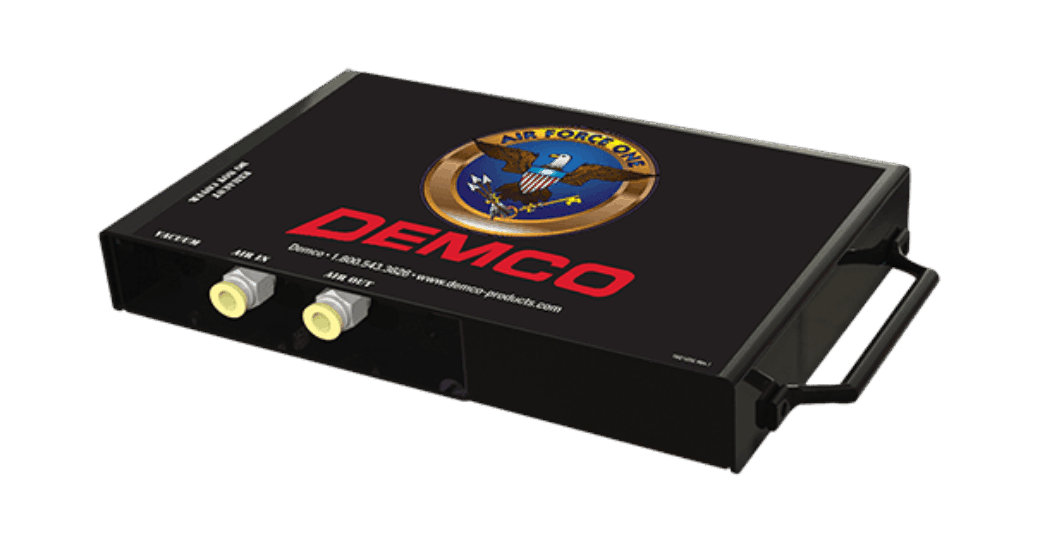 Demco Air Force One · 9599007 / 9599019Click for application, pros & cons, examples, photos and manualsTap to close+ Add to my inquiry
Opens in a new tab. Match the part number and revision to your equipment; save the PDF for your installation and travel records.
Air Force One is for a motorhome with air brakes. 9599007 and 9599019 are the listed package options, with Wireless Coachlink on 9599019. It is not the hydraulic-coach counterpart to DUO.
A coach-side pneumatic connection communicates braking to the towed-vehicle system. Some motorhomes have a factory towed-brake connection, but the actual chassis package determines which installation components are needed.
A diesel motorhome owner with an existing factory air-brake tow connection can potentially avoid duplicating some coach-side work. The installer first identifies the chassis connection, then specifies the matching Demco package and truck-side components.
The final scope needs the air line, breakaway, monitor, Maverick pedal/assist setup and complete release test. Motorhome size or fuel type alone does not identify its brake system.
Enlarge photo9599007 / 9599019
Air-brake-motorhome system; 9599019 adds Wireless Coachlink. Verify whether the coach already has a compatible factory towed-vehicle air connection.
The motorhome-side air integration is part of the job unless an approved existing connection is confirmed. A coach with hydraulic brakes needs a different system. Identify chassis, year and any factory tow-brake package rather than choosing by motorhome size alone.
Open manufacturer manual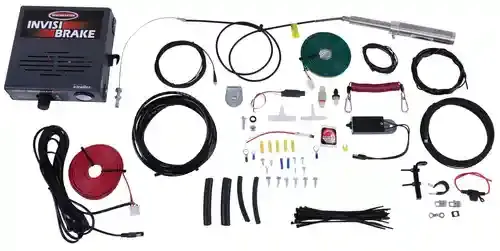 Roadmaster InvisiBrake · 8700Click for application, pros & cons, examples, photos and manualsTap to close+ Add to my inquiry
Opens in a new tab. Match the part number and revision to your equipment; save the PDF for your installation and travel records.
Roadmaster FitMaster identifies InvisiBrake as an applicable Roadmaster choice for the 2022–2026 Maverick Hybrid’s active brakes. The active-assist pressure setup is required; the factory setting cannot simply be assumed correct.
The installed controller and pedal-actuating hardware remain in the truck. It receives the signals required by its wiring design and applies braking according to its adjustment; do not describe every installed brake as operating identically.
For a 2025 Hybrid, Roadmaster lists the OEM brake switch as unusable for the required signal and identifies custom switch 751513 or universal 751000. That is a separate function from making the rear towing lamps illuminate.
Roadmaster identifies 20 PSI as the initial active-brake setting, followed by its adjustment procedure. For earlier Maverick years, its fitment notes instead call out brake-light relay 88400. Use the year-specific signal plan.
Product instructions ↗ · Manufacturer application / specifications ↗
Enlarge photo8700
A permanently mounted option with a pedal actuator. Compare installation space, coach signal inputs and the exact vehicle-specific setup.
The brake manufacturer’s application and adjustment instructions govern. On a Hybrid, brake-assist behavior and pedal force need deliberate verification; applying a generic conventional-vehicle adjustment can produce too much or too little braking.
Open manufacturer manual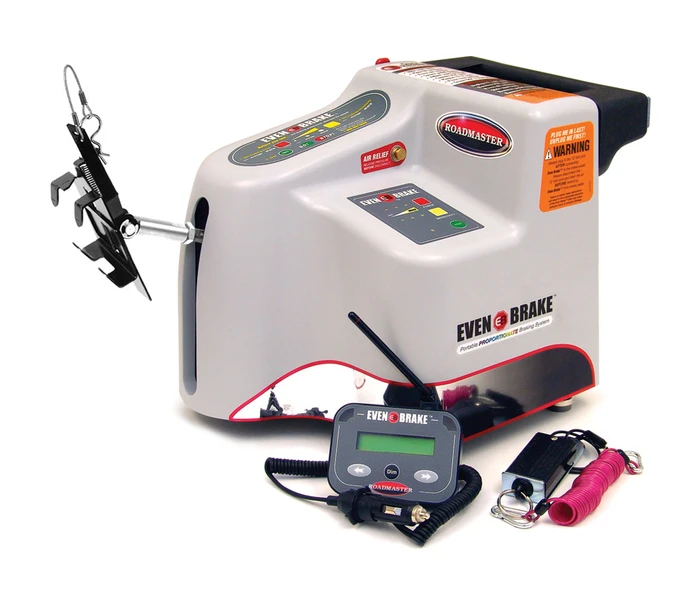 Roadmaster Even Brake · 9400Click for application, pros & cons, examples, photos and manualsTap to close+ Add to my inquiry
Opens in a new tab. Match the part number and revision to your equipment; save the PDF for your installation and travel records.
Not a Maverick Hybrid recommendation. Roadmaster’s Even Brake 9400 manual explicitly prohibits use with active/continuous-assist brakes, and Roadmaster identifies the Maverick Hybrid as having that brake behavior.
This portable proportional system is retained here to help owners identify existing equipment and understand why a brake that worked on a previous car may not transfer to the Maverick.
An owner moving an Even Brake from an older conventional-brake vehicle to a Maverick should select a suitable active-assist system instead of reinstalling the existing unit and hoping a lighter setting is enough.
Compare Patriot in Hybrid mode, RVibrake 4 in its Active configuration, or an approved installed application. Within Roadmaster’s range, its Maverick notes identify InvisiBrake or BrakeMaster with the required reducer.
Enlarge photo9400
Not recommended for Maverick Hybrid: the Even Brake 9400 manual prohibits active/continuous-assist brake applications. Retained here to identify existing equipment and explain the incompatibility.
A suitable clamp, working power supply or reduced sensitivity cannot override the active-brake exclusion. Choose a system with the required Maverick active-assist application.
Open manufacturer manual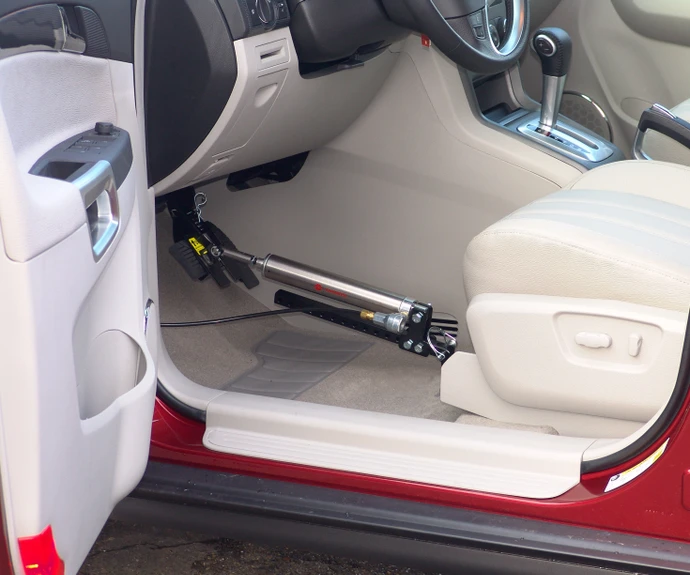 Roadmaster BrakeMaster · 9060 / 9160Click for application, pros & cons, examples, photos and manualsTap to close+ Add to my inquiry
Opens in a new tab. Match the part number and revision to your equipment; save the PDF for your installation and travel records.
BrakeMaster 9060 is the hydraulic-coach version; 9160 is the air-brake-coach version. Roadmaster’s Maverick Hybrid application requires Brake Pressure Reducer 900002 and lists seat adapter 88357; the mounting post is not included in that seat-adapter kit.
A removable pedal cylinder works with installed vehicle and coach components. This sits between a portable box and a fully out-of-the-way installed actuator in terms of daily handling.
An air-brake coach owner considering 9160 for a 2024 Hybrid needs more than the cylinder: the estimate should identify 900002, 88357, the mounting post, signal/monitor arrangement and breakaway equipment.
Verify cylinder geometry, release and the model-specific coach connections. Never substitute the instructions for 9060 when installing the air-coach components of 9160.
Product instructions ↗ · Manufacturer application / specifications ↗
Enlarge photo9060 / 9160
9060 is the hydraulic-coach system; 9160 is the air-brake-coach system with breakaway. Treat these as application-dependent alternatives.
Do not select solely by price. Confirm the Maverick’s current application approval, any required pressure regulation and the cylinder mounting method. The exact components differ with the coach’s braking system.
Open manufacturer manualNSA Ready Brake / Elite II · RB-9050-2 systemClick for application, pros & cons, examples, photos and manualsTap to close+ Add to my inquiryOpens in a new tab. Match the part number and revision to your equipment; save the PDF for your installation and travel records.
Ready Brute Elite II combines an 8,000-lb bar with mechanical surge braking. NSA sells different clevis options, including Blue Ox, Demco Classic and Roadmaster hole-size versions; choose the one approved for the actual baseplate.
As the towed vehicle pushes against the slowing coach, the surge mechanism pulls an installed cable that applies the truck’s brake pedal. It is a different operating approach from a portable electric pedal actuator.
An owner comparing Elite II with a separate tow bar and DUO should compare complete installed systems: include the NSA vehicle cable, breakaway and monitor before comparing totals.
Do not confuse Ready Brute II with Ready Brute Elite II: NSA states the non-Elite tow bar lacks the integrated surge brake. Have the installer demonstrate full pedal release.
Product instructions ↗ · Manufacturer application / specifications ↗
Enlarge photoRB-9050-2 system
The Elite II tow-bar option incorporates mechanical surge braking, using a properly installed cable to operate the truck’s pedal.
The tow bar alone is not the finished installation. Cable routing and adjustment, a compatible connection, monitoring and an appropriate breakaway arrangement need to be specified. Confirm manufacturer approval for the exact Hybrid and its brake-assist operation.
Manufacturer details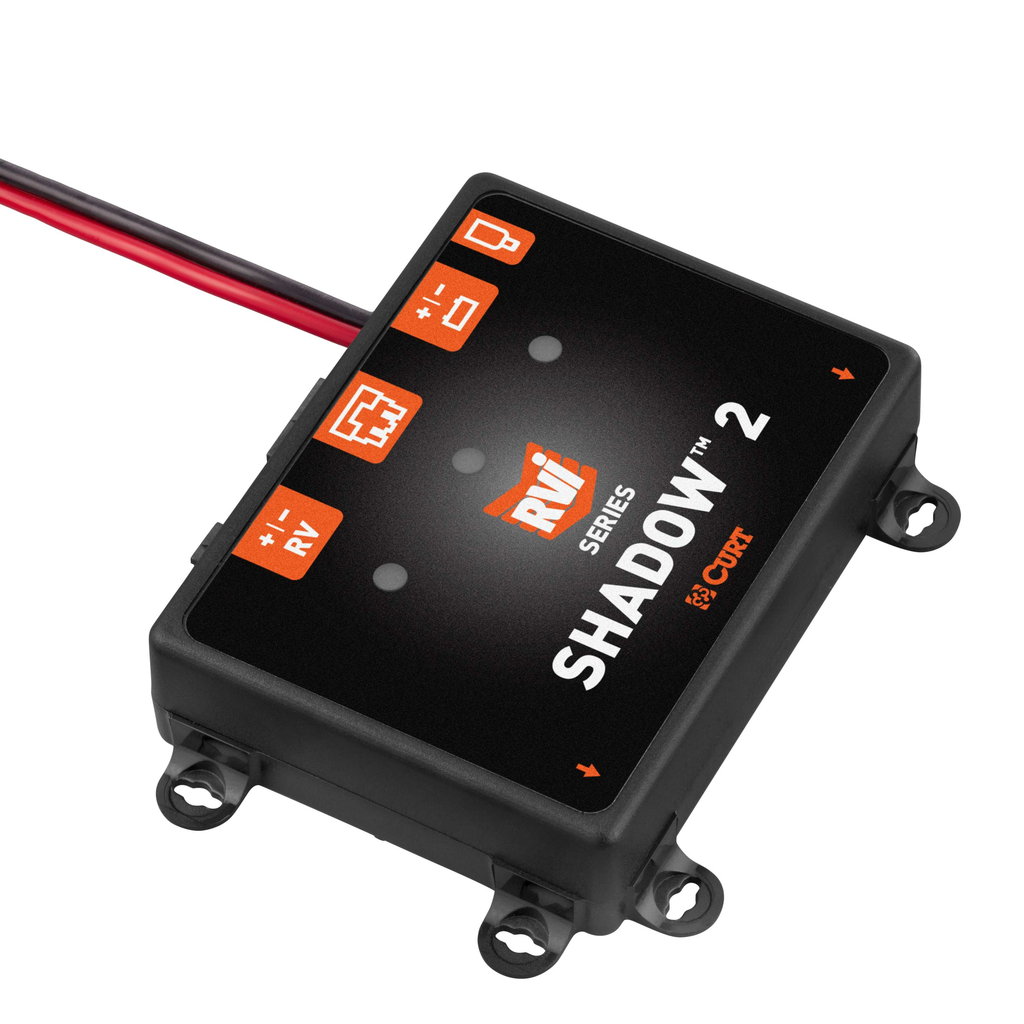 CURT RVibrake Shadow 2 · 52201Click for application, pros & cons, examples, photos and manualsTap to close+ Add to my inquiry
Opens in a new tab. Match the part number and revision to your equipment; save the PDF for your installation and travel records.
RVibrake Shadow 2 52201 is an installed brake with Bullseye monitoring and integrated battery charging. Its manual excludes hydroboost vehicles; an exact Maverick installation still needs the correct pedal-actuator and brake-assist configuration.
It reduces daily equipment handling by leaving the operating components installed. Its charging feature is a separate electrical function whose output depends on a working coach supply and wiring path.
A frequent traveler comparing Shadow 2 with RVibrake 4 can decide whether reduced daily handling is worth the permanent installation. Compare full installation prices, including the coach-to-truck power path.
Verify the current Maverick application, test monitor operation and full pedal release, and measure charging under load. Automatic detection does not replace Ford’s Neutral Tow procedure.
Enlarge photo52201
An installed alternative with tow-mode detection, Bullseye monitoring and a built-in battery charger rated up to 10 amps by CURT.
Confirm the current application guide, any required accessories and the actual 12V supply. Automatic brake operation does not remove Ford’s Neutral Tow steps, scheduled stops or the need to verify the brake monitor before departure.
Manufacturer details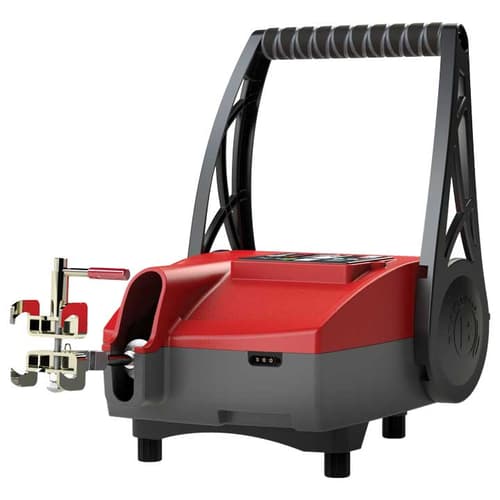 Brake Buddy Select 3 · 39524Click for application, pros & cons, examples, photos and manualsTap to close+ Add to my inquiry
Hopkins / Brake Buddy 39524 instructions, hosted by ManualsLib. The manufacturer’s own PDF website was unavailable when checked; confirm the revision for your unit.
Brake Buddy Select 3 39524 is a portable pedal brake with selectable braking behavior. This guide has not established a current manufacturer-approved Maverick Hybrid setting for this exact model; it is an existing-equipment comparison, not a confirmed Maverick recommendation.
It is useful to identify when an owner already has one and is deciding what can transfer. The operating mode and pedal force must suit active assist, not simply the approximate vehicle weight.
If an owner already has a Select 3, record its complete model and revision and obtain Brake Buddy’s application answer. If that answer is unavailable, compare an alternative with published active-assist instructions.
The linked document is a hosted manufacturer-manual copy because the manufacturer PDF host was unavailable during review. Do not apply instructions from a different Brake Buddy model.
Enlarge photo39524
A portable Brake Buddy option with selectable braking behavior. Include it when comparing an existing Select 3 or a proposed package, with current application and availability verification.
Use the manufacturer’s instructions for vehicle-specific setup, pedal clamp, power, breakaway and remote operation. On a Maverick Hybrid, confirm the appropriate brake-assist settings and a suitable power arrangement before selecting the system.
Open manufacturer manual
| Your priority / coach | Options to compare | Installation tradeoff |
|---|---|---|
| Transfer equipment between vehicles | Patriot in Hybrid mode; RVibrake 4 in Active mode | More setup and removal each trip; permanent breakaway wiring still required. |
| Hydraulic-brake motorhome; less daily setup | Stay-IN-Play DUO; applicable installed alternatives | More initial vehicle installation; verify vehicle-specific brake-assist setup. |
| Air-brake motorhome | Air Force One; applicable BrakeMaster system | Coach-side air equipment and chassis compatibility must be confirmed. |
| Mechanical surge system | Ready Brute Elite II / Ready Brake family | Cable routing and adjustment are critical; specify monitoring and breakaway separately. |
Tell us whether your motorhome has hydraulic or air brakes. If you are unsure, send its year, make, model and chassis.
Plan my installationSupplemental braking operates the Maverick’s service brakes. The breakaway system applies them if the vehicles separate. Neither function is provided by the tow bar, safety cables or tail-light wiring alone.
Equipment / Lighting
Tap an option to open it. Tap it again to close it.
Maverick wiring applications · reviewed November 10, 2026
Start with the rear lamps and the exact model year. LED headlamps, bed lighting and a trailer-tow package do not identify the taillight circuit used for flat towing. The table below separates published Maverick applications from components selected by circuit type.
Published wiring choices: Blue Ox lists BX8848 for this HEV application. Roadmaster’s entries for all three years permit universal diode wiring and identify combined stop/turn lighting.
Additional signal part: Roadmaster calls out brake-light relay 88400 when using supplemental braking. The relay addresses the truck’s own brake-light signal interfering with the RV’s turn signal; it is separate from the diodes.
Blue Ox 2022–2024 application · Roadmaster 2024 requirements
Published wiring choices: Blue Ox lists BX8848 on its 2025–2026 HEV application. Roadmaster’s 2025 and 2026 entries allow universal diode wiring.
Additional signal part: Roadmaster lists the OEM brake switch as unusable for the required supplemental-brake signal and identifies custom switch 751513 or universal 751000. Do not carry the earlier-year relay answer forward as though a relay and a brake switch perform the same job.
Blue Ox 2025–2026 application · Roadmaster 2026 requirements
Ford’s 2025 specifications list halogen taillamps on XL and XLT, and LED taillamps on Lariat. The 2025 Black Appearance Package adds LED taillamps to XLT. Ford’s 2026 order guide likewise lists LED taillamps for Lariat and the XLT Black Appearance Package. Check the actual build and any lamp replacements; trim alone can miss that exception.
Ford 2025 lamp specifications · 2025 package details · 2026 package details
Lamp technology describes the bulb or assembly. Variable-voltage control describes how the circuit commands different light functions. Roadmaster permits its LED Smart Diodes on suitable normal or variable-voltage LED circuits; its conventional 15267 is excluded from variable-voltage applications. Incandescent Smart kit 153267 and LED Smart kit 153967 are different products.
The badges both say XLT, but Ford’s package changes the rear lamps to LED. That is why the parts worksheet records the rear-lamp assembly and package, not just “2025 Maverick.” Both owners can consult the published HEV wiring applications above; a Smart Diode choice, if used, must match the actual lamp type and circuit.
Roadmaster’s checked Maverick applications say no bulb-and-socket kit. A separately drilled bulb arrangement should not be offered as a default alternative to the listed diode approach. Its recommendation to use InvisiBrake or BrakeMaster is within Roadmaster’s own brake range; other brands must follow their own published active-assist applications.
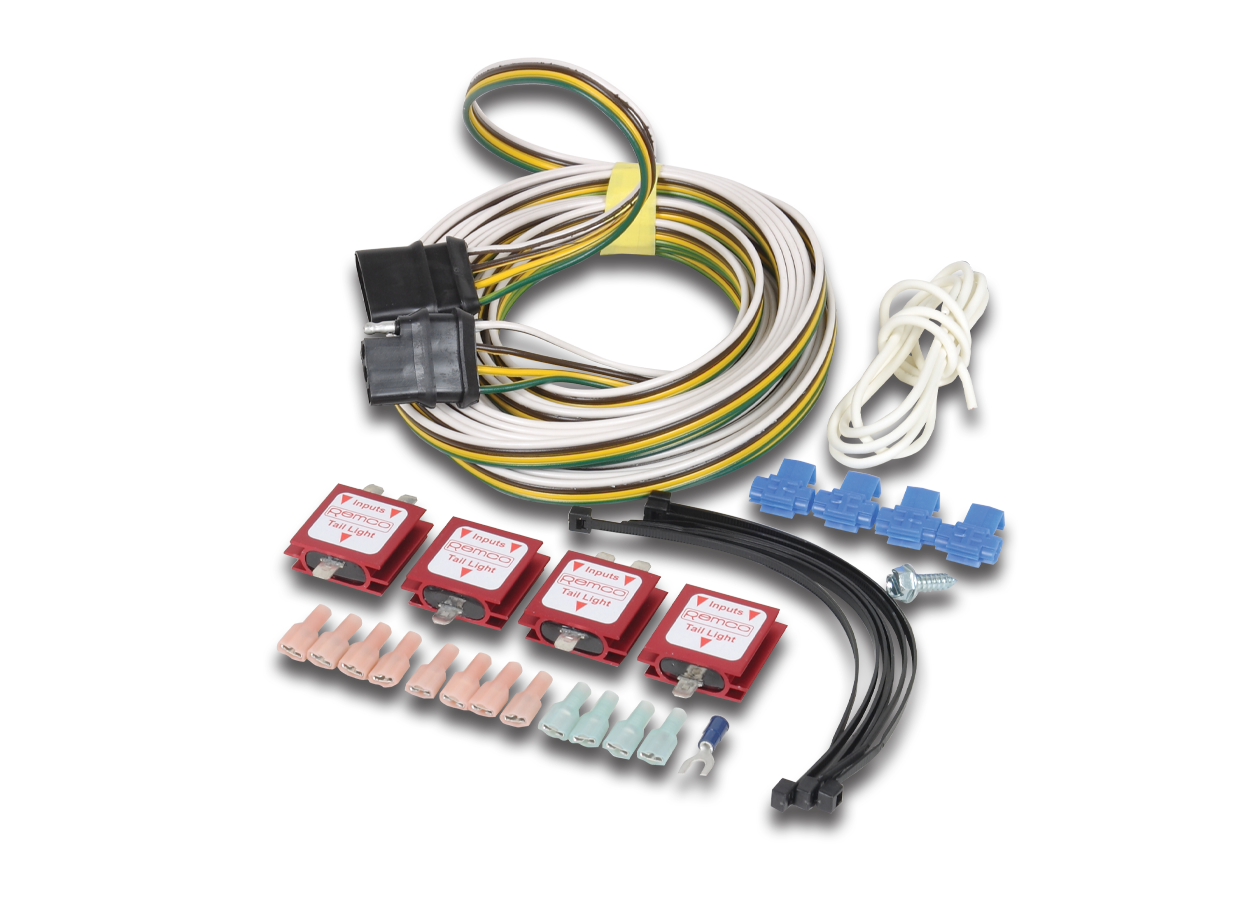 Enlarge photo
This manufacturer product photo shows the kit components. A complete plan still needs the correct socket, cord, wiring method and functional test for the truck’s actual lamps.
Browse electrical documents ↑| Wiring approach | Reference parts | What it does / what to verify |
|---|---|---|
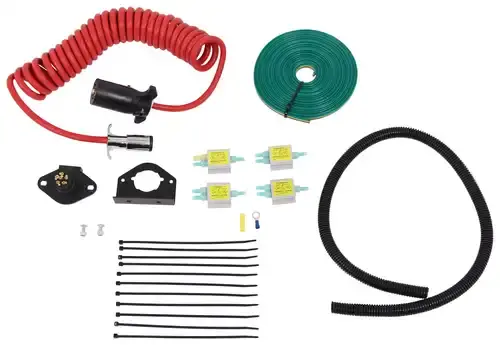
| Roadmaster diode wiring | 15267 · 154 | Roadmaster FitMaster lists universal diode wiring for the 2022, 2023, 2024, 2025 and 2026 Maverick Hybrid applications checked. The 15267 uses that conventional four-diode approach and includes a 7-to-6 coiled cord and front socket. Roadmaster excludes variable-voltage circuits from 15267.Click for application, pros, cons & examplesUnderstand the circuit, kit contents and installationClose the detailed explanation+ Add to my inquiry Pros, cons & Maverick applicationWhat it works withRoadmaster FitMaster lists universal diode wiring for the 2022, 2023, 2024, 2025 and 2026 Maverick Hybrid applications checked. The 15267 uses that conventional four-diode approach and includes a 7-to-6 coiled cord and front socket. Roadmaster excludes variable-voltage circuits from 15267. What it does and who it suitsThe diodes allow the motorhome to operate the truck’s existing rear lamps while isolating the two vehicles’ lighting supplies. This is a splice-in installation, not a Maverick-specific plug-in harness. Pros — reasons to choose it
Cons — tradeoffs and limits
Example in practiceFor a stock 2025 Hybrid, start with Roadmaster’s Maverick universal-wiring application. Do not decide that an LED headlamp automatically requires LED Smart Diodes at the rear. If the actual taillight circuit is variable-voltage, choose the appropriate Smart Diode arrangement instead. Complete the application15267 is the 7-to-6 package. Roadmaster 154 supplies a 4-flat lighting connection; it does not provide the separate auxiliary charging circuit through that 4-flat cord. Product instructions ↗ · Manufacturer application / specifications ↗ Manuals & installation instructionsOpens in a new tab. Match the part number and revision to your equipment; save the PDF for your installation and travel records. Manuals & installation instructionsOpens in a new tab. Match the part number and revision to your equipment; save the PDF for your installation and travel records. |
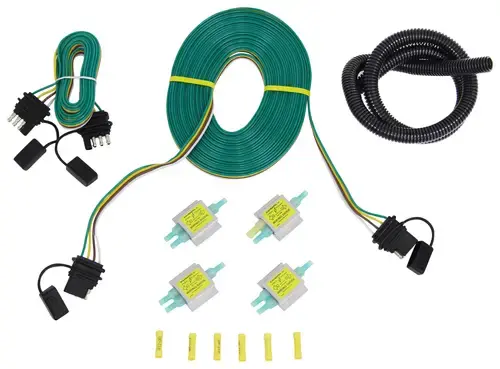
Blue Ox diode wiring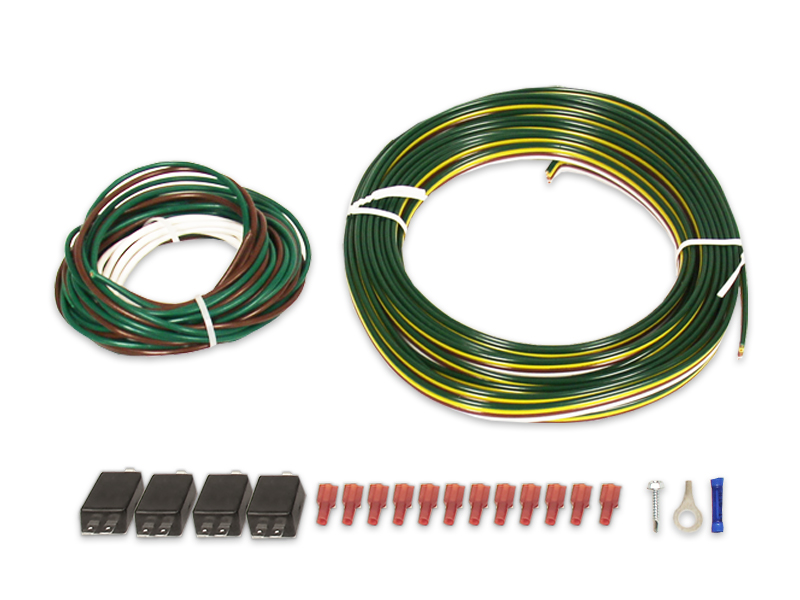 Enlarge photo | BX8848 | Blue Ox explicitly lists BX8848 as a wiring option for Maverick HEV 2022–2024 on the BX2913 application and 2025–2026 on the BX2917 application. Those are vehicle-specific manufacturer listings, not an assumption based on a universal label.Click for application, pros, cons & examplesUnderstand the circuit, kit contents and installationClose the detailed explanation+ Add to my inquiry Pros, cons & Maverick applicationWhat it works withBlue Ox explicitly lists BX8848 as a wiring option for Maverick HEV 2022–2024 on the BX2913 application and 2025–2026 on the BX2917 application. Those are vehicle-specific manufacturer listings, not an assumption based on a universal label. What it does and who it suitsBX8848 uses four diodes to connect the RV’s left stop/turn, right stop/turn and running-light signals to the truck’s lamps. The diodes limit electrical feedback into the original lighting circuits. Pros — reasons to choose it
Cons — tradeoffs and limits
Example in practiceAn owner with a 2024 Hybrid and a Roadmaster tow bar can still compare the BX8848 wiring approach. Mechanical tow-bar brand and electrical lamp wiring are separate choices. Complete the applicationThe published application covers the stock HEV lighting arrangement. An aftermarket lamp conversion needs its own circuit review. Use the manufacturer’s diagram rather than assuming Ford wire colors match the kit’s green, yellow, brown and white harness wires. Product instructions ↗ · Manufacturer application / specifications ↗ · 2022–2024 HEV listing ↗ Manuals & installation instructionsOpens in a new tab. Match the part number and revision to your equipment; save the PDF for your installation and travel records. |
| Demco diode wiringEnlarge photo Image: Demco · manufacturer reference | 9523010 | Demco 9523010 is a universal hardwired taillight/diode kit for conventional vehicle lighting circuits. The documents checked do not provide a separate Maverick year/trim approval for this kit; it is a circuit-based alternative rather than a confirmed plug-in Maverick fit.Click for application, pros, cons & examplesUnderstand the circuit, kit contents and installationClose the detailed explanation+ Add to my inquiry Pros, cons & Maverick applicationWhat it works withDemco 9523010 is a universal hardwired taillight/diode kit for conventional vehicle lighting circuits. The documents checked do not provide a separate Maverick year/trim approval for this kit; it is a circuit-based alternative rather than a confirmed plug-in Maverick fit. What it does and who it suitsThe kit connects the motorhome’s running, turn and brake-light functions to the towed vehicle through isolating diodes. It is different from Demco’s vehicle-specific Towed Connector harnesses. Pros — reasons to choose it
Cons — tradeoffs and limits
Example in practiceIf a quote says only “Demco wiring,” ask which part: 9523010 is the hardwired diode kit, while a Towed Connector requires an exact vehicle-specific harness number. Complete the applicationFor a buyer wanting an explicit published Maverick application, the Blue Ox BX8848 listings and Roadmaster FitMaster universal-wiring entries provide that evidence. Do not label 9523010 a no-splice Maverick harness. Product instructions ↗ · Manufacturer application / specifications ↗ Manuals & installation instructionsOpens in a new tab. Match the part number and revision to your equipment; save the PDF for your installation and travel records. |
Roadmaster smart diodes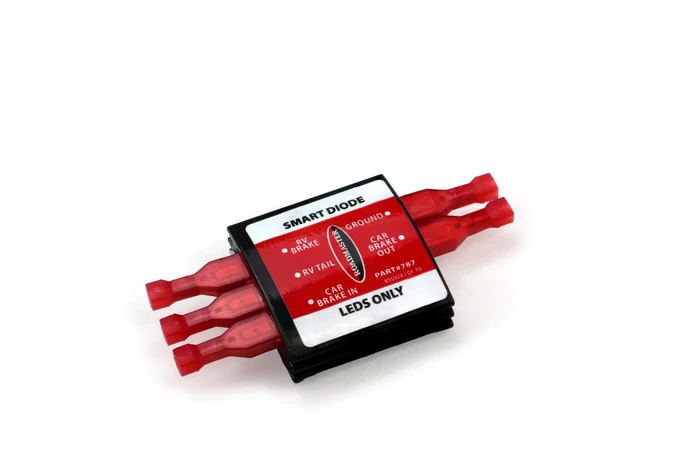 Enlarge photo | 787 / 789 family | Roadmaster 787 is one LED Smart Diode; 789 is the two-pack. These are for LED lamp circuits, including variable-voltage/multiplex operation. The complete 7-to-6 LED Smart kit is 153967. Incandescent lamps use a different Smart Diode family; the corresponding complete kit is 153267.Click for application, pros, cons & examplesUnderstand the circuit, kit contents and installationClose the detailed explanation+ Add to my inquiry Pros, cons & Maverick applicationWhat it works withRoadmaster 787 is one LED Smart Diode; 789 is the two-pack. These are for LED lamp circuits, including variable-voltage/multiplex operation. The complete 7-to-6 LED Smart kit is 153967. Incandescent lamps use a different Smart Diode family; the corresponding complete kit is 153267. What it does and who it suitsA conventional diode mainly isolates current. A Smart Diode also conditions the RV signal for the lamp’s operating voltage, allowing the correct brightness/function on a compatible circuit. Pros — reasons to choose it
Cons — tradeoffs and limits
Example in practiceA 2025 Lariat has LED taillamps, while a standard XL or XLT has halogen taillamps. The installer identifies the actual rear circuit before choosing LED Smart, incandescent Smart or the manufacturer-listed conventional wiring arrangement. Complete the applicationThe Maverick FitMaster entries checked allow universal diode wiring. This guide therefore does not claim every Maverick requires Smart Diodes. Choose a complete kit when you also need the harness, socket and cord. Product instructions ↗ · Manufacturer application / specifications ↗ Manuals & installation instructionsThis schematic is for 789 LED Smart Diodes. Confirm the exact diode and complete kit number before wiring; it is not a universal diagram for every 787 / 789 kit. |
Separate wireless light bar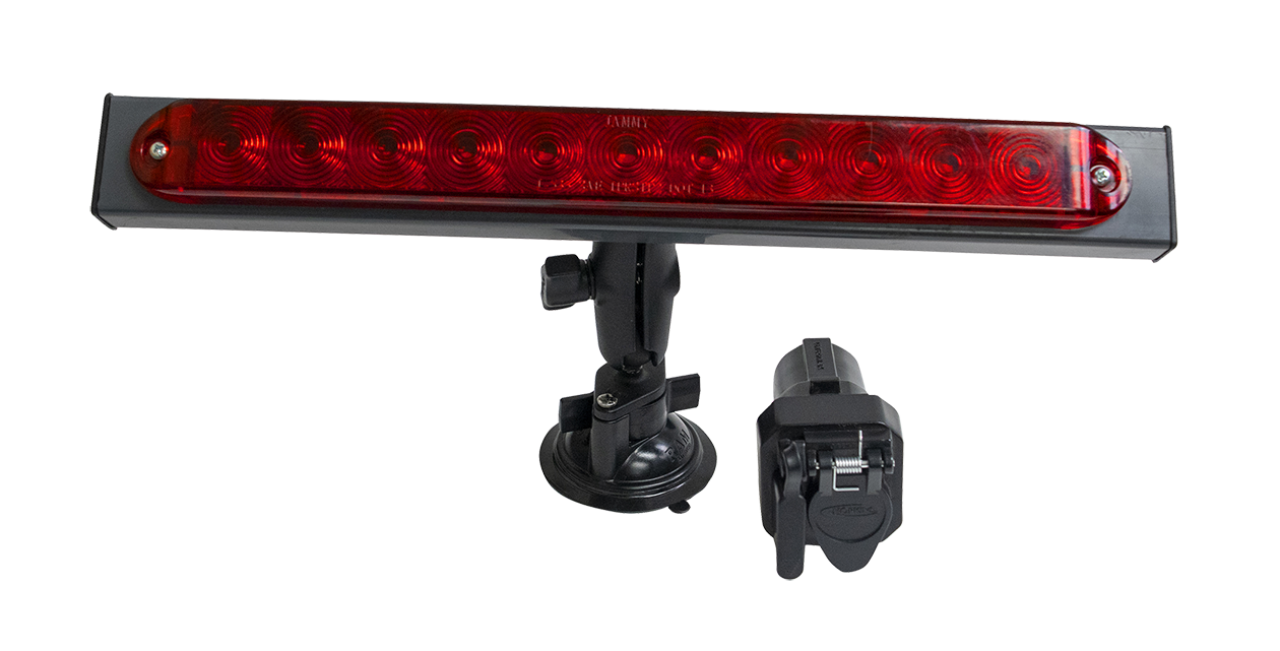 Enlarge photo | Demco 6343 | Demco 6343 is a separate wireless rear light bar, not a splice-in interface to a particular Ford lamp. Its application depends on a suitable mounting position, rearward visibility and the specified transmitter/power arrangement rather than whether the Maverick has halogen or LED factory lamps.Click for application, pros, cons & examplesUnderstand the circuit, kit contents and installationClose the detailed explanation+ Add to my inquiry Pros, cons & Maverick applicationWhat it works withDemco 6343 is a separate wireless rear light bar, not a splice-in interface to a particular Ford lamp. Its application depends on a suitable mounting position, rearward visibility and the specified transmitter/power arrangement rather than whether the Maverick has halogen or LED factory lamps. What it does and who it suitsThe light bar receives the motorhome’s lighting commands and supplies the separate rear signals. This avoids cutting into the Maverick taillight circuits, but moves the installation questions to mounting, signal reception and power. Pros — reasons to choose it
Cons — tradeoffs and limits
Example in practiceA truck with a bed cap or heavily tinted rear glass needs a visibility review before selecting a rear-window light-bar location. A successful bench test does not prove it can be seen by traffic behind the assembled rig. Complete the applicationConfirm mounting and signal operation on the actual truck. The linked manufacturer setup page is available; a separate current 6343 PDF was not located. Product instructions ↗ · Manufacturer application / specifications ↗ Manuals & installation instructionsA separate current PDF was not available on the manufacturer page when checked. Use the included 6343 instructions or request them from Demco before setup. |
| Vehicle-specific plug-in harness | Exact application required | No exact Maverick towed-vehicle plug-in harness part number was established from the manufacturer listings checked. CURT 56477 and 56567 are trailer-output harnesses, not substitutes for an RV-to-Maverick lighting harness. |
With the Maverick in its actual towing configuration, test running lights, left turn, right turn, brake lights and combined brake/turn operation. Then verify the supplemental brake does not create a misleading signal or backfeed.
The Maverick’s trailer socket sends signals out to a trailer. Flat-tow wiring receives signals from the motorhome and operates the truck’s lights. Those are opposite jobs, so the 4K Tow Package does not supply a complete flat-tow lighting solution.
Lighting wiring, battery charging and brake control are separate circuits. Plan them together, label them clearly and test the complete connection in towing mode.
A vehicle-specific towed-vehicle harness would plug into the truck’s lamps and receive signals from the RV. No exact Maverick towed-harness part number was established from the manufacturer listings checked for this update. Demco’s published Towed Connector chart does not list Maverick; its universal 9523010 diode kit is a different product.
Concrete examples of the wrong function: CURT 56477 and 56567 are Maverick-related trailer-output harnesses. They power a trailer behind the Maverick; they are not RV-to-Maverick flat-tow lighting harnesses. A product page saying “fits Maverick” is not enough if it performs the opposite job.
Pros of a properly listed towed harness: fewer factory-wire splices and matched connectors. Cons: it must have the exact year/lamp application; a physically matching plug does not establish signal compatibility. Use the documented diode choices above unless an exact current towed-harness application is supplied.
Demco towed-harness application chart · CURT 56477 function and applications · CURT 56567 function and applications
Equipment / Charging
Tap an option to open it. Tap it again to close it.
Coach battery/supply → protected coach charge circuit → RV socket → cord → Maverick front socket → protected truck-side charge line → Maverick 12V battery. Every link has to work. Roadmaster’s checked 2022–2026 Hybrid applications identify battery drain during towing and list truck-side 156-25 and coach-side 156-75. They also identify outlet 9332 when the chosen brake plugs into a 12V socket.
156-25 and CURT 52113 are alternative truck-side approaches. 156-75 is the coach-side solution when a suitable supply is missing. A four-flat lighting cord carries ground and three lighting functions; it does not also carry a dedicated charge feed.
Working lights demonstrate the lighting circuits, not the auxiliary charge path. Check the coach charge terminal in its travel state, the cord’s charge conductor, both grounds and the truck-side protection. Measure through the connected system with the brake powered. Seeing voltage at an unplugged socket does not prove useful current reaches the battery.
Shadow 2 52201 advertises charging up to 10 amps. Pro: it can be part of one planned brake/power installation. Con: the feature still depends on the coach supply and wiring; do not add a second charging arrangement without designing how the circuits work together. Other brake models should not be assumed to include that feature.
Maverick electrical requirements · Shadow 2 installation instructions
| Component | Reference part | Role |
|---|---|---|
Truck-side charge line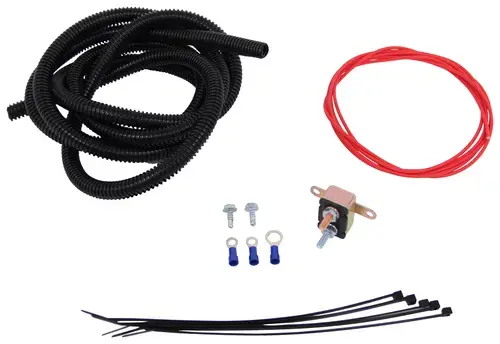 Enlarge photo | Roadmaster 156-25 | Roadmaster 156-25 is the towed-vehicle side of a 12V maintenance-charge circuit, and Roadmaster lists it in the 2022–2026 Maverick Hybrid applications checked. It requires a working coach charge supply and a suitable six-wire or 7-to-6 cord/socket arrangement.Click for application, pros, cons & examplesUnderstand the circuit, kit contents and installationClose the detailed explanation+ Add to my inquiry Pros, cons & Maverick applicationWhat it works withRoadmaster 156-25 is the towed-vehicle side of a 12V maintenance-charge circuit, and Roadmaster lists it in the 2022–2026 Maverick Hybrid applications checked. It requires a working coach charge supply and a suitable six-wire or 7-to-6 cord/socket arrangement. What it does and who it suitsIt carries protected power from the truck’s front towing socket to the specified low-voltage battery connection. It supports the Maverick’s 12V system; it is not a charger for the high-voltage hybrid traction battery. Pros — reasons to choose it
Cons — tradeoffs and limits
Example in practiceIf the Maverick battery falls during towing, first measure the coach supply through the connected cord under load. Installing another 156-25 cannot repair a failed coach fuse or an unused charge pin. Complete the applicationPair it with an already adequate coach circuit or the correctly installed 156-75 where needed. Verify the pin assignment at both ends instead of assuming every six-pin socket uses the same center-pin function. Manuals & installation instructionsOpens in a new tab. Match the part number and revision to your equipment; save the PDF for your installation and travel records. |
Coach-side charge line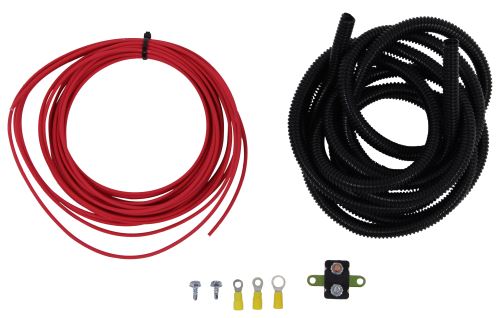 Enlarge photo | Roadmaster 156-75 | Roadmaster 156-75 is installed on the motorhome when it lacks a suitable protected charge supply to the rear connector. It works with a truck-side circuit such as 156-25; it is not a replacement for that truck-side circuit.Click for application, pros, cons & examplesUnderstand the circuit, kit contents and installationClose the detailed explanation+ Add to my inquiry Pros, cons & Maverick applicationWhat it works withRoadmaster 156-75 is installed on the motorhome when it lacks a suitable protected charge supply to the rear connector. It works with a truck-side circuit such as 156-25; it is not a replacement for that truck-side circuit. What it does and who it suitsIt completes the coach end of the path that can help maintain the Maverick’s 12V battery during towing. Roadmaster’s Maverick entries identify both sides because either end can be the missing piece. Pros — reasons to choose it
Cons — tradeoffs and limits
Example in practiceA coach has working stop/turn lights at the rear plug but no auxiliary power. The lighting can pass its test while the Maverick receives no charge. The coach-side circuit must be corrected before evaluating the truck-side kit. Complete the applicationTest with the coach in its intended travel state and through the actual umbilical. Document which fuse or breaker protects each end so a later fault can be diagnosed. Manuals & installation instructionsOpens in a new tab. Match the part number and revision to your equipment; save the PDF for your installation and travel records. |
Alternative charge-line kit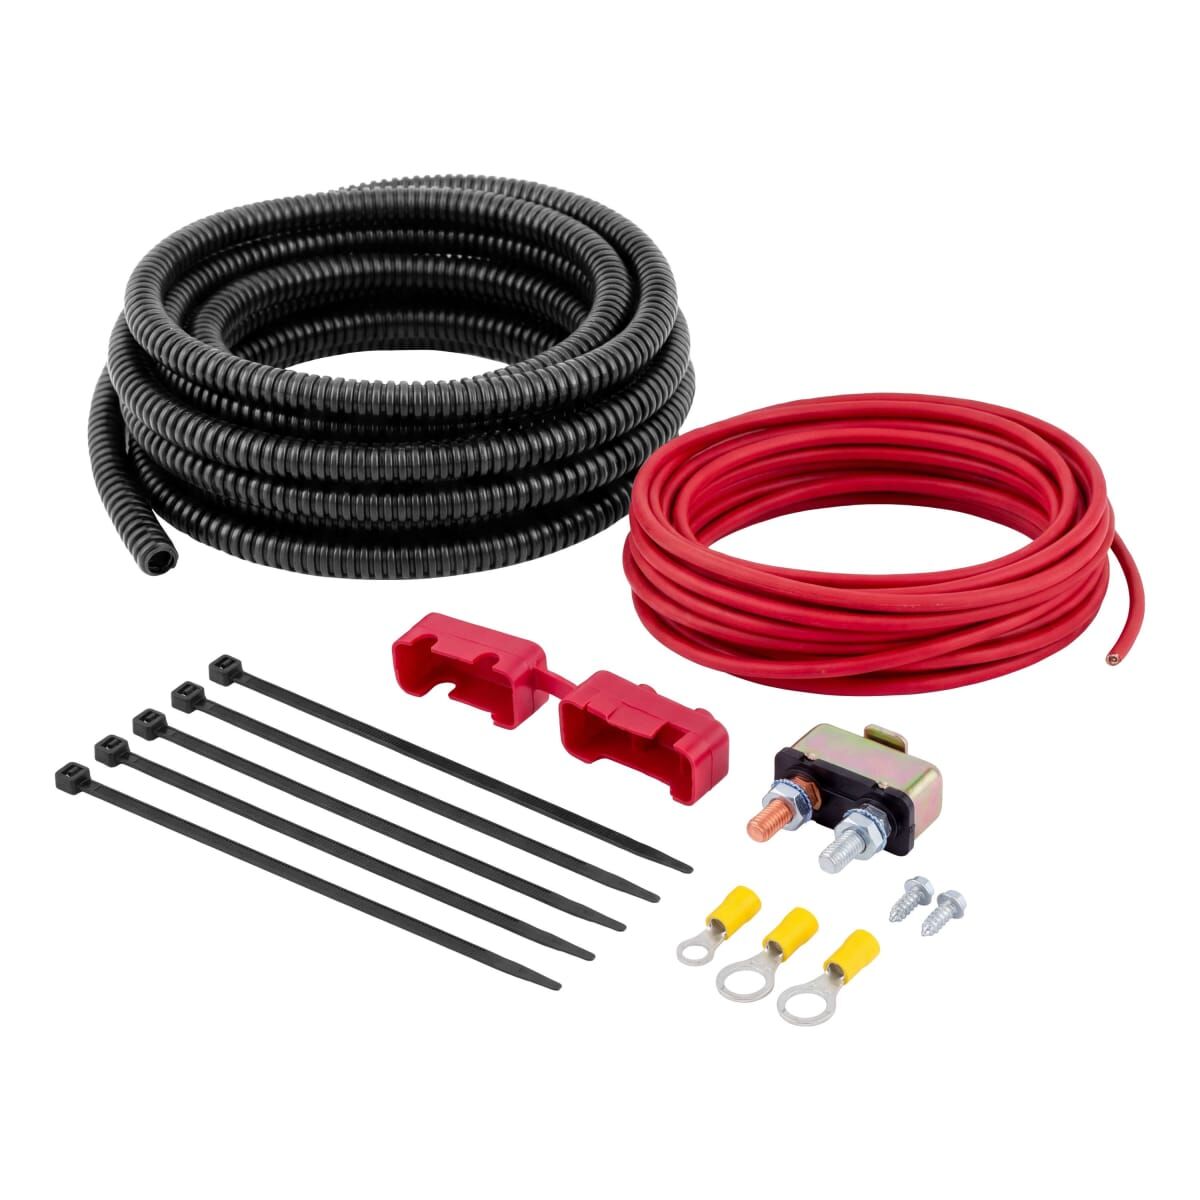 Enlarge photo | CURT 52113 | CURT 52113 is an alternative truck-side dinghy charge-line kit. Its instructions require a 7-to-6 supply cord, a six-way car-end connector and, where missing, a coach charge circuit; those items are not all included in the kit.Click for application, pros, cons & examplesUnderstand the circuit, kit contents and installationClose the detailed explanation+ Add to my inquiry Pros, cons & Maverick applicationWhat it works withCURT 52113 is an alternative truck-side dinghy charge-line kit. Its instructions require a 7-to-6 supply cord, a six-way car-end connector and, where missing, a coach charge circuit; those items are not all included in the kit. What it does and who it suitsThis adds a protected low-voltage charge path from the towing socket to the vehicle’s specified battery connection. It serves the same general truck-side role as 156-25, not the coach-side role of 156-75. Pros — reasons to choose it
Cons — tradeoffs and limits
Example in practiceCompare a 52113 quote with a 156-25 quote only after both include the same missing socket, cable and coach-side work. A lower kit price alone may hide an incomplete power path. Complete the applicationMeasure the completed system with the brake powered. Preserve the Maverick’s prescribed battery connection/monitoring arrangement and follow both the kit and vehicle instructions. Manuals & installation instructionsOpens in a new tab. Match the part number and revision to your equipment; save the PDF for your installation and travel records. |
| Integrated charging option | Brake-system-specific | Some installed brake packages include a charging function. Verify the actual kit and usable output; do not add or omit hardware from a name alone. |
Test the low-voltage battery and connections. A charge line is not a repair for a failing battery, loose terminal or abnormal vehicle draw.
Verify the charge terminal is powered in the required coach operating state, then check voltage and available current through the connected cord. Open-circuit voltage alone does not prove the circuit can support the load.
Follow the kit’s specified wire size, circuit protection, ground and connection points. Protect wiring from heat, movement and sharp edges. Preserve the vehicle’s battery-monitoring arrangement as directed.
Check charging at the Maverick with the brake system powered and all towing connections installed. Confirm that the system remains supported during the intended travel routine and that nothing is backfeeding unexpectedly.
The brake unit and vehicle electronics create a real 12V demand. A wire connected to a socket is not enough; the coach, cord, circuit protection and truck-side connection all have to work.
Plan your installation
Tap an option to open it. Tap it again to close it.
| The complete installation | What should be identified in the quote |
|---|---|
| VIN-specific baseplate | Manufacturer part number, required structural hardware, removable arms and permitted fascia/shutter changes. |
| Tow bar & connection | Exact model, receiver size, approved adapters or crossbar, pins and retaining clips. |
| Safety cables | Correct rating, approved attachment points, sufficient turning travel and routing clear of the ground. |
| Supplemental brake & breakaway | Coach type, vehicle compatibility, pedal installation, switch, power supply and driver monitoring. |
| Lighting | Tail-light solution, front socket, coach-to-truck cord, isolation and combined-signal test. |
| 12V support | Coach output test, protected charge circuit or other approved power solution, and final test under operating load. |
| Height & clearance | Actual receiver/baseplate measurements, approved rise/drop equipment if needed, turning clearance and accessory compatibility. |
| Verification & owner handoff | Ford mode demonstration, brake and light tests, connection practice, applicable manuals and written warranty terms. |
Compare an approved baseplate/bar combination with a Patriot or RVibrake 4, lighting and 12V support. Plan time to position, connect and calibrate the portable brake at each departure.
Compare an approved bracket/bar combination with Stay-IN-Play DUO or another confirmed installed application. Include coach signals, vehicle brake setup, breakaway and monitoring.
Compare Air Force One and the required chassis-specific coach connection with the truck hardware, lighting and power plan. A factory air port must be identified and verified.
A useful estimate itemizes the whole connection. Send photos of any equipment you already own so we can separate reusable parts from missing pieces.
Plan my installationA low baseplate price is only one line of the project. Compare packages by their installed scope, exact part numbers and verification—not by a headline price alone.
Plan your installation
Tap an option to open it. Tap it again to close it.
We begin with the Maverick VIN, front-end options and motorhome details. Existing equipment labels and photos help identify usable parts, adapter needs and coach-side work.
The applicable manual determines fascia removal, structural mounting, fasteners and torque, trimming, shutter changes and clearances. Visible damage or missing structure needs to be resolved before relying on the mount.
The brake system, front socket, lighting circuits and power support are routed and secured as a coordinated installation. The selected equipment determines coach-side wiring or air work.
We verify the actual Ford towing mode, light functions, brake response, breakaway setup, monitor indication and 12V support. Any sensor work is evaluated against the vehicle’s service requirements.
The handoff should include connecting and locking the bar, inspecting pins, routing cables and the cord, operating the brake, using the exact Ford routine and disconnecting safely. Keep the manuals and written parts list with the RV.
Installation scope depends on the selected equipment, what the coach already has and what can safely be reused. Request a VIN-specific written estimate and confirm parts availability before planning a travel date. A remote preliminary discussion is not final fitment approval.
Ask for the written terms covering the installation and each manufacturer’s equipment. Coverage, exclusions and claim procedures can differ. Contact Stellar first if an installation concern arises so the source can be identified and the appropriate next step arranged.
Stellar Auto & Mobility Repair installs and evaluates automotive and mobility equipment in West Melbourne. Your estimate should explain the work, the equipment and the final handoff.
Inside a real installation
Tap an option to open it. Tap it again to close it.
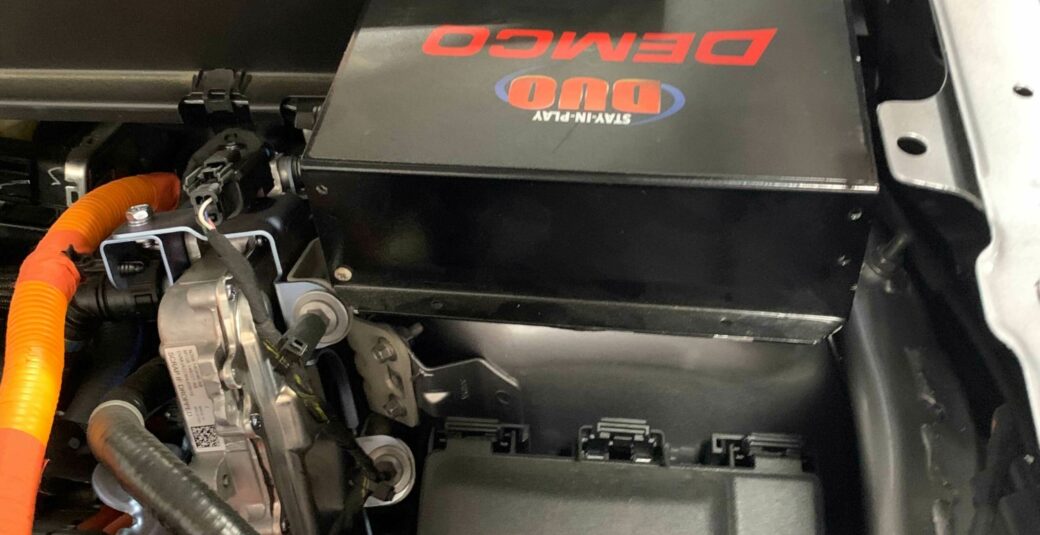 2023 Maverick · DUO operating unitView installation photo and explanationTap to closeEnlarge photo
An underhood placement reference. Secure mounting and service access must follow the kit instructions.
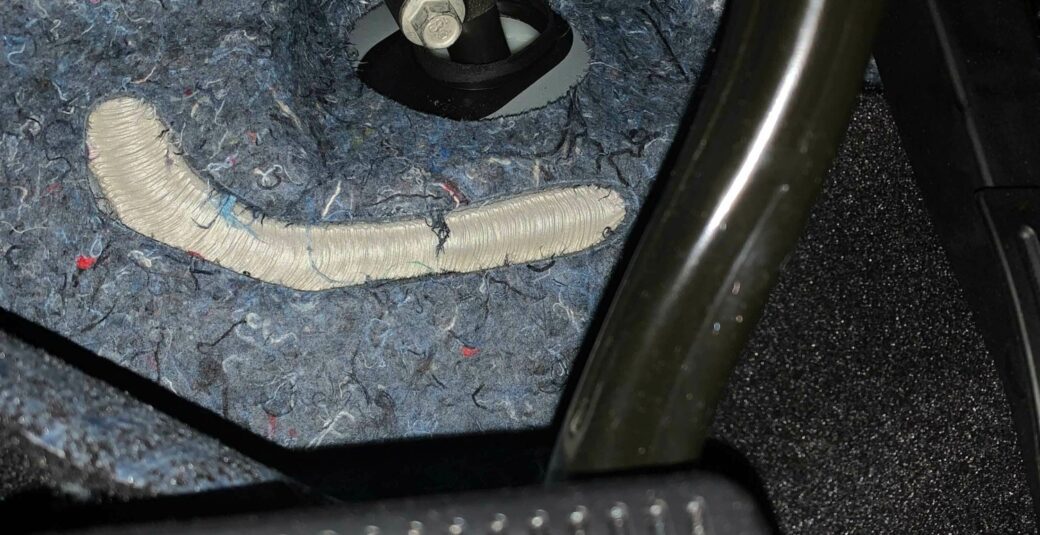 2023 Maverick · floor and cable-anchor areaView installation photo and explanationTap to closeEnlarge photo
A closer look at the cable-anchor area. Routing, mounting strength and cable geometry are installation-specific.
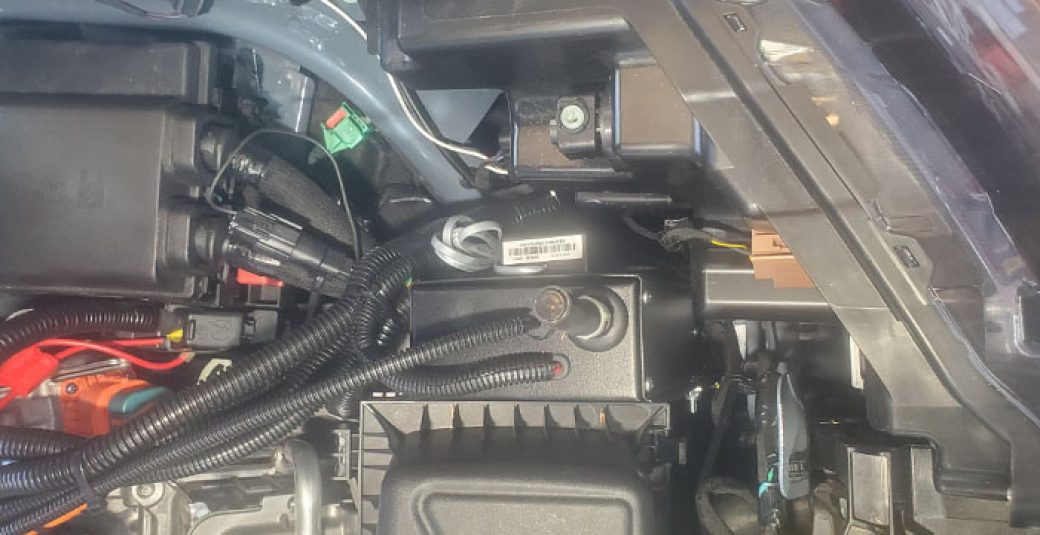 2025 Maverick · DUO underhood installationView installation photo and explanationTap to closeEnlarge photo
The refreshed truck has its own packaging considerations. An older installation photo is not a template.
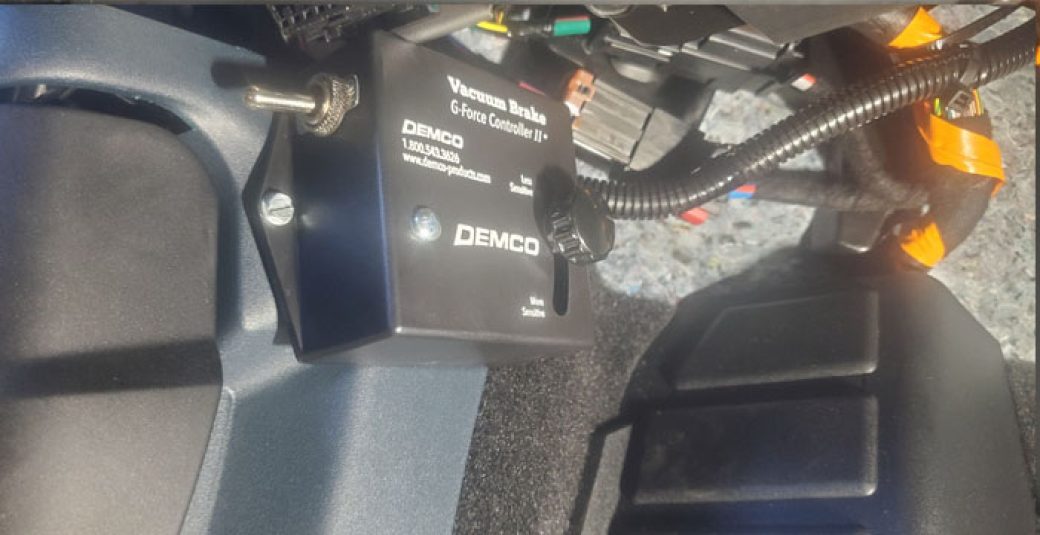 2025 Maverick · G-Force controllerView installation photo and explanationTap to closeEnlarge photo
Controller mounting and orientation matter. Follow Demco’s setup and adjustment procedure.
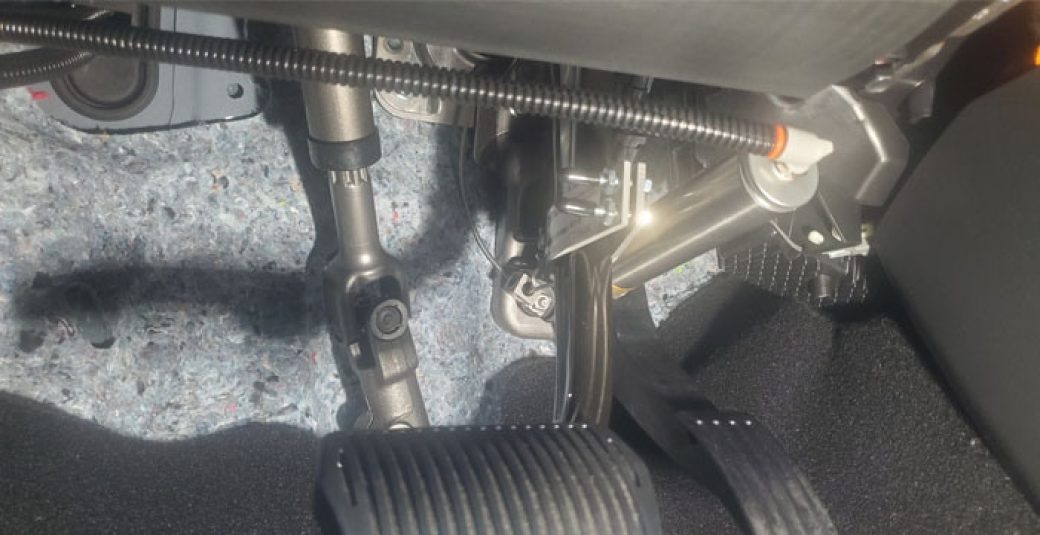 2025 Maverick · pedal cylinderView installation photo and explanationTap to closeEnlarge photo
The pedal connection must apply and fully release the brake without interfering with normal driving.
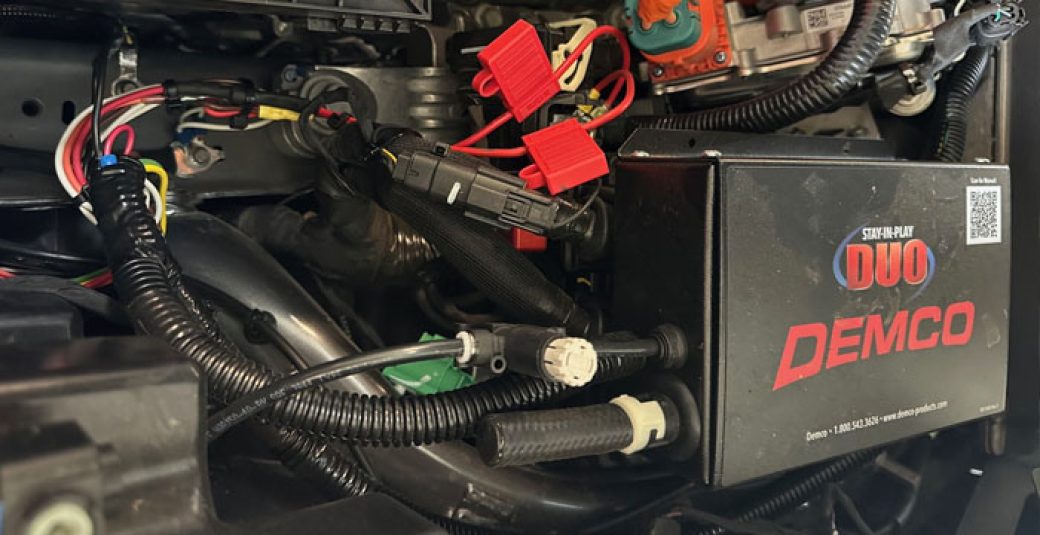 2025 Maverick Hybrid Lariat · DUO unitView installation photo and explanationTap to closeEnlarge photo
A second manufacturer installation example. Verify the current Maverick regulator requirement.
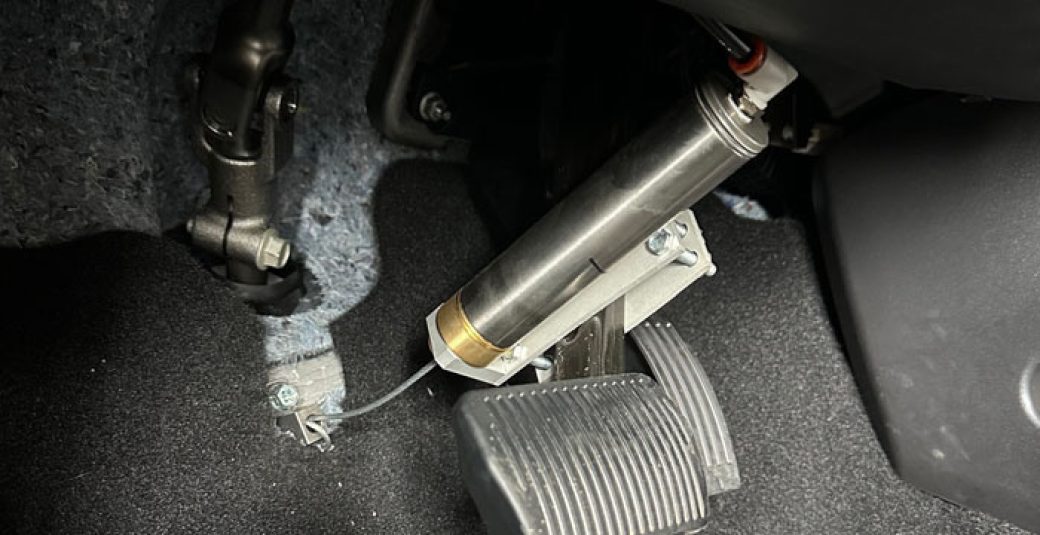 2025 Maverick Hybrid Lariat · installed cylinderView installation photo and explanationTap to closeEnlarge photo
Inspect cable alignment, pedal clearance and secure mounting in the actual vehicle.
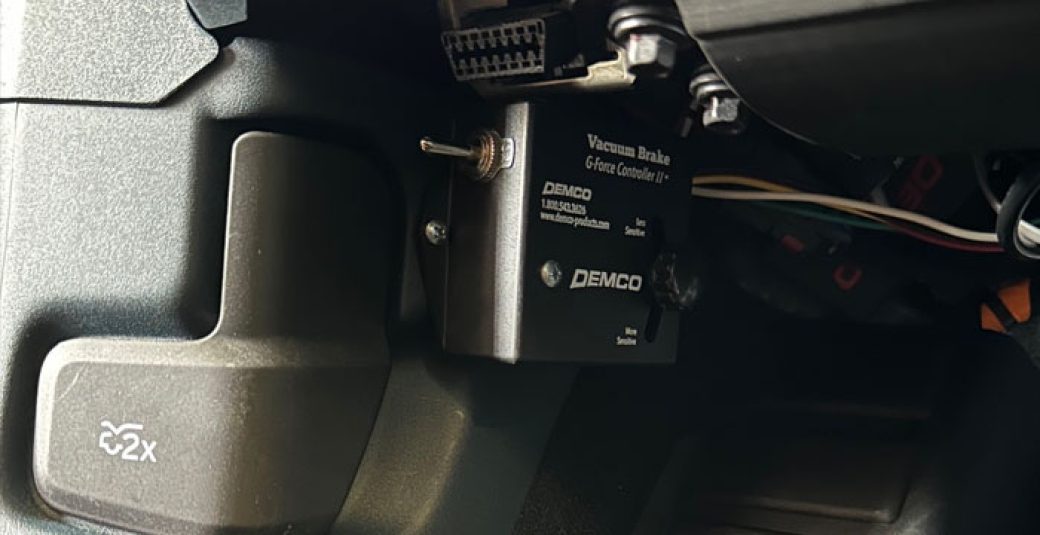 2025 Maverick Hybrid Lariat · G-Force controllerView installation photo and explanationTap to closeEnlarge photo
An alternate installation example. Placement is subject to the current manufacturer instructions.
Eight real Maverick installation references from Demco. These show the components in context; they are not represented as Stellar customer vehicles or a substitute for installation instructions.
Tow with confidence
Tap an option to open it. Tap it again to close it.
Secure the truck to the motorhome before releasing it to roll. Tow facing forward only.
Use accessory mode, then the steering-wheel menu: Settings → Neutral Tow. Follow the display instructions.
Fully press the brake, select N and switch the ignition off as directed. Confirm Neutral Tow is enabled and release the parking brake. Stay within 70 mph and any lower applicable limit.
| Model year | Ford’s routine, summarized | Open the exact instructions |
|---|---|---|
| 2022–2023 | At the start of the day and at intervals of six hours or less: run the engine for a few minutes; with the brake held, select D, then R, then N. Re-enable Neutral Tow before continuing. | 2022 manual · 2023 manual |
| 2024 | At the start of the day and at intervals of six hours or less: start the vehicle; with the brake held, select D, then N. Re-enable Neutral Tow and keep the vehicle on for three minutes before continuing. | 2024 manual |
| 2025–2026 · passive key | Start each day and at intervals of six hours or less. With the vehicle on and brake held, select D, then N. Re-enable Neutral Tow, keep the vehicle on three minutes, then switch it off. | 2025 manual · 2026 manual |
| 2025–2026 · ignition key | The current online instructions give a different battery-recharge routine: vehicle on, brake held, P, then run or drive at least 30 minutes. Re-enable Neutral Tow, keep it on three minutes, then switch it off. Driving requires disconnecting the tow setup first. | Read the key-type instructions |
Current online instructions: accessory mode, brake fully pressed, select P, release the brake and switch off. Wait 15 minutes with doors closed and no vehicle interaction before starting. Read the full vehicle-specific instructions before disconnecting or restarting.
Starting the truck or pressing the pedal can change the supplemental brake’s setup. After Ford’s required routine, repeat the brake manufacturer’s positioning or calibration steps where required. Then recheck the complete towing configuration.
The truck’s model year and ignition type matter. These summaries reflect the linked Ford guidance checked November 9, 2026. Keep the full applicable manual available during travel.
Tow with confidence
Use the sequence in your equipment manuals, then make a final walk-around. The first few feet of movement are a confirmation step—not a way to force a bar or vehicle into the correct state.
Ford Maverick flat-tow departure checklist · 321-477-1234
stellarautoandmobility.com/maverick-flat-tow-redesign
This interactive check helps organize a walk-around. It does not certify the vehicle or replace either manufacturer’s instructions. Checks reset when this page is reloaded.
0 of 12 checked
Tow with confidence
Tap an option to open it. Tap it again to close it.
| What you notice | What to check first | What to avoid |
|---|---|---|
| Neutral Tow will not enable | Correct Hybrid application, accessory/ignition state, full brake input, exact cluster prompts and 12V battery condition. | Do not tow in ordinary N, car-wash mode or an unconfirmed mode. |
| Neutral Tow message remains after exit | Recheck the exact exit routine and ignition type; record the message and have the vehicle diagnosed if it persists. Certain earlier trucks have a Ford service message discussed below. | Do not assume a software bulletin applies to every VIN or clear warnings without diagnosis. |
| Dead or weak 12V battery after towing | Battery health, actual coach charge output under load, fuse/breaker, ground, cord terminals and brake-system demand. | Do not assume a 7-pin plug means charging is active, or disconnect the battery as a generic fix. |
| One light is wrong or another circuit flashes | Socket pin assignments, ground quality, diode orientation, lamp type and combined brake/turn behavior. | Do not join circuits by color alone or bypass isolation without the wiring instructions. |
| Brake dragging, heat or repeated brake alarm | Stop safely. Check the unit’s positioning, pedal clearance, cable adjustment, setup state and brake-assist configuration. Seek service if the cause is not clear. | Do not keep towing to see if it clears. Do not use a universal gain or force setting. |
| Tow bar binds during disconnect | Secure both vehicles against movement, follow the bar’s release procedure and unload the connection as the manufacturer directs. | Do not hammer out loaded pins, pull with a strap or back the connected combination. |
| New radar, driver-assistance or other warning after installation | Inspect disturbed connectors, sensor mounting, fascia alignment and related service requirements. Diagnose the actual fault. | Do not cover the warning with a reset or promise calibration is never required. |
Stop and identify the cause before continuing. The guide can point you toward the right check; it cannot confirm a vehicle’s mechanical or electrical condition remotely.
Maverick flat-tow FAQ
Up to 15 questions per page. Tap a question to read its answer, or choose a topic below.
The 2022–2024 2.5L Hybrid FWD and eligible 2025–2026 2.5L Hybrid FWD/AWD configurations have Ford four-wheel-down towing instructions. The 2.0L EcoBoost does not gain that approval just because a baseplate fits. Start with the actual model year, powertrain and VIN; then check the separate equipment application. A trim badge alone is not enough.
Check my truckYes, Ford lists four-down capability for the 2.5L Hybrid AWD in these model years, subject to Ford’s towing procedure. This does not approve an EcoBoost AWD, and it does not mean an earlier baseplate fits the newer front end. Confirm the VIN, ignition type and current baseplate listing before buying equipment.
See year and powertrain guidanceDo not use the Hybrid procedure on a 2.0L EcoBoost truck. Ford does not approve that gasoline powertrain for recreational four-down towing. Check the actual drivetrain rather than assuming an off-road or performance package makes it towable. For an AWD configuration that is not approved, review Ford’s all-wheels-off-ground transport instructions.
Check the actual configurationFord’s four-down eligibility is based on the vehicle configuration and towing procedure, not on buying the 4K trailer-towing package. The Maverick’s trailer rating describes what the truck can pull; it is not the rating for an RV pulling the truck. Flat towing still needs its own baseplate, tow bar, braking, lighting and power plan.
See the complete flat-tow systemThey are different towing methods with different approvals. Do not assume lifting two wheels makes any Maverick safe to tow. Ford’s gasoline FWD instructions allow a front-wheel dolly; AWD instructions require all wheels off the ground for that transport method. Check the exact year and powertrain manual, plus the dolly or trailer rating, before choosing.
Check the factory transport instructionsUse the truck’s actual loaded weight, including cargo and installed equipment. Compare it with the motorhome’s remaining combination-weight allowance, receiver limit and every towing component’s rating. Any adapter or extension may add another restriction. A higher-rated tow bar cannot raise the motorhome’s or hitch’s limit; the applicable lowest limit controls.
Compare ratings and equipmentFord warns that damage caused by failing to follow its towing instructions may not be covered. That is different from a promise that every towing-related repair will be covered—or that the entire warranty automatically disappears. Keep the correct manual, installation invoice, part numbers and service records. Ford must evaluate a specific claim against the vehicle’s warranty terms.
Read Ford’s instructionsWe have not found a Maverick-specific Ford statement in the reviewed towing instructions that guarantees odometer behavior for every year and software version. Confirm it with Ford for your VIN if it affects a purchase decision. Keep a separate tow-mileage log regardless: tires, bearings and braking equipment still experience use, even when the odometer does not reflect it.
Open the departure checklistOpen Ford manuals below and choose your model year. Each card provides the full factory PDF, a separate Ford online towing section, and a link to the towing pages inside the PDF with the printed page numbers. To save only those pages, use the PDF viewer’s print dialog, choose that page range and select Save as PDF. The separate online section is Ford’s webpage, not a separate factory PDF.
Open year-specific downloadsA useful written estimate starts with your VIN, motorhome, chosen equipment and anything you already own. It should separate baseplate installation, tow bar and adapters, supplemental braking, lights, charging, any coach-side work and final testing. Online totals may leave out important pieces. Send the details through our estimate form so Stellar can confirm fitment, availability and the actual scope.
Request an itemized estimateNo. The N position alone does not confirm recreational-towing preparation. Use Ford’s Neutral Tow menu and complete the cluster prompts, then confirm that the mode is enabled. Do not substitute car-wash or temporary-neutral instructions for the recreational-towing procedure. If the expected confirmation is missing, stop and resolve it before towing.
Open the Ford setup walkthroughSecure the truck to the towing vehicle as Ford directs. The reviewed 2025 procedure uses accessory mode, the steering-wheel menu, Settings, then Neutral Tow. Follow the cluster prompts, fully apply the brake, select N and switch the ignition off. This is an orientation to the controls: use your exact year’s full instructions and confirm the enabled message before moving.
Read the complete year-specific stepsFord’s setup ends with the ignition off. Key handling depends on ignition type: a physical key cannot be removed with the transmission in N and the vehicle off. Do not copy a push-button truck’s key routine onto a keyed truck. The required daytime restart procedure is separate from the ignition state used while towing.
Check ignition and key instructionsYes. Ford requires the parking brake released for four-down towing. The steering must also be free to follow the motorhome; do not strap the wheel in place or tow with a steering lock engaged. Secure the vehicles against unintended movement while setting up or disconnecting, then complete the checks in Ford’s and the tow-bar maker’s instructions.
Review the departure checksThe reviewed Ford Maverick Hybrid instructions specify a maximum of 70 mph (113 km/h). That is a ceiling, not a recommended cruising speed. Use a lower limit whenever the equipment instructions, road conditions or applicable traffic rules require it. Do not borrow a limit from another Ford model or from emergency-towing instructions.
See Ford’s towing limitsFord requires the start-and-shift routine at the beginning of each day and at intervals of six hours or less. Plan stops before that limit. The exact gear sequence and running time depend on model year, ignition type and manual revision. Re-enable Neutral Tow before resuming, and reset the supplemental brake when its instructions require it.
Review the required stop routineFord publishes different sequences. The 2022–2023 instructions describe running the engine and shifting D, R, then N. The reviewed 2024 online section describes D then N and a three-minute period after re-enabling. The 2025–2026 instructions distinguish passive-key operation from a physical-key routine that includes at least 30 minutes running in P or driving to recharge. Use the instructions for your truck; do not combine them.
Compare the correct Ford manualFor the reviewed 2025–2026 procedure: switch to accessory mode, fully press the brake, select P, fully release the pedal, then switch the ignition off. Ford then requires 15 minutes with the doors closed and no interaction before starting the engine. Ford does not explain the engineering reason in this section. Follow the complete exit procedure whenever exiting the mode, including a towing stop; ask Ford to resolve any VIN-specific conflict.
Read Ford’s exit procedureNo. A charge line supports the 12V battery; it does not cancel the start-and-shift routine. Ford’s 2025 guidance contains both external-power guidance for add-on braking and the required towing stops. Complete each requirement independently, and confirm Neutral Tow and the brake system are ready again before continuing.
Review battery supportDo not move the combination in an unconfirmed towing mode. Recheck the exact Hybrid application, accessory/ignition state, brake input and cluster prompts. Low 12V power is another item to investigate because enabling the mode requires battery power. If the sequence will not complete, record the message and obtain diagnosis rather than repeatedly shifting or guessing.
Open towing troubleshootingThe guide compares Roadmaster, Blue Ox, Demco and etrailer applications. Examples include Roadmaster 524470-5 and Blue Ox BX2913 for earlier trucks, and Roadmaster 524480-5 and Blue Ox BX2917 for the later front end. Open the filtered baseplate section for the full list, installed references and instructions. These examples are not a fitment guarantee: verify the actual year, VIN, trim and current exclusions.
See all baseplate optionsDo not assume it will. The front-end update changes the application, and manufacturers list different earlier and later kits. Match the actual part number and current installation instructions before ordering. Transferring an old bracket is also a separate issue: Roadmaster warns against reinstalling a used baseplate on another vehicle and limits its warranty to the original installation.
Compare early and later applicationsThere is no universal no-cut answer. Review the current instructions for the exact kit, including fascia trimming, drilling, active-grille-shutter work and any factory-option exclusions. Removable arms do not make the permanent installation reversible. Tell Stellar that minimizing visible changes matters before parts are chosen, and compare the required modifications alongside the installed appearance.
Open installation documents and photosRemovable-arm and tabless designs reduce visible connection points, while the fixed bracket, electrical socket and breakaway switch remain. Compare the real installed-reference photos and discuss accessible mounting locations. The labeled baseplate pictures are reference installations from etrailer, not claimed as Stellar customer work. The hero is a licensed real-vehicle photograph. Current kit instructions control the actual installation.
View the real installation referencesIt depends on the exact kit and vehicle equipment. Mounting work can be near shutters, wiring, fascia and driver-assistance components. Follow the application exclusions and installation instructions, preserve clearances, and diagnose any new warning. Do not assume every trim needs calibration—or that none does. Review factory service requirements for anything disturbed during installation.
Review the installation processOnly when the manufacturers approve the exact combination and adapter. Check both part numbers, the tow-bar ends, pin hardware, crossbar requirements and ratings. A compatible brand name alone is not enough. Direct-Connect and crossbar setups are different, and some older bars require serial-number checks. An adapter can change the connection length and height as well.
Compare bars and adapter requirementsChoose a rating that covers the truck’s loaded weight and remains within every other component limit. Nonbinding release features help release tension during an approved disconnect procedure; they do not raise capacity or permit backing. Compare actual model numbers and receiver sizes. For example, the guide distinguishes Blue Ox Apollo BX7475 with a 2-inch receiver from BX7470 with a 2.5-inch receiver.
Compare all tow-bar choicesPossibly, after an application and condition review. Send clear label photos, part and serial numbers, all adapters and pins, receiver size, and service history. A portable brake or tow bar may be reusable; the vehicle-specific baseplate needs its own approval. Check missing accessories, wear and recalls before comparing reuse with new equipment. Do not assume an older bar’s end fittings match a new baseplate.
Request an existing-equipment reviewMeasure the loaded combination on level ground at the motorhome receiver and the baseplate connection points. Compare that difference with the exact tow-bar manual. For example, the Nighthawk manual permits no more than three inches above or below level. Use an approved adapter if needed and account for its rating and any receiver-extension restrictions; do not stack adapters by guesswork.
Read height and adapter guidanceNo. Safety cables are backup mechanical connections; the breakaway cable activates the towed-vehicle brake if separation occurs. Install and route both according to their manufacturers, with secure attachment, adequate turning clearance and no dragging or binding. A breakaway cable does not replace safety cables, and the electrical cord does neither job. Include all three in the walk-around.
Open the connection checklistPlan a compatible supplemental braking and breakaway system as part of the complete setup. The motorhome’s brakes do not automatically operate the truck’s service brakes. Equipment requirements, the actual loaded combination and rules along the route must be checked; an RV’s size alone does not settle the question. Have the installed system tested and demonstrate its monitor and breakaway operation before departure.
Compare supplemental brake optionsA conventional electric-trailer brake controller is not automatically a Maverick supplemental brake. A towed-vehicle system must operate the truck’s service brakes and provide its intended breakaway function. Identify the coach brake type and the chosen system before assuming an existing controller is enough. Some systems use coach brake-light information, but that is not the same as an electric-trailer brake output.
See how the brake systems differPortable systems can move between approved vehicles but need positioning, pedal attachment and setup each trip. They still require suitable power and breakaway wiring. Installed systems trade more initial installation work for a different daily routine. Compare the controls you can comfortably reach, setup effort, monitoring, coach compatibility and manufacturer approval for the Maverick’s brake assist.
Compare portable and installed brakesThe selected brake must support the vehicle’s brake-assist behavior. Do not copy a force setting from a different vehicle. For example, the Blue Ox Patriot manual requires Hybrid mode for hybrids or continuous power-assist brakes. Other systems have their own installation and adjustment requirements. Verify both proper braking and complete pedal release, then demonstrate the monitor to the driver.
Read hybrid brake requirementsYes, coach brake type matters. Demco specifies Stay-IN-Play DUO for a hydraulic-brake coach and recommends Air Force One for an air-brake coach. Other products have their own compatibility rules. Confirm the motorhome chassis and whether any factory or aftermarket towed-brake connection is already fitted; a connector’s appearance alone does not establish compatibility.
Match braking to the motorhomeIt may be usable with an approved baseplate connection and the correct brake installation. The Ready Brute Elite II combines a tow bar and mechanical surge-brake mechanism, but still requires its specified vehicle brake cable, adjustment and breakaway arrangement. Inspect the exact model, clevises and existing parts. Owning the bar alone does not mean the Maverick-side installation is complete.
Review Ready Brute and other barsChoose a lighting method approved for the exact lamp type and vehicle. A diode or compatible harness arrangement uses the truck’s lamps while managing circuit isolation; separate lamps are a different installation. Test running lights, both turns and brake signals through the actual RV connection. The selected braking system may also need a stop-light signal or relay, depending on the wiring behavior.
Compare lighting and wiring choicesTowing electronics and supplemental brakes can use 12V power. Ford’s current 2025–2026 guidance calls for an external 12V supply when an add-on flat-tow brake is used. A working system needs the coach supply, protected truck circuit, compatible cord and reliable ground. Test charging through the connected rig under load; simply plugging in a seven-pin cord does not prove that charging is working.
Review the complete charge-line pathOnly if the outlet remains powered in the required towing state and meets the brake maker’s requirements. Check after the vehicle’s power timeout, not just immediately after shutting it off. A properly protected dedicated outlet may be needed. CURT specifically says RVibrake4 must have power from the towed vehicle’s battery, so a breakaway does not remove its only supply.
Review brake power and chargingFollow that brake’s reset instructions every time. Blue Ox explicitly requires resetting the Patriot whenever the towed vehicle is started. Reconfirm the hybrid setting, pedal position, readiness and monitor as directed. Ford’s Neutral Tow procedure and the brake’s setup are separate tasks; completing one does not prove the other is ready.
Review the restart and departure checksDisconnect before backing. Reverse movement can damage the tow bar, steering or mounting equipment. Nonbinding releases and removable baseplate arms do not make backing acceptable. Plan fuel stops, parking and campsites with a forward exit, and use the manufacturer’s secured disconnect procedure if you need to reposition.
Open the travel checklistConfirm the correct Ford towing mode, released parking brake and free steering; locked tow-bar arms, pins and clips; safety and breakaway connections; cord routing and lights; brake readiness and monitor; and working 12V support. Check tires, clearance and loose hardware. Use the full 12-point checklist and equipment manuals, then make the initial movement and locking checks exactly as the tow-bar maker directs.
Open or download the departure checklistPhysical attachment does not remove the next morning’s setup requirements. Secure both vehicles against movement and follow Ford’s and the brake maker’s instructions for any mode or power changes. Do not assume the RV keeps charging the truck while parked. At the next departure, perform the daily Ford routine and recheck every connection, light, brake and power supply.
Review the next-day checksStop towing if power, brake readiness or towing-mode status is uncertain. Ford says battery power is required to enter and exit Neutral Tow; the reviewed instructions do not publish a universal safe cutoff voltage. Do not assume a dead battery is harmless or disconnect it as a general fix. Diagnose battery health, charge output, grounds, protection devices and brake demand before continuing.
Open battery and towing troubleshootingStop safely and investigate before continuing. Check pedal clearance, brake-unit position, cable adjustment, breakaway-pin seating and the correct assist/setup configuration. A system must fully release the truck’s brakes. Do not increase force, bypass the alarm or keep driving to see whether it clears; get service when the cause is uncertain.
Review brake troubleshootingSecure the vehicles against movement and use the exact bar’s release procedure to unload the connection. Uneven ground and side loading can make release difficult. Do not hammer loaded pins out, pull on the setup with a strap or back the connected combination. If the bar cannot be unloaded as instructed, get help before removing hardware.
Open the tow-bar operating manualsThe tow wiring and the truck’s own brake-light signal may be interacting. Check combined brake/turn behavior, lamp type, diode orientation, socket pin assignments and grounds against the selected wiring instructions. A relay or other approved interface may be required for that setup. Do not splice by wire color alone or buy a relay without first identifying the actual circuit behavior.
Review lighting and brake-signal integrationRoadmaster’s 2022–2024 Maverick Hybrid entries specifically call out brake-light relay 88400 with supplemental braking. Its 2025–2026 entries identify an unusable OEM brake switch and list 751513 or 751000 for the required brake signal. A relay, signal switch and lamp diode perform different functions; use the year-specific application described in the lighting chapter.
A service message is not automatically a recall. Ford SSM 53562 addresses a persistent tow warning/N display on certain earlier Hybrid XL/XLT trucks with a four-inch cluster; the document’s heading and body differ in year wording, so verify VIN applicability and diagnosis. Separately, check tow-bar and brake recalls using actual model and serial numbers. Follow the manufacturer’s inspection, repair and stop-use instructions before towing.
Read the service information and next checksContact us before committing to a travel date. Send the Maverick VIN, motorhome details, equipment labels and your timing so we can review the application, parts and work required. Installation is at our West Melbourne shop. A confirmed scope and appointment are needed before arrival; the estimate should also include a complete hookup demonstration and functional checks.
Request an appointment and estimateNo. Ford controls vehicle eligibility and operation; each equipment manufacturer controls its fitment, installation and use. Check the exact year, VIN, ignition type, part number and document revision. Ford notes that online information may differ from the manual supplied with the vehicle. If instructions conflict, ask Ford or the equipment maker to resolve applicability before towing. This guide helps organize the questions and original documents.
Open manufacturer documentsQuestions selected from Maverick owner discussions and common installation concerns. Answers checked against the linked manufacturer documents. Last reviewed November 10, 2026. Confirm the instructions for your exact vehicle and equipment before towing.
Choose as many products as you like while reading. You can compare alternatives in one request.
Your selected products will be included with the estimate form below.
Continue to contact form ↓Stellar Auto & Mobility Repair · West Melbourne, FL
Use the estimate form below. A few specific details help us check the application and prepare a useful equipment plan.
Your selected truck will be added to the form. You can edit it.
Use selected truck7791 Industrial Rd · West Melbourne, FL 32904
Monday–Friday 8:30–5:00 · Saturday by appointment